# Management Console
> Symcon documentation · English · generated on 2026-09-26
> Index: https://www.symcon.de/en/llms.txt
Source: https://www.symcon.de/en/service/documentation/components/management-console/
The Management Console is the tool for setting up and configuring the complete logics of the IP-Symcom Server. There are two versions of the Management Console: The web based Management Console and the [Pro Console](management-console.md).
### Web-based Management Console
since IP-Symcon 5.0
The web-based Management Console is platform-independent and can be accessed via browser. Officially recommended browsers are: Google Chrome, Apple Safari and Opera
#### Connect to the IP-Symcon Server
The web-based Management Console can be opened in a browser via "[IP]:3777/console/" .
#### The Start Page
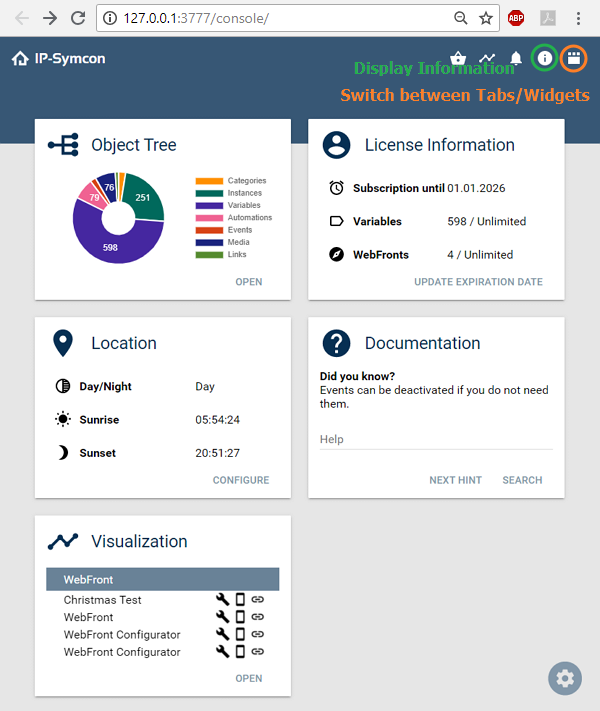
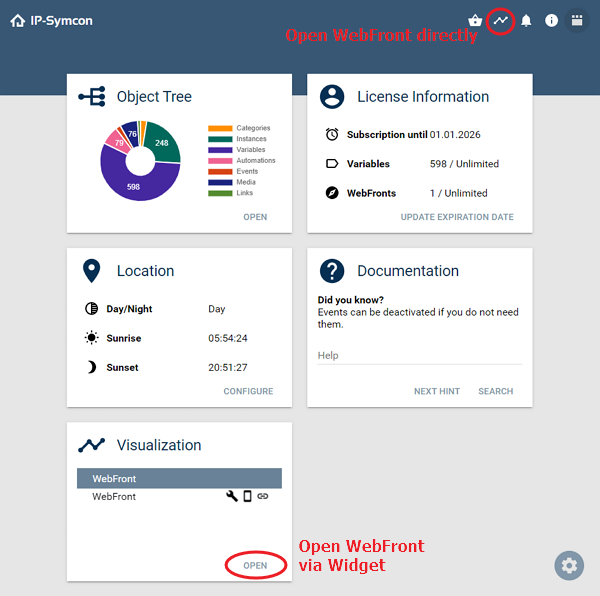
Widgets are shown on the start page of the Management Console. These are individually configurable and offer an initial view of the many activities of the system.
##### Configuring Widgets
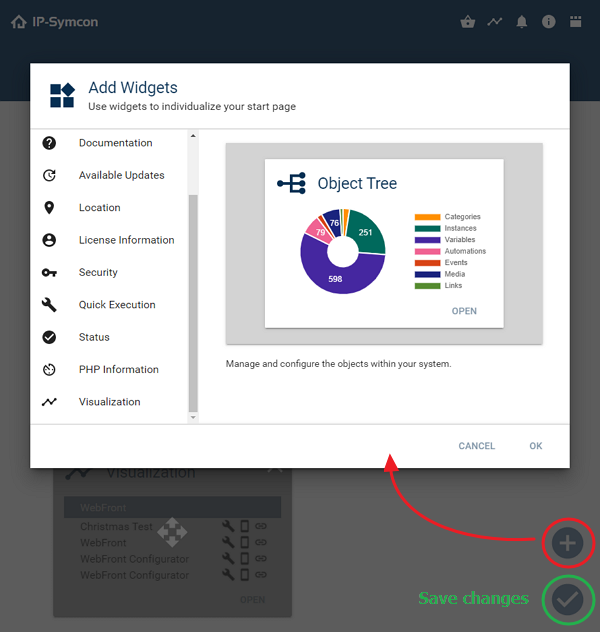
At the start page, one can display and remove widgets using the cogwheel button.
##### View changer
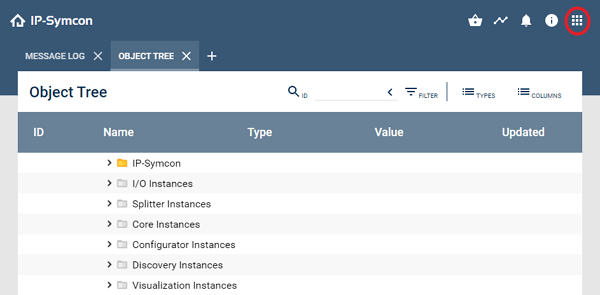
Using the button on the top right, one can quickly switch between the start page and the Tab List.
##### Tab List
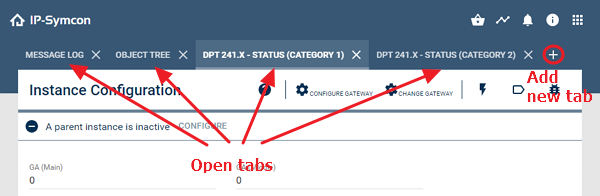
Diverse tabs can be opened in the tab list. This includes the [Object Tree](management-console.md), the [Messages](management-console.md) , or the configuration of [Instances](../concepts.md) or [Automations](../concepts/automations.md). The Plus Icon at the right of the tab list can open new tabs. If multiple tabs of objects with the same name are open, the path to those objects is displayed as well, so the corresponding object can be properly identified.
##### Visualization
The [WebFront](webfront-visualization.md) can be opened directly via the button on the top right.
##### Information
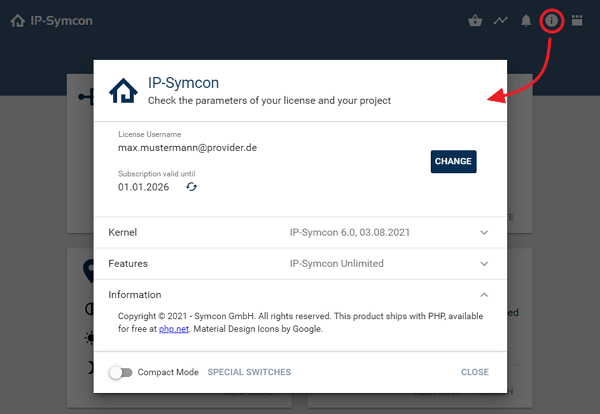
A variety of information can be retrieved using the information button.
These include kernel and feature information, as well as a button to the [Special Switches](../developer/special-switches.md).
##### Device Search
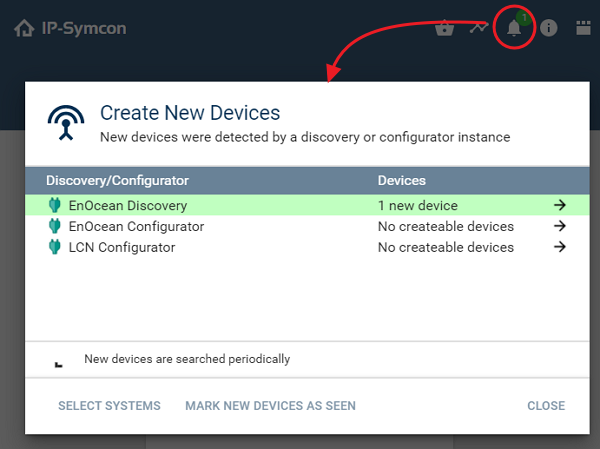
Discovery instances can be configured via the Device Search button.
These inform about newly connected devices and simplify the configuration of new devices.
##### Module Store
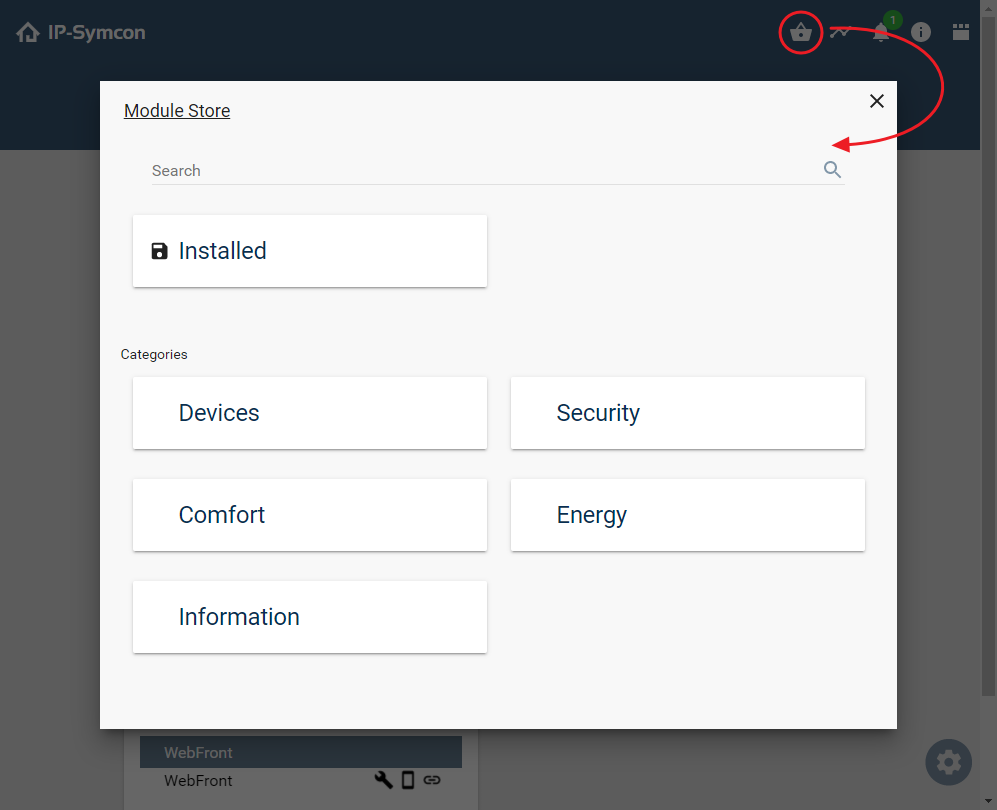
New modules can be installed via the Module Store. These modules expand the functionality and enable the usage of new functions or additional devices.
## Device Search
Source: https://www.symcon.de/en/service/documentation/components/management-console/device-search/
The Device Search button can be used to set up Discoveries and view Configurators. These provide information about newly connected devices and simplify the setup of new devices.
### Set Up Discovery
The Device Search can be accessed via the bell icon at the top right of the console.
#### Initial Setup
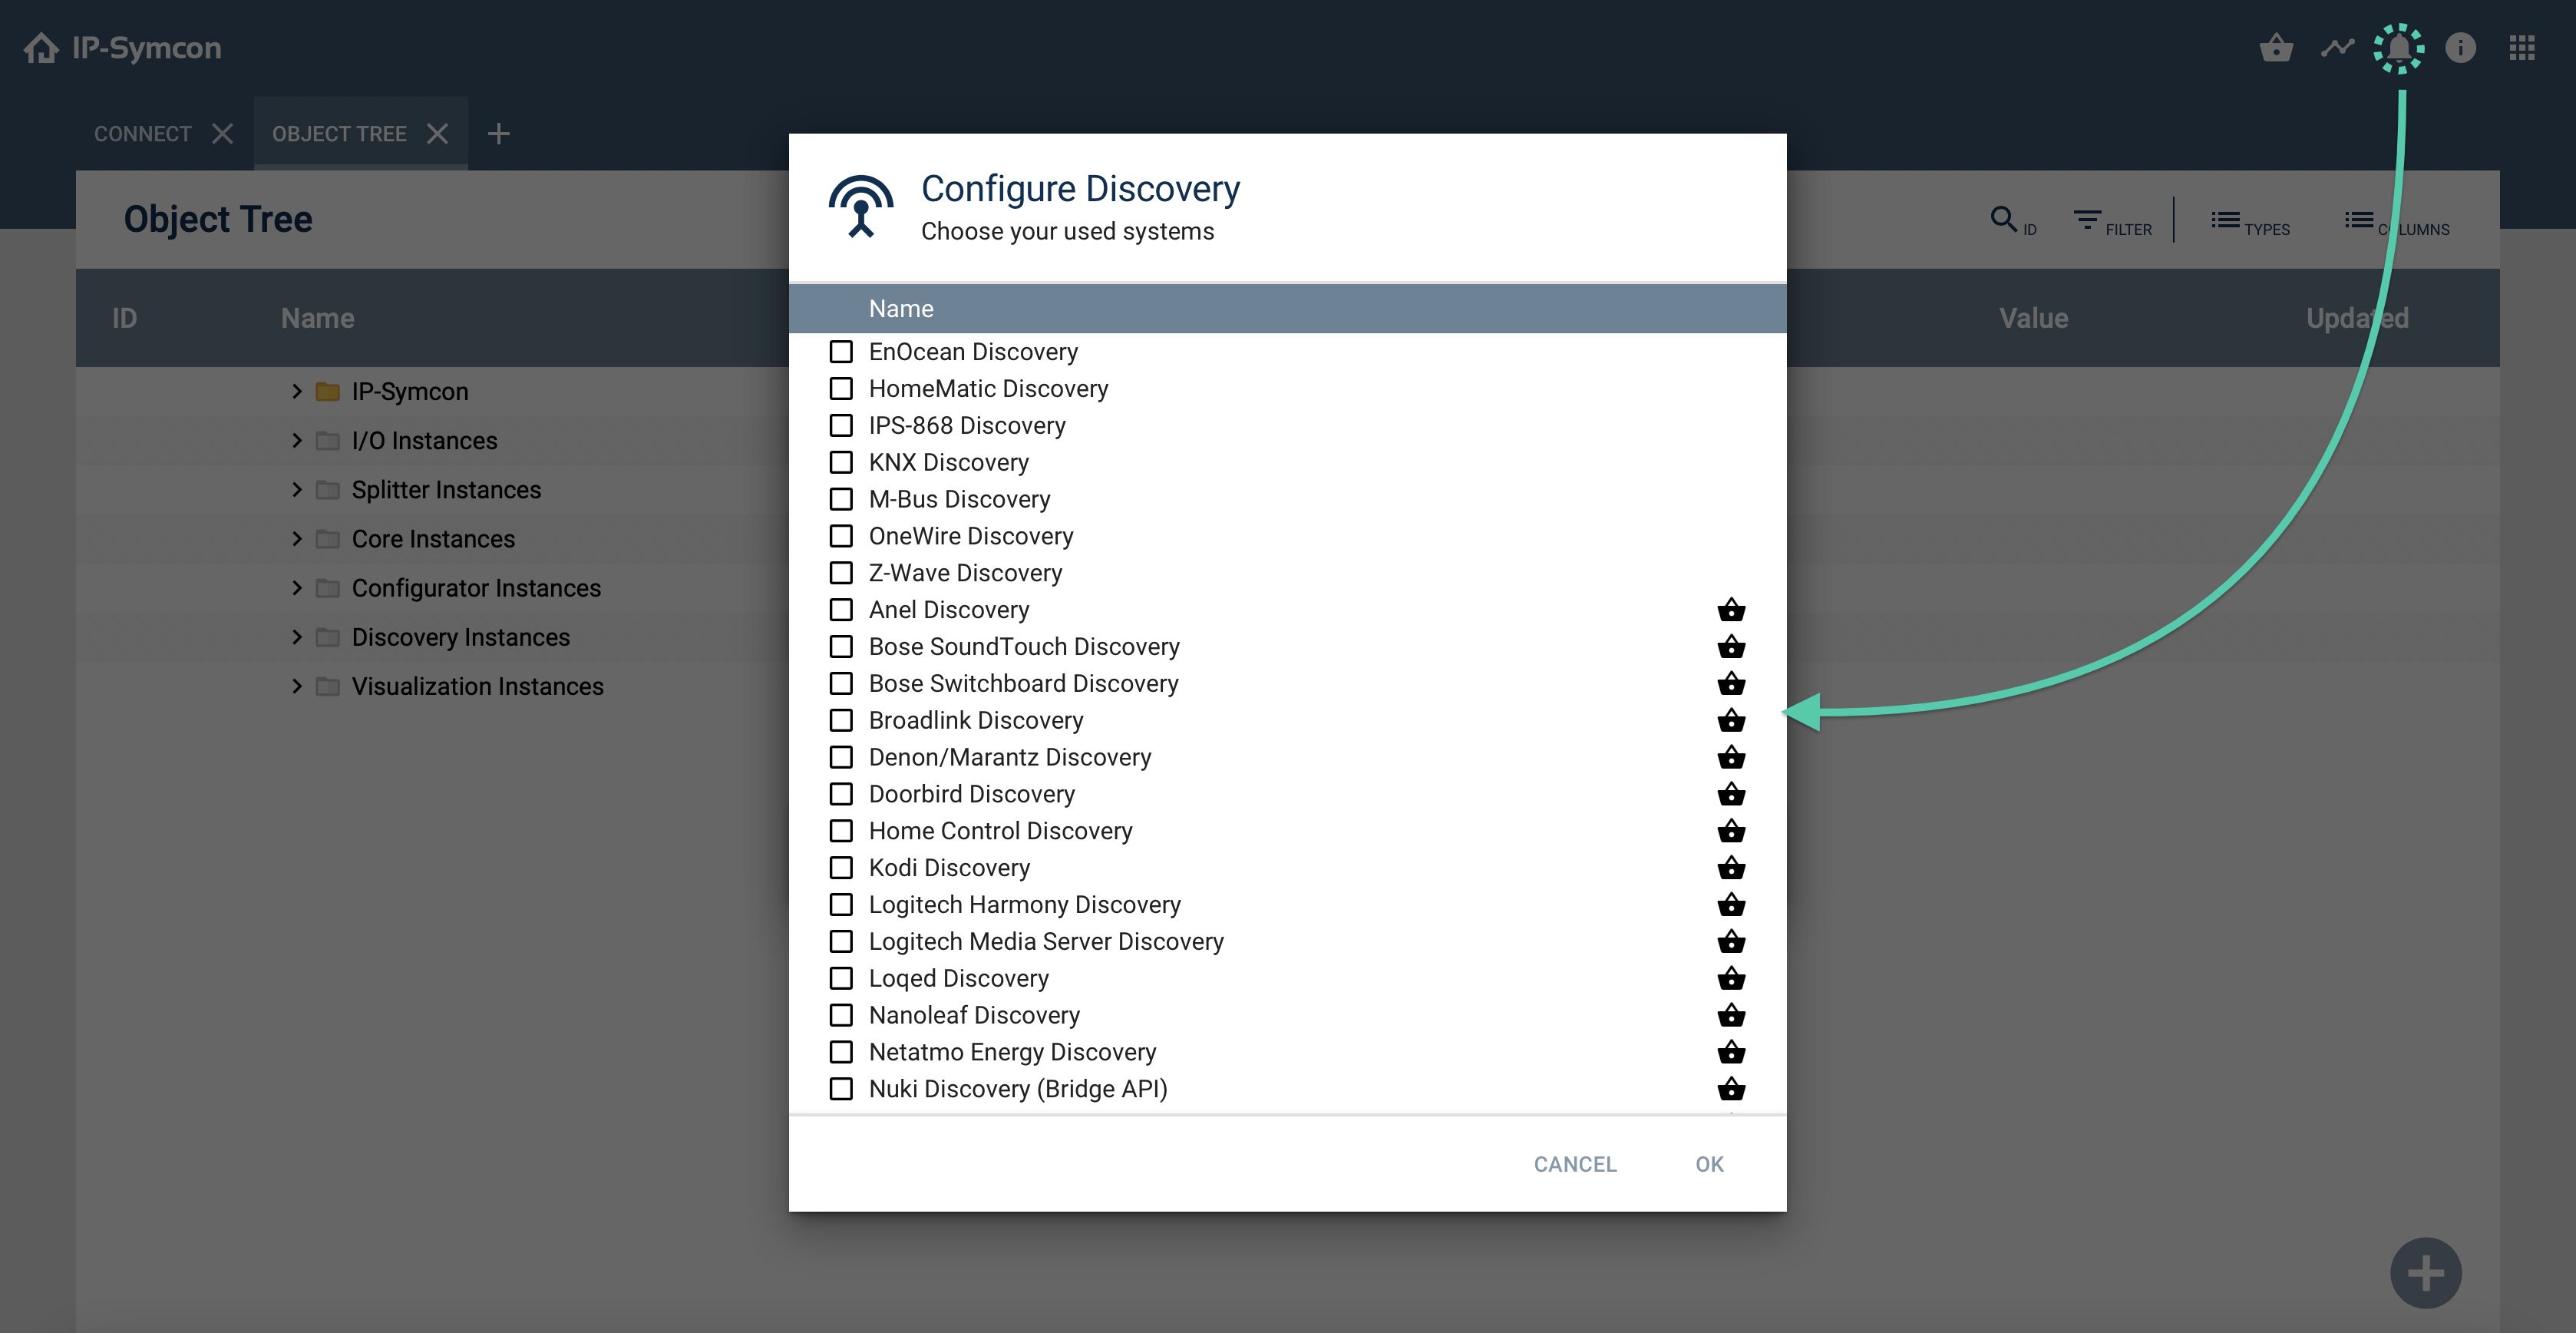
New Discoveries can be set up by ticking the box on the left side.
If there is a basket on the right edge, it is a Discovery from the [Module Store](management-console.md). These can be opened by clicking on the basket.
When setting up a Discovery, the required IO/splitter instances are automatically created.
#### Additional Setup
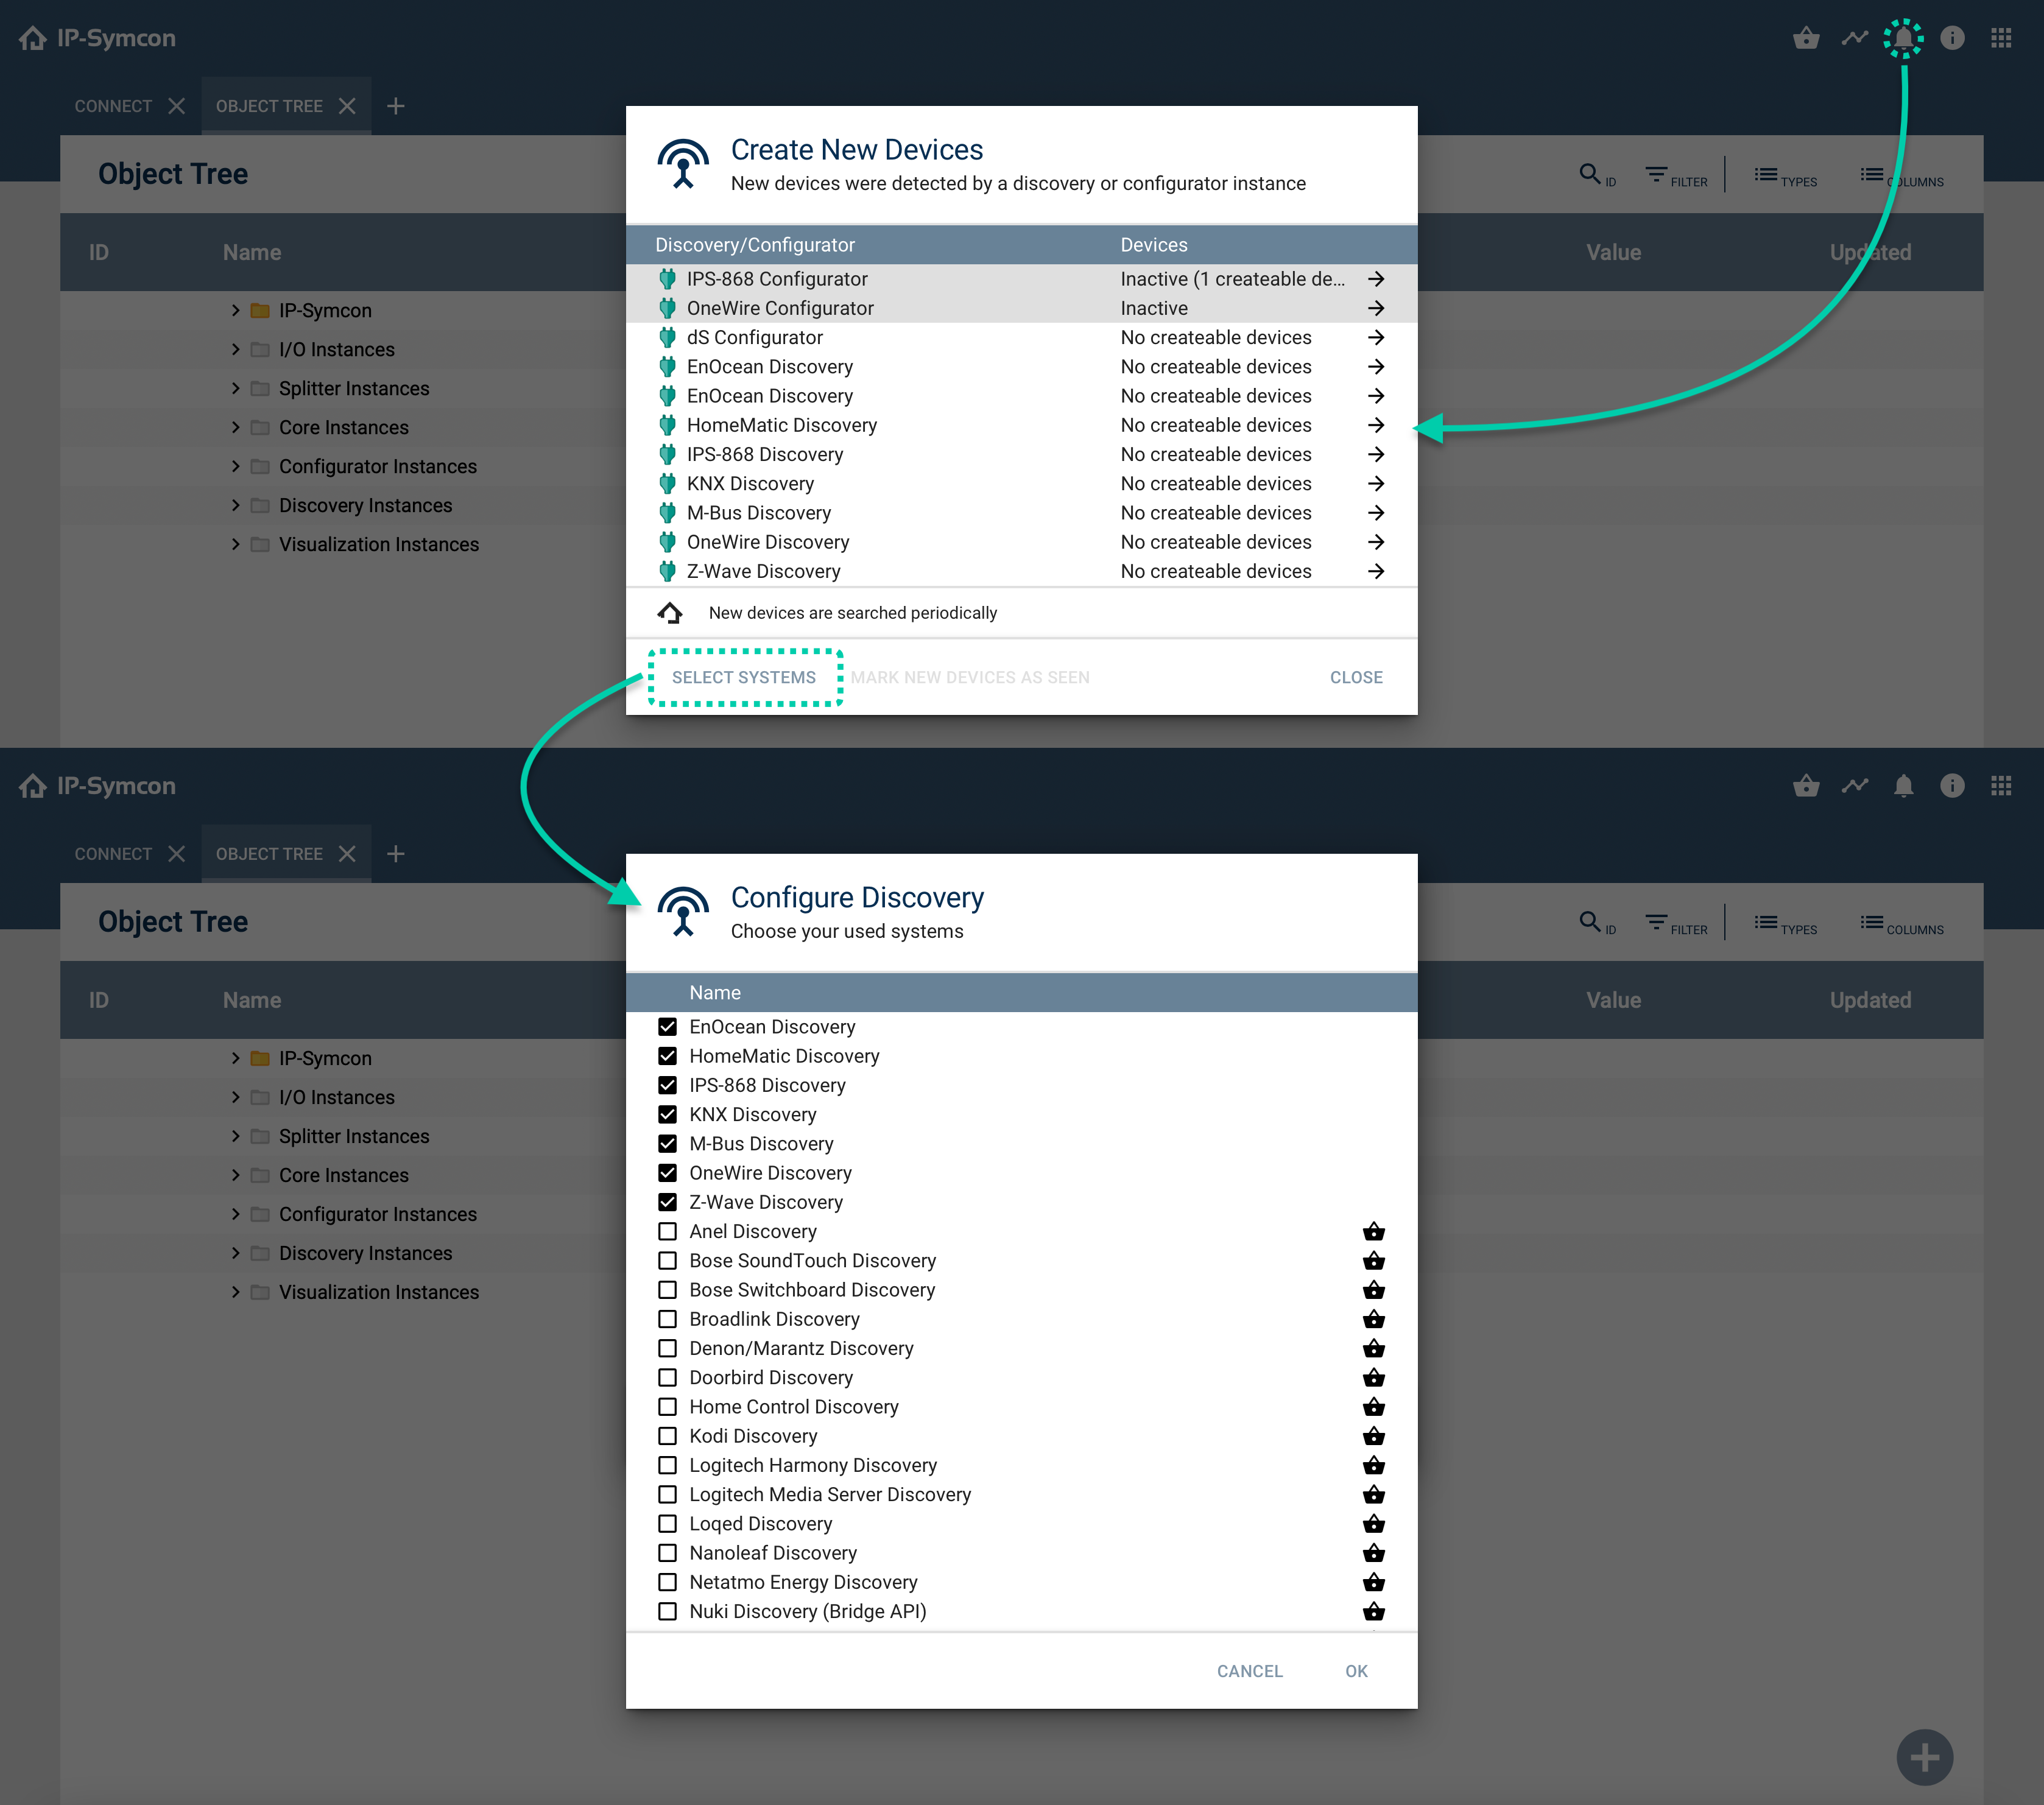
Additional Discovery Systems can be added via "Select Systems".
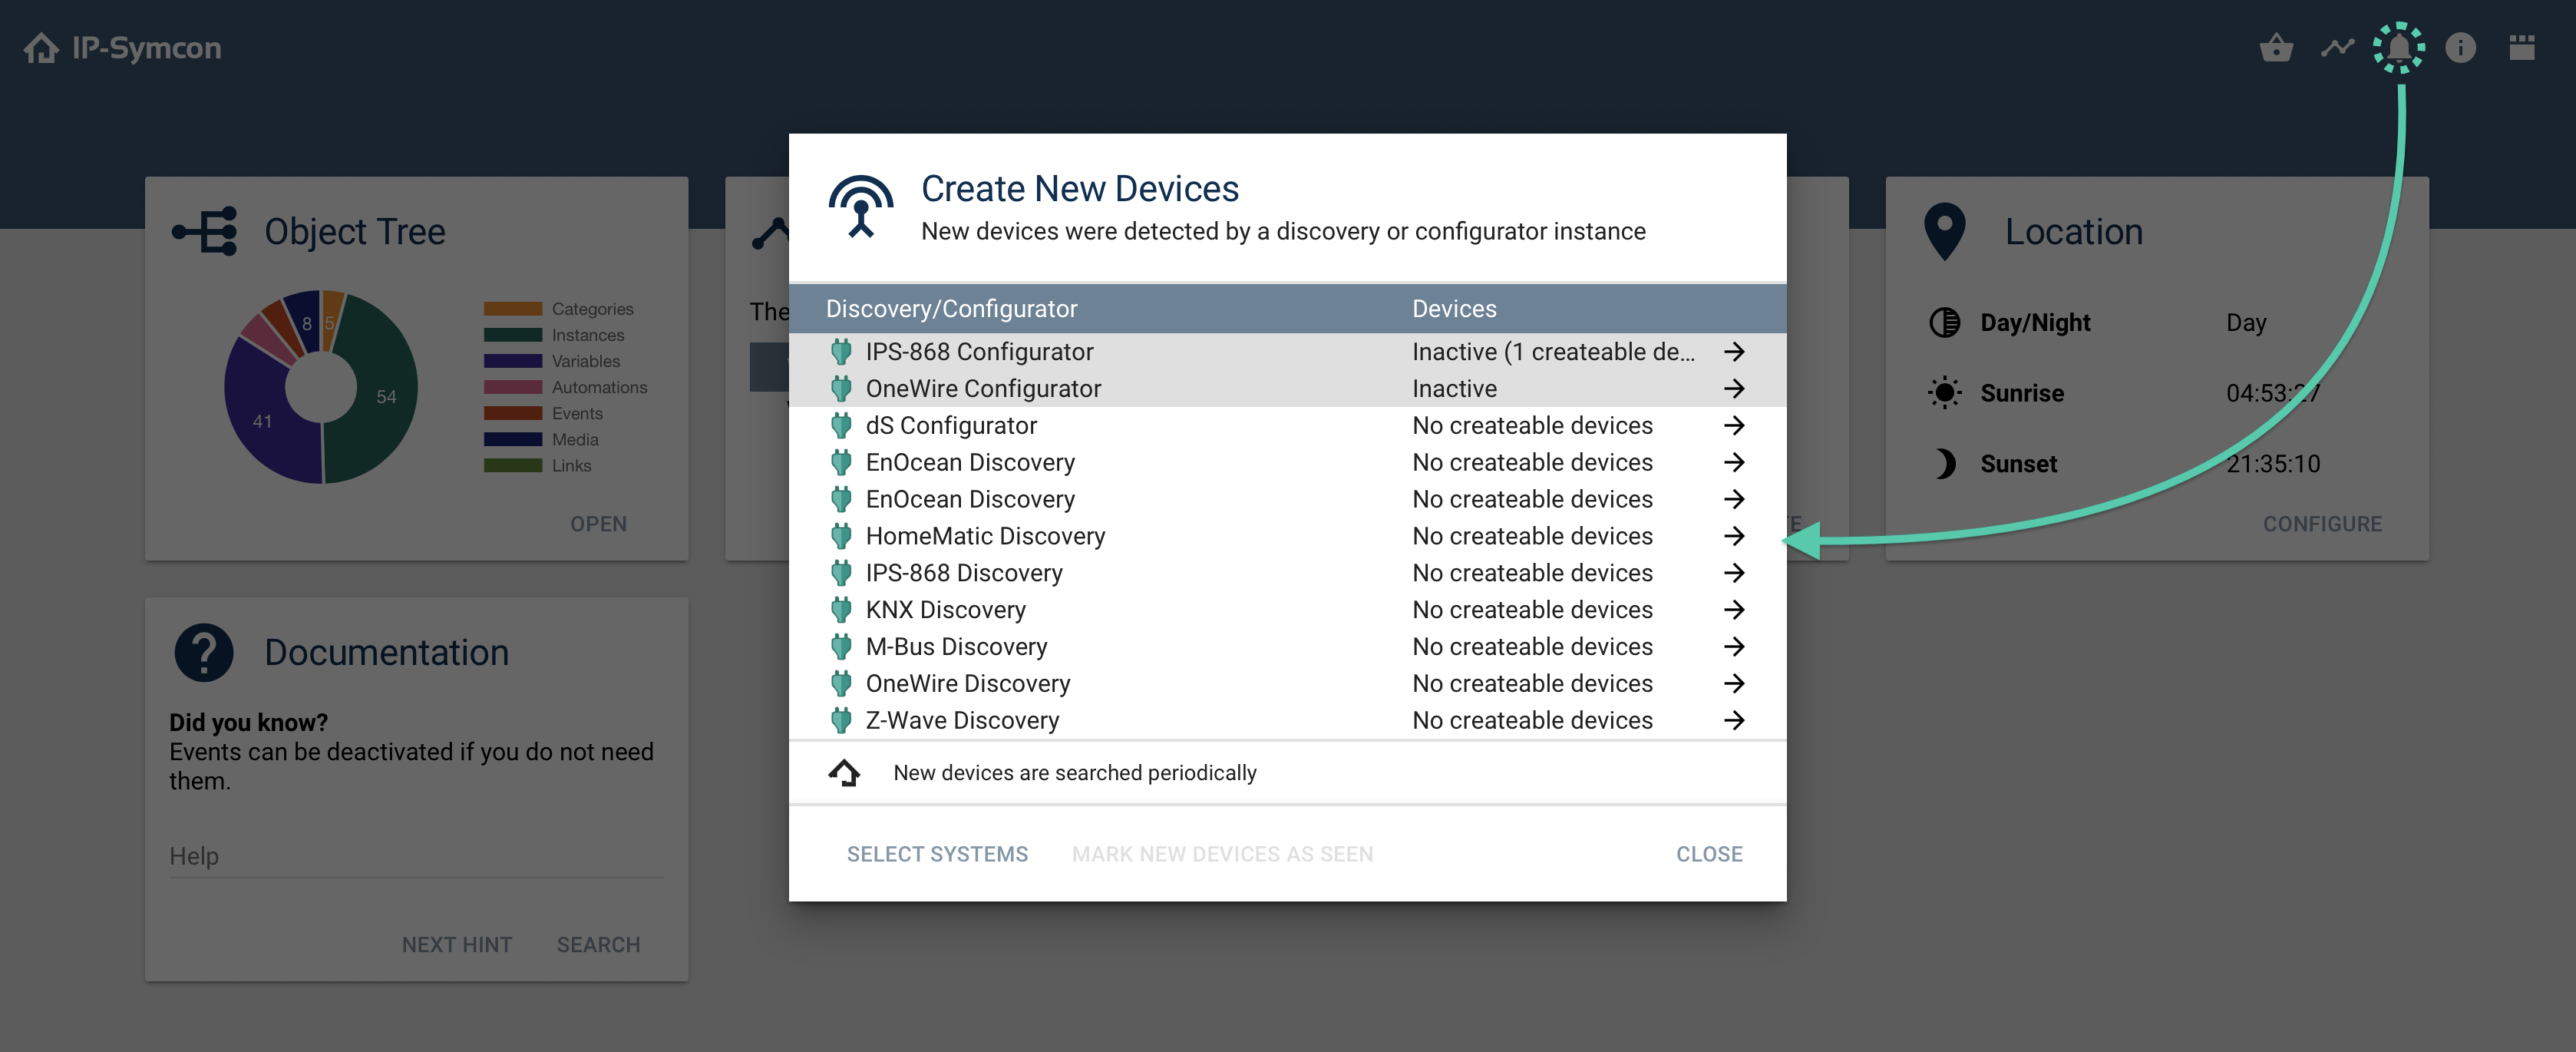
Configurators can be created and configured automatically using previously established Discoveries. The created configurators are displayed in the Device Search.
The configuration for the established Discoveries/Configurators can be opened using the arrows on the right side.
#### Create a Configurator
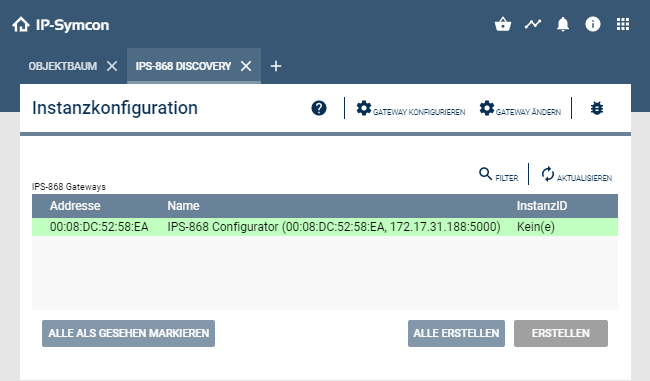
System-specific [Configurators](../concepts.md) can be created in the respective Discovery. To do this, the appropriate entry must first be selected from the list. Then "Create" has to be clicked.
The Discovery automatically mirrors the complete configuration of the Configurator making it immediately functional.
### Various Statuses
The Device Search icon shows directly whether, for example, a new device can be created.
There are three statuses for this, which are indicated by the icon on the console.
#### Status unchanged
If no new devices have been detected, all devices that can be created have been created or marked as "seen", only the standard symbol is displayed.

#### No Discovery is Set Up
No Discovery instance has been set up yet.

#### New Devices Can Be Created
When new devices are recognized, their number is shown in a green circle.
If no setup is desired, this message can be hidden in the Device Search window with "Mark new devices as seen"

[setupdiscovery]:/images/dokumentation/komponenten/webverwaltungskonsole-geraetesuche-discoveryeinrichten.png
## Messages
Source: https://www.symcon.de/en/service/documentation/components/management-console/messages/
The Messages tab displays information about operations that are currently happening on the IP-Symcon server. Here, changes, activities, and also error messages are collected and can be filtered.
> **Note:** By double-clicking or "right-click -> open" on a variable within the message windows, it can be changed.
### Configuration
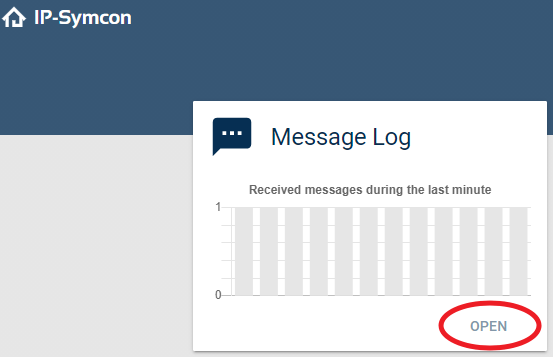
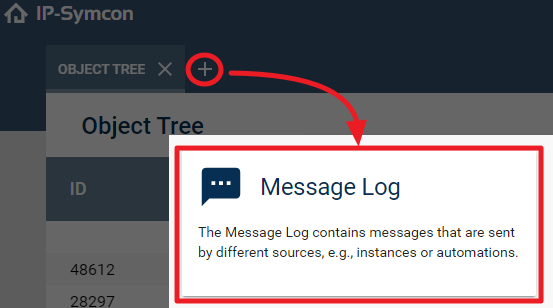
The messages can be accessed via Message Log Widget or the plus in the tab list.
This is done by simply clicking "Open" in the widget or openening the Message Log with the plus in the tab list.
### Color codes
The different messages are displayed in color in the message window.
__Transparent background:__
A default message. (MESSAGE)
__Gray background:__
A custom message. (CUSTOM)
__Green background:__
A success message. (SUCCESS)
__Purple background:__
A notification message. (NOTIFY)
__Yellow background:__
A warning message. (WARNING)
__Red background:__
An [Error Message](management-console.md). (ERROR)
### Menu Items
#### Start/Stop
Starts and stops the recording of messages. Thus, the previous messages can be analyzed calmly.
#### Clear
Clears all previous messages.
#### Limit Messages
The maximum number of displayed messages. When the limit is reached, the oldest messages are removed before new ones are added. This can cause the list to scroll automatically, even if the AutoScroll feature has been disabled.
#### AutoScroll
When enabled, the window automatically scrolls to the most recent messages.
#### Filter
Here you can select which type of messages should be displayed.
#### Quick filter
The "Sender" and "Message" columns are searched for the content of the input field. The search is activated when entering the search field itself, but can be activated/deactivated by clicking on "Quick filter".
Searching for multiple terms is not possible.
## Error Messages
Source: https://www.symcon.de/en/service/documentation/components/management-console/messages/error-messages/
An error message is displayed either directly or in the message log. Error messages are shown in red in the message window.
All error messages that appear in the message log are also saved in the log file in the "logs" folder.
> **Note:** The following applies: If an error message is not displayed directly, it will be displayed in the message log.
#### Examples for a direct output of the error messages:
* Execute in the Script Editor
* Execute in WebFront and the app
* Execute one’s own action (Script / PHP Module) via WebFront and app
* Executing Web Hooks and OAuth Hooks
#### Examples of error messages in the log:
* Events (cyclic, trigger)
* Script timer
* Timers of instances (including PHP modules)
* Error in the start and stop script in the Event Control
* Error when evaluating a Register Variable
## Module Store
Source: https://www.symcon.de/en/service/documentation/components/management-console/module-store/
New modules can be installed via the Module Store. These modules expand the range of functions and thus enable the use of new functions or additional devices.
> **Note:** Search all available modules in the [Module Store](https://www.symcon.de/en/module-store/) in the browser
.
### Open Module Store
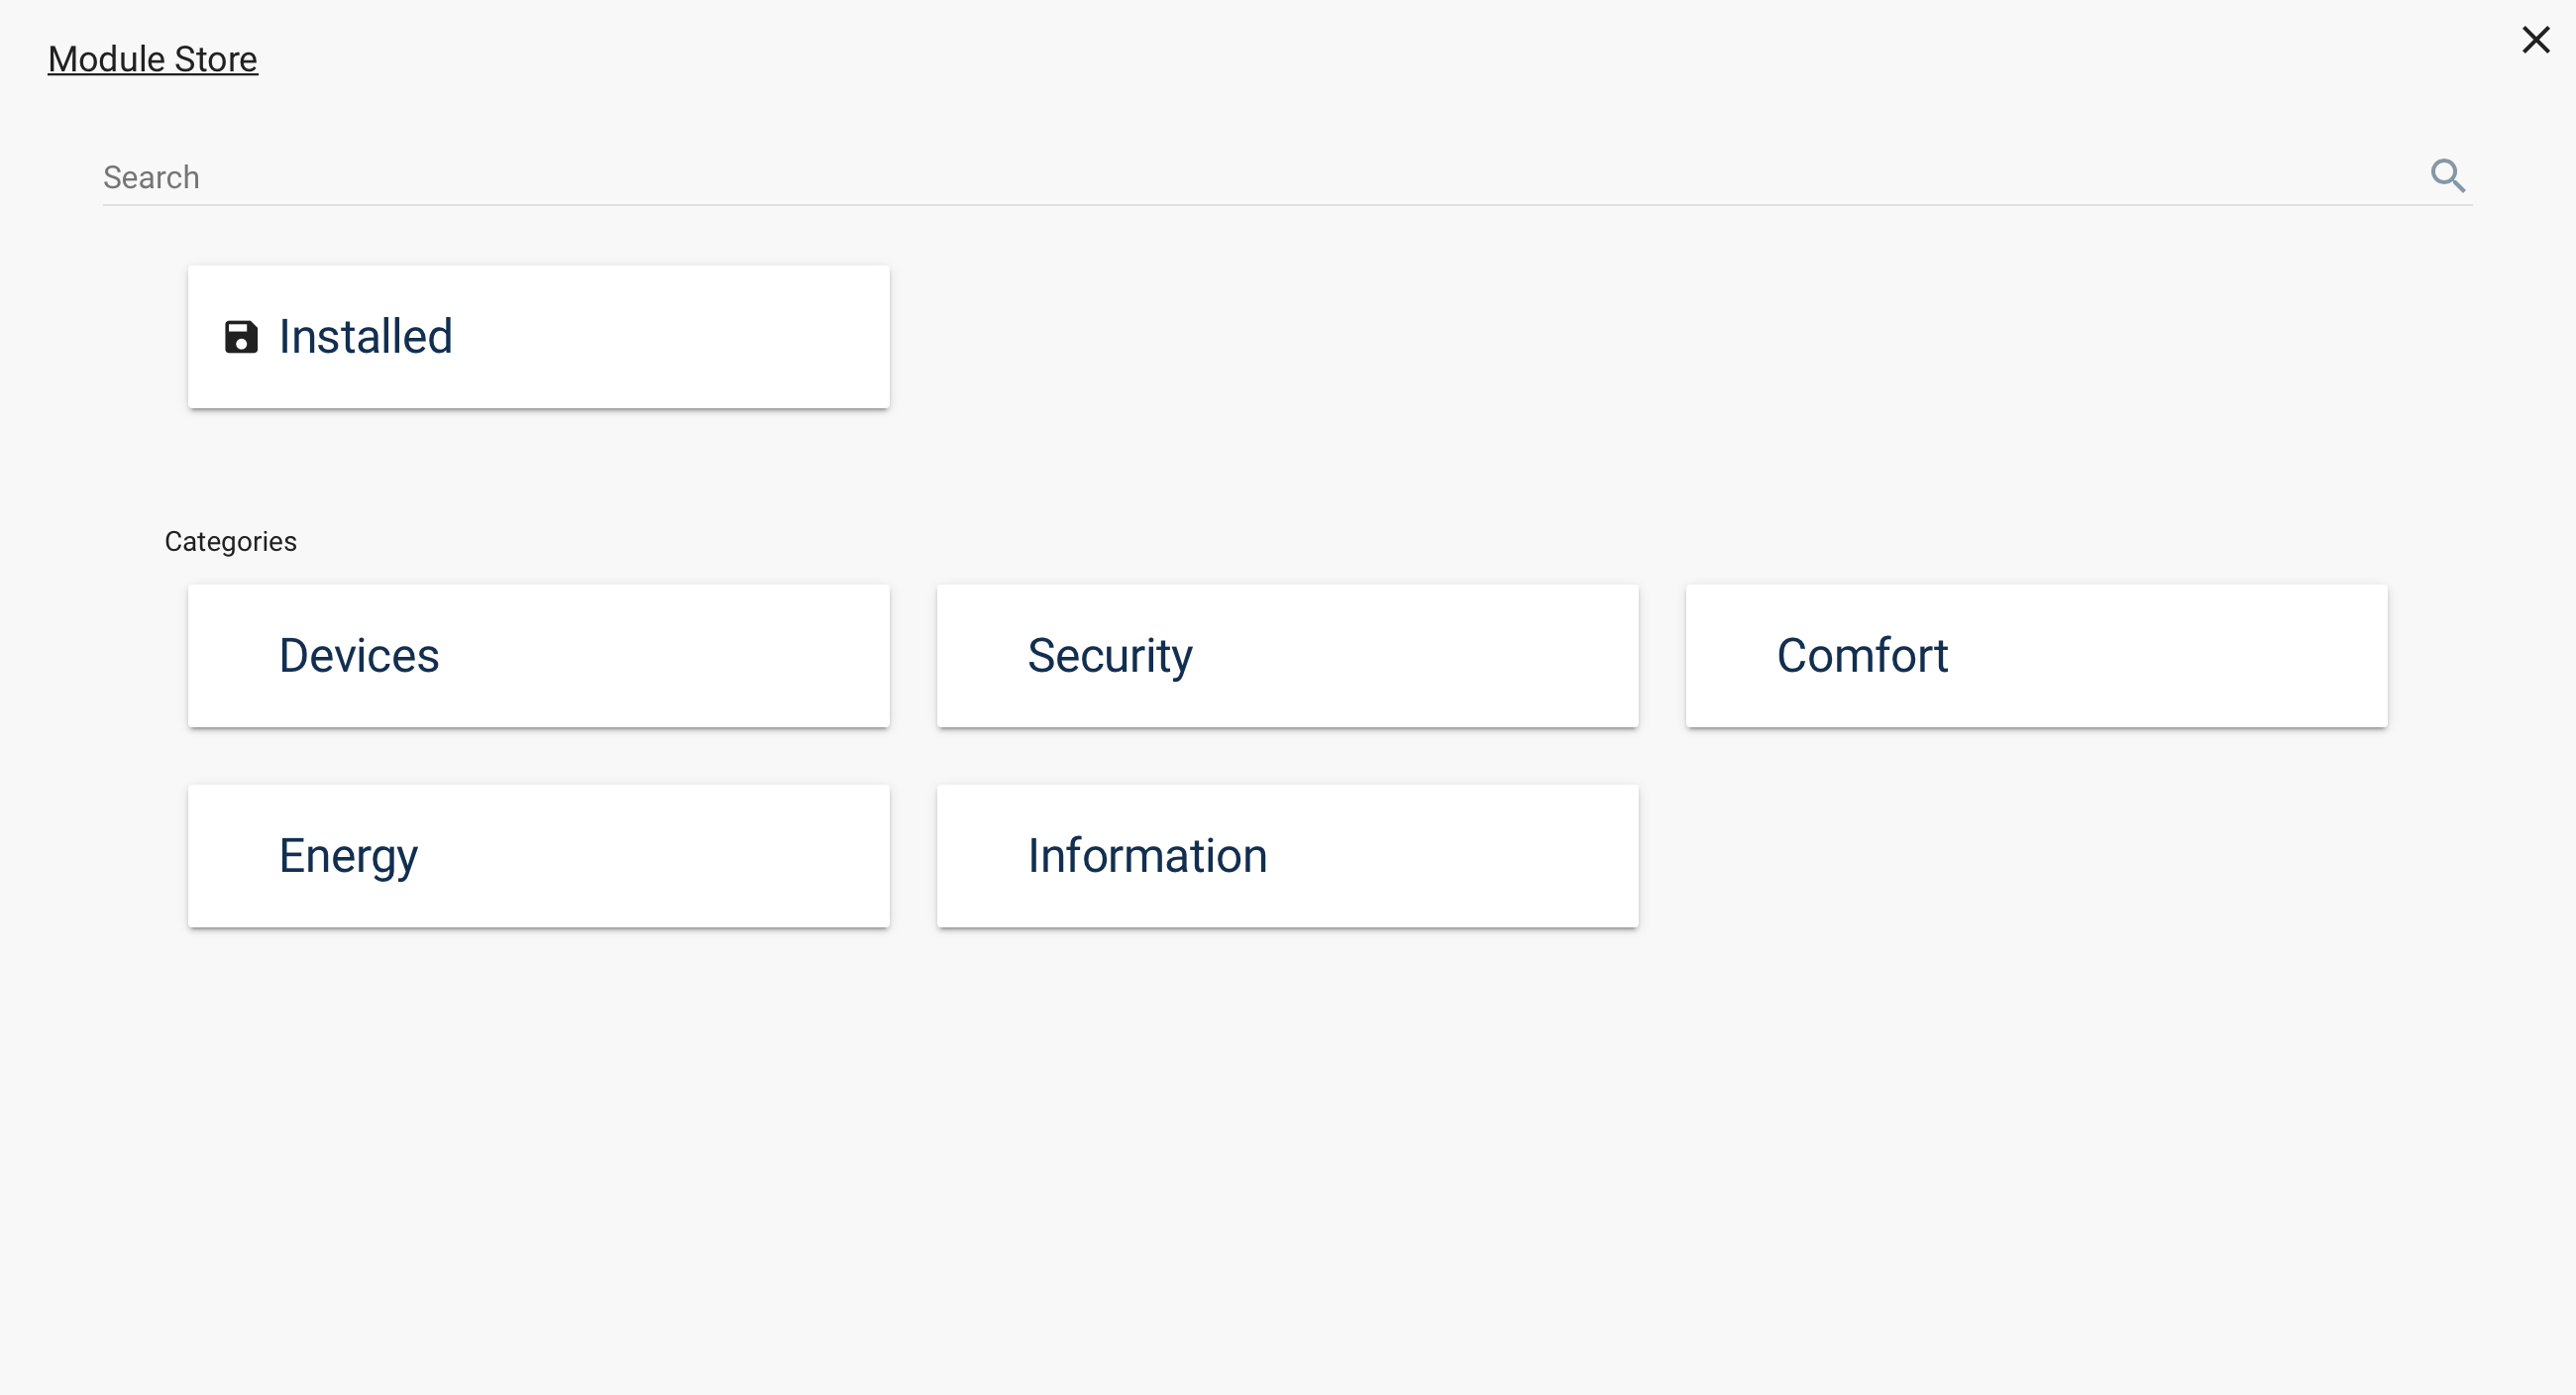
The module store can be reached via the basket in the upper right corner of the console.

Initially, the Module Store shows different categories in which modules are offered and provides a search function. If modules have already been installed via the Module Store, they can be accessed via a corresponding special category.
### Find modules
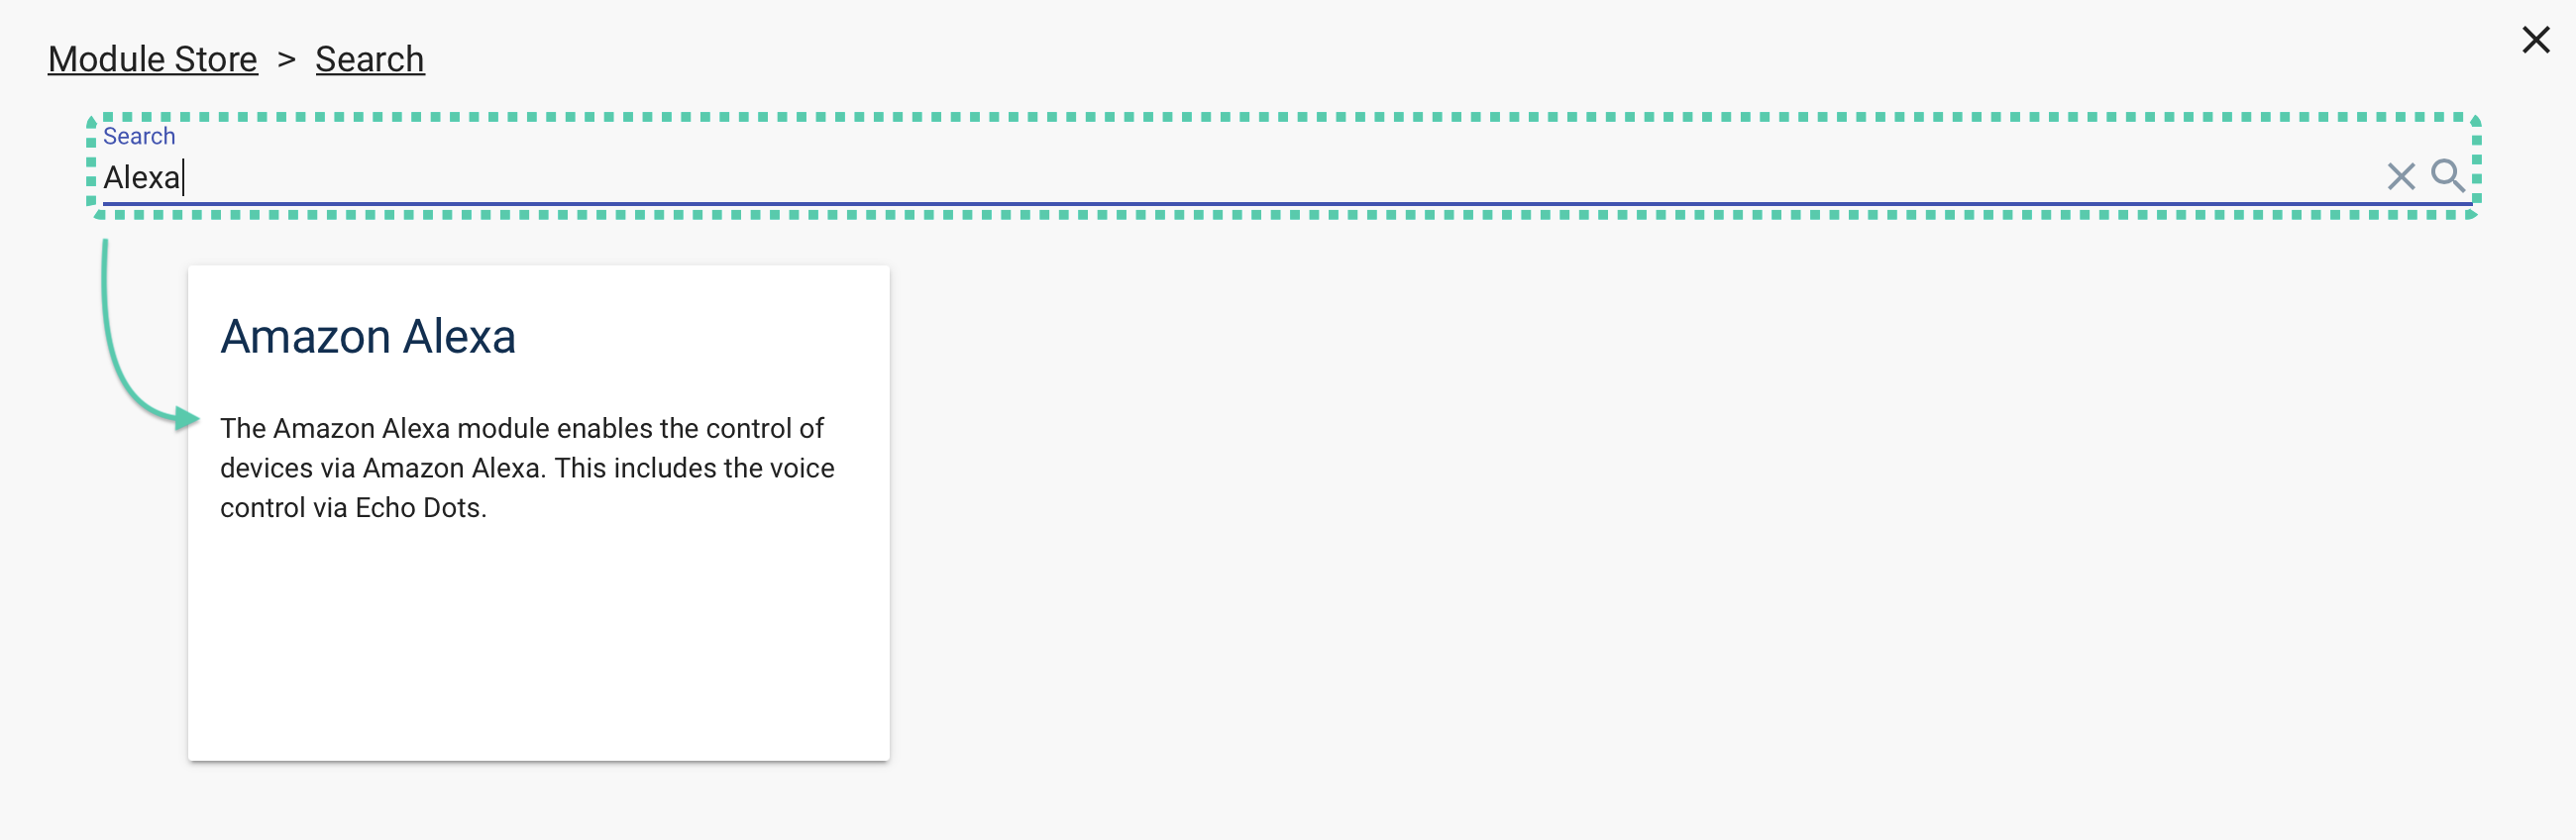
There are various options for finding a suitable module. On the one hand, the search function can be used. A search term can be entered here and confirmed by pressing the Enter key or clicking on the magnifying glass. Matching modules are then displayed.
Alternatively, a category can be selected by clicking on it to display the modules it contains. Categories can contain sub-categories, which can then also be selected. One can return to a previous category by clicking on it in the top bar. A click on "Module Store" returns one to the start screen.
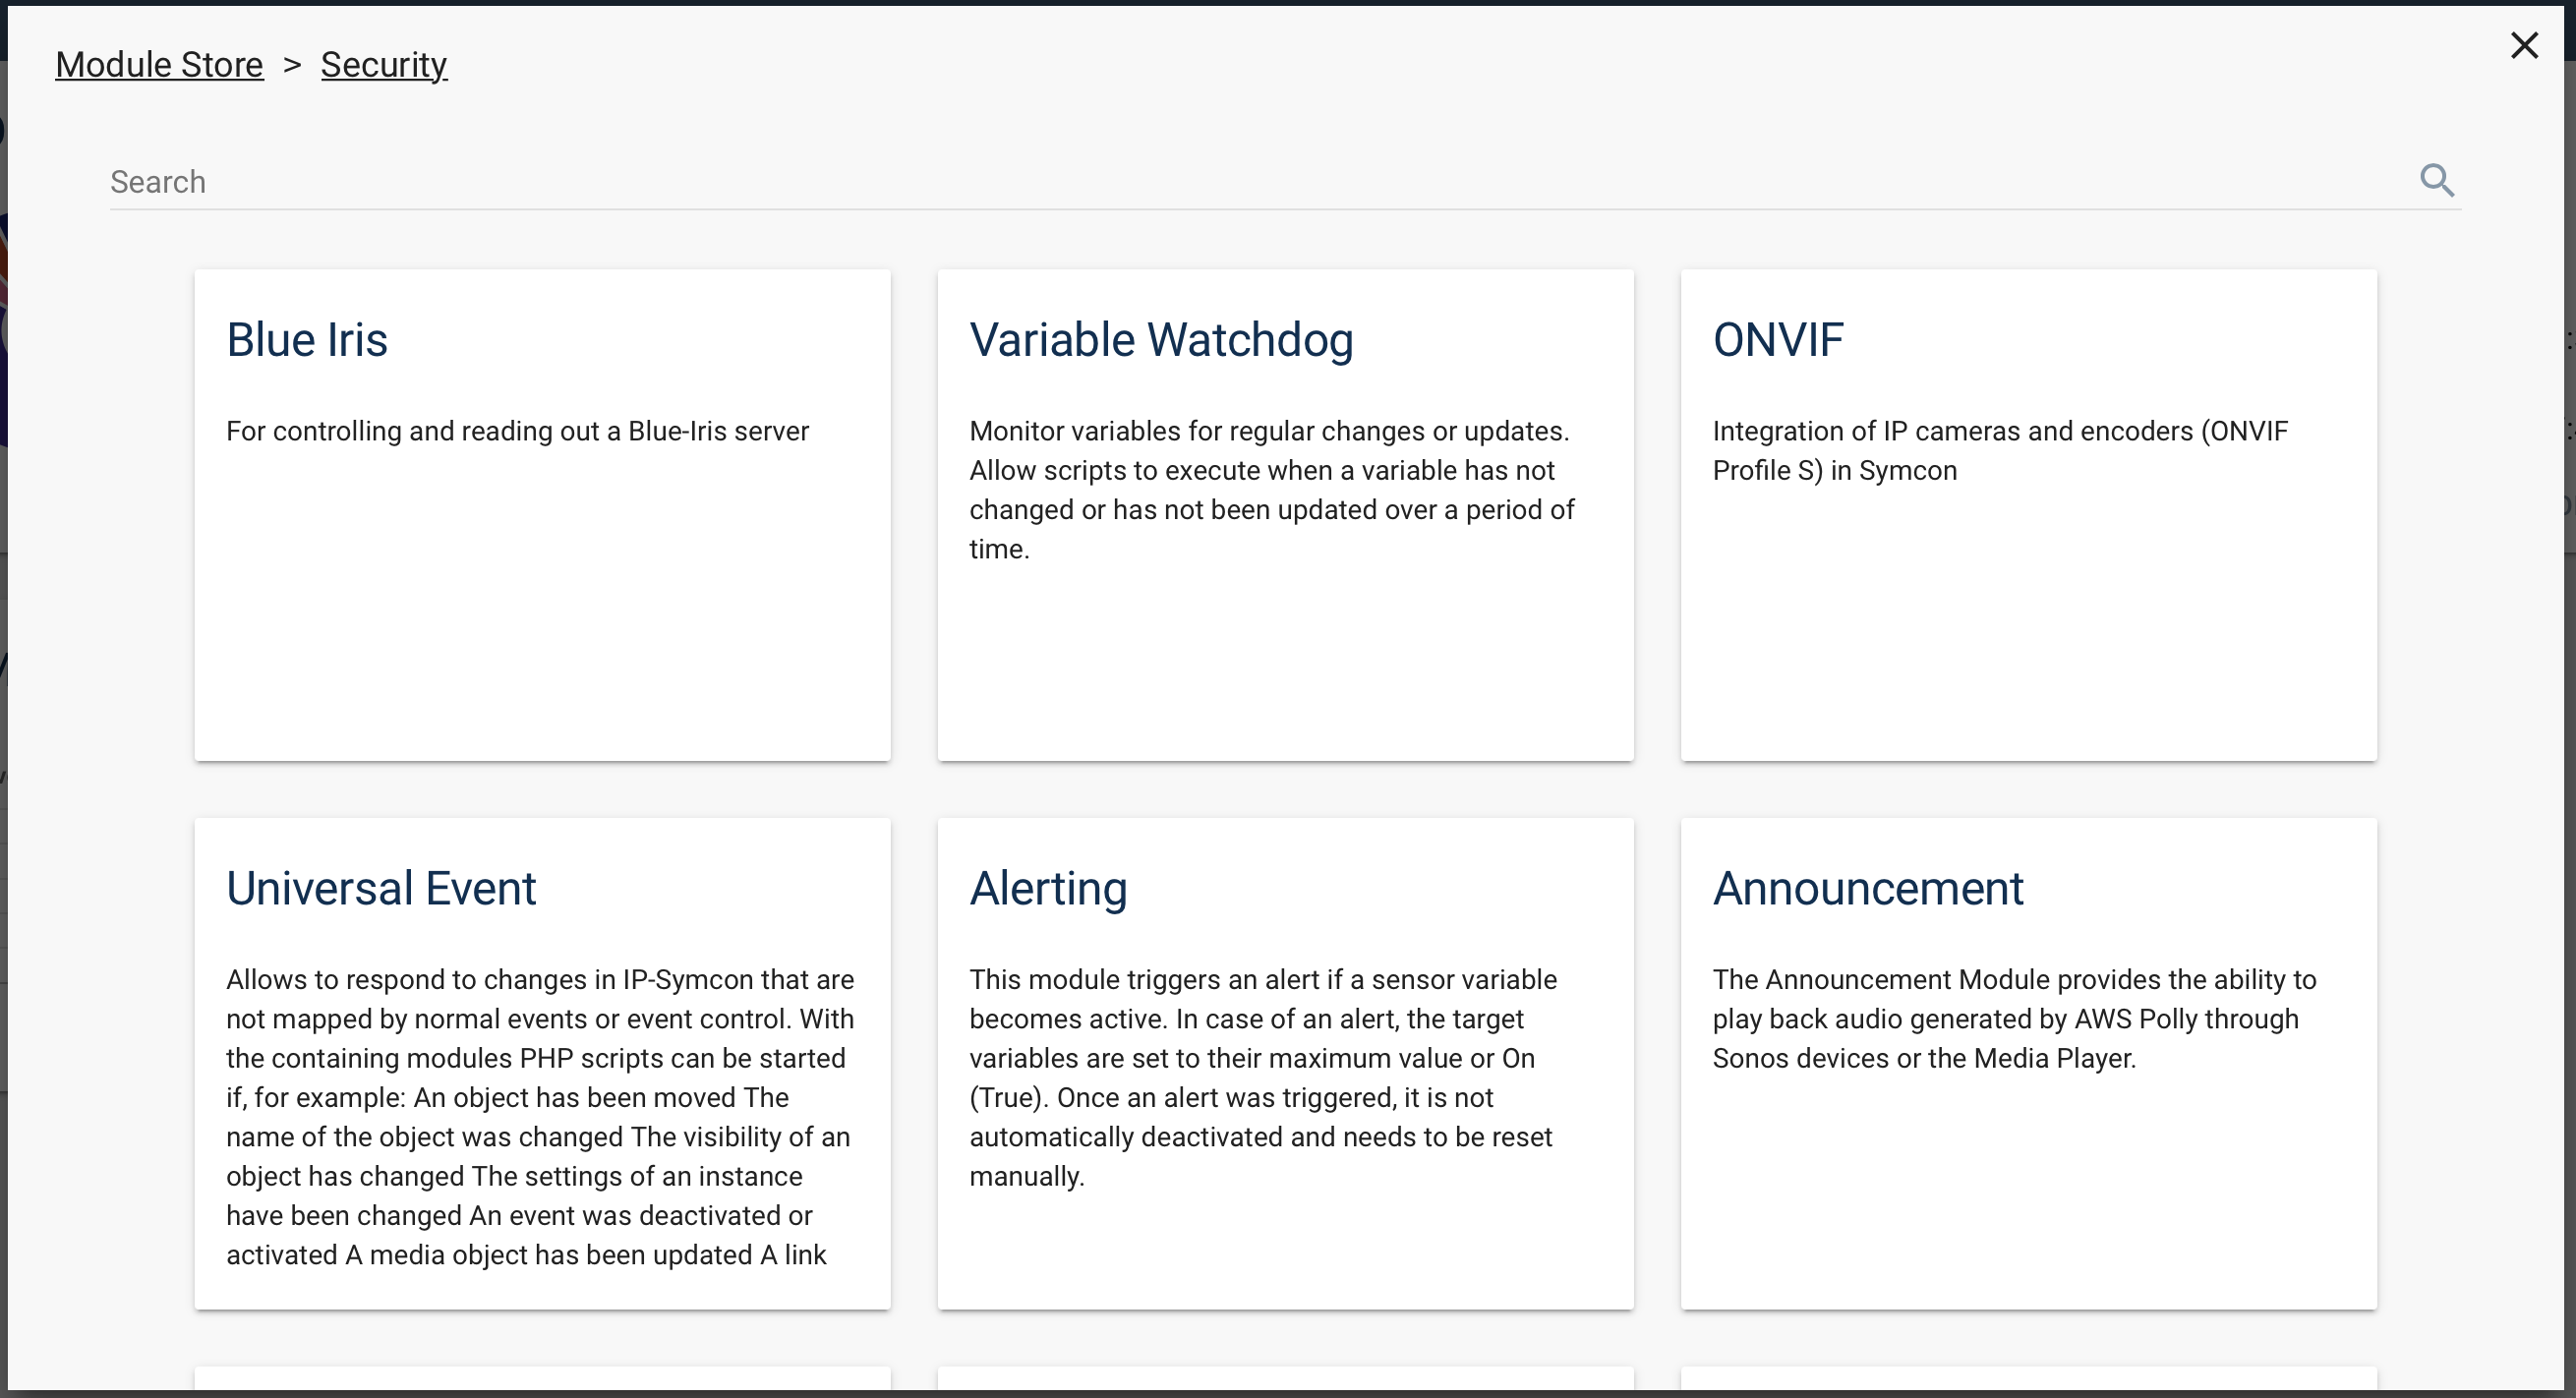
These two methods can also be combined. One can search for a term in a certain category or limit a search result afterwards by using categories.
> **Note:** If a search term is used, then sub-categories are also searched. Without a search term, only modules from the current category are displayed, but not their subcategories.
### Install modules
If modules are to be installed, the associated card must first be clicked. Following, a dialog opens which explains the currently selected modules.
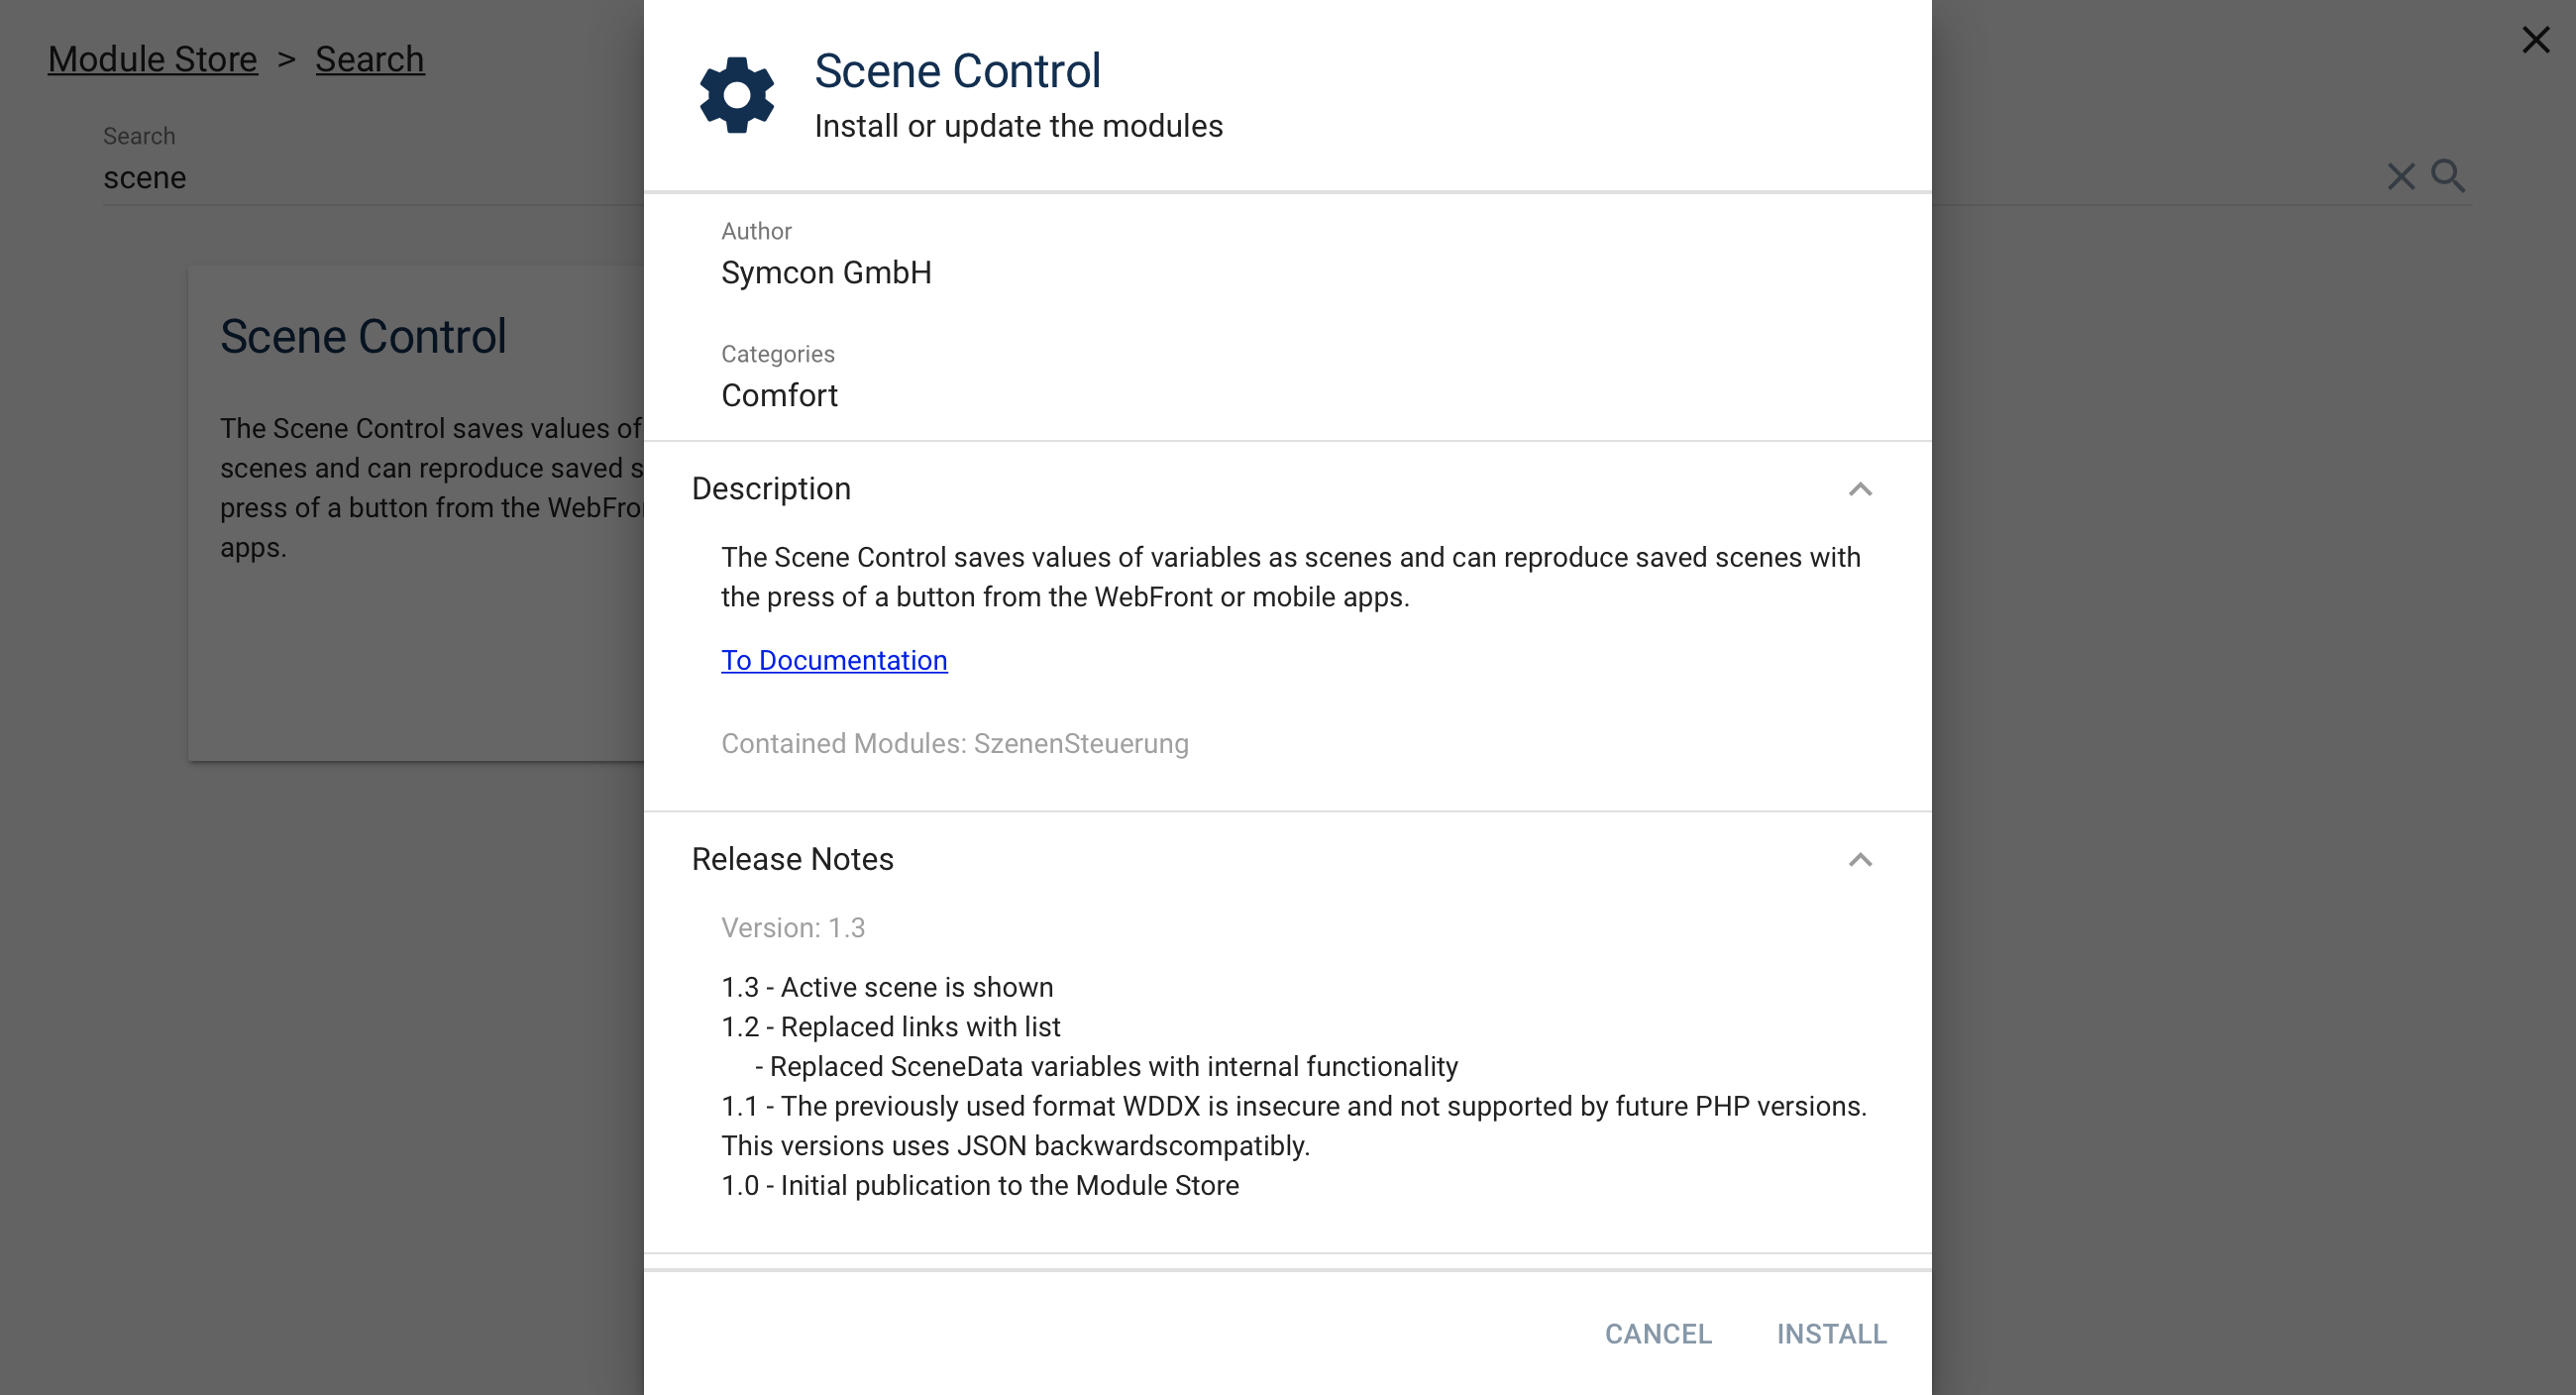
| Element | Description |
| ------------------- | -------------------------------------------------------------------------------------------------------------------- |
| Author | The author of the modules |
| Categories | The categories in which the modules are contained |
| Description | The description of the modules. In addition, there is a link to the documentation and a list of the included modules |
| Version information | The current version number and a description of what is new about that version |
| Beta settings | If the modules have a beta version, this can be used to switch to the beta version |
At the bottom of the dialog there is the "Install" button to install the modules and "Cancel" to close the dialog again.
If a beta version is to be installed, the beta settings can be expanded and "Switch to beta" may be clicked on. The module information will then be adapted to the beta version and this can be installed by clicking on "Install".
> **Warning:** Beta versions are not checked by the Symcon-Team.
### Update and remove modules
If modules have been installed, a special category "Installed" appears on the start screen of the module store. All installed modules are listed here. If there are new versions for modules this is highlighted.
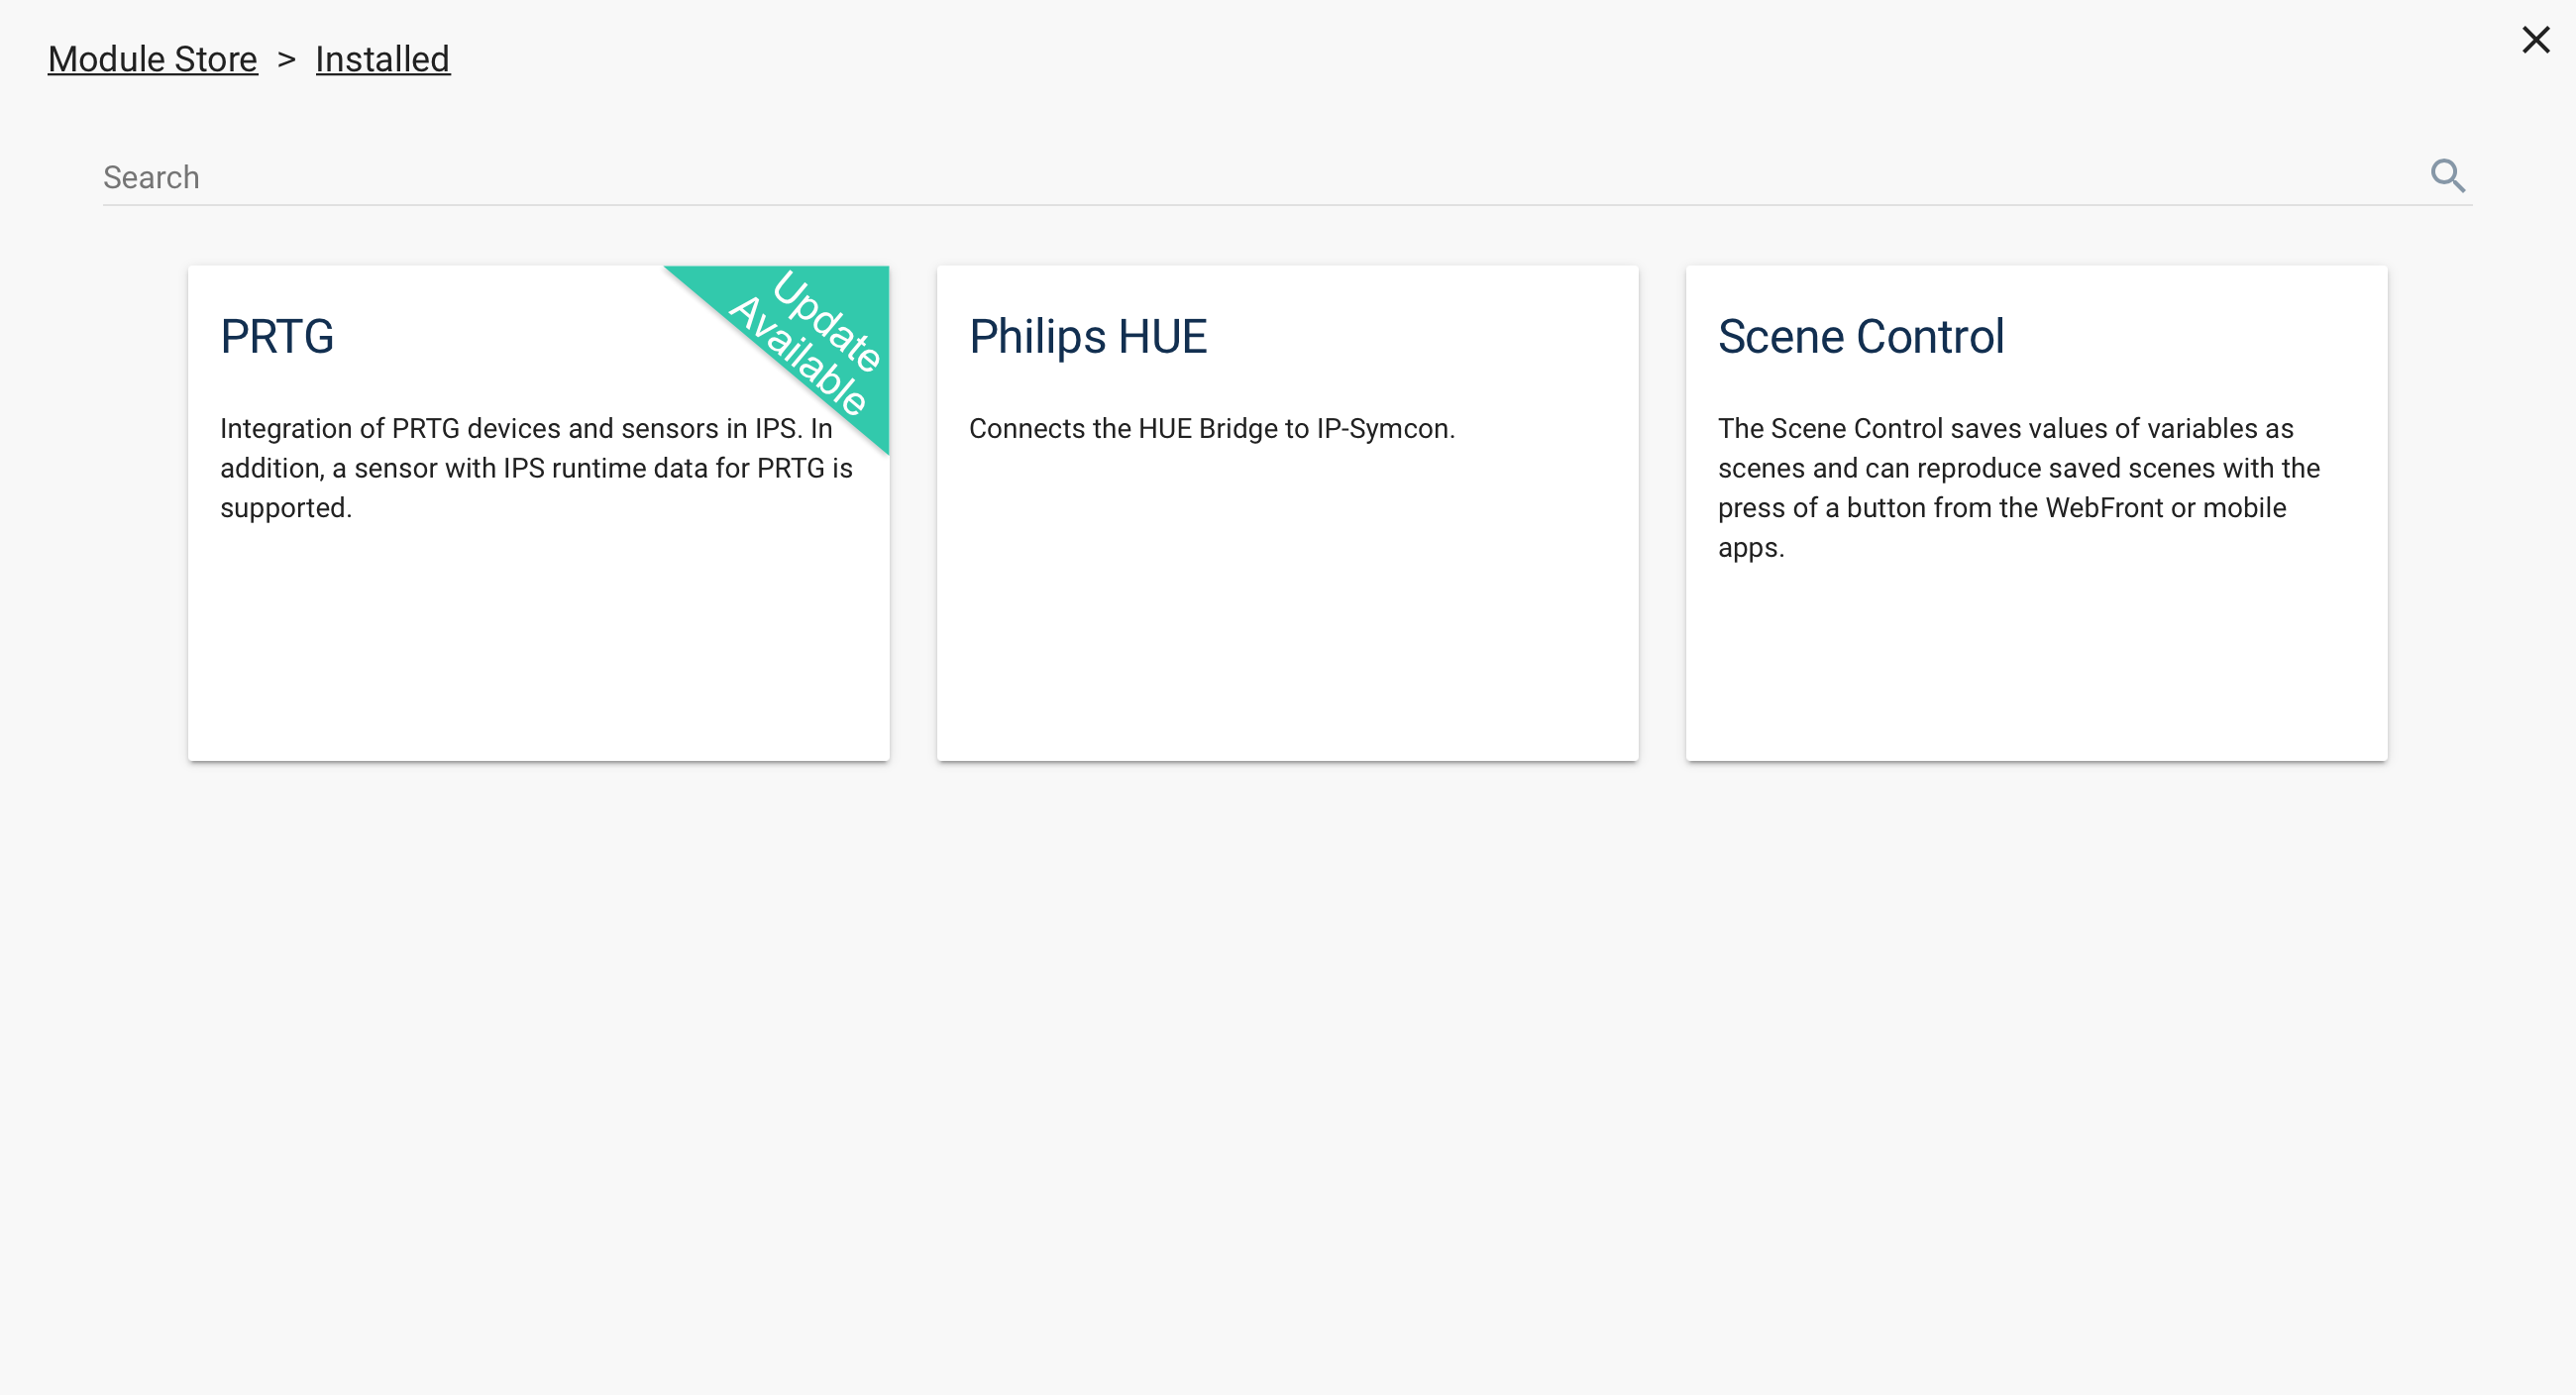
If an installed module is clicked on, the installation dialog appears again. One now has the additional option of deleting the modules by clicking on "Remove".
If there is a new version, one can install it using "Update". If one desires to change the channel afterwards, i.e. from the regular stable version to beta or the other way around, this can be done via the beta settings and is confirmed with "change channel". If the current version is installed, one can download it again via "Reinstall".
## Object Tree
Source: https://www.symcon.de/en/service/documentation/components/management-console/object-tree/
The Object Tree is used to overview and manage all objects and instances. The structure used here is also used as foundation for the [WebFront](webfront-visualization.md). Objects can be used Drag & Drop.
> **Note:** The explanation of the context menu of the different instances can be found in the [Basics](../concepts.md).
### Configuration
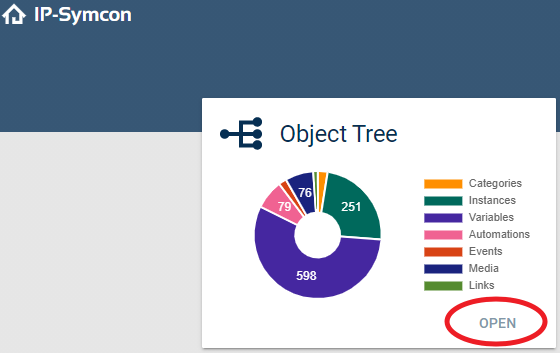
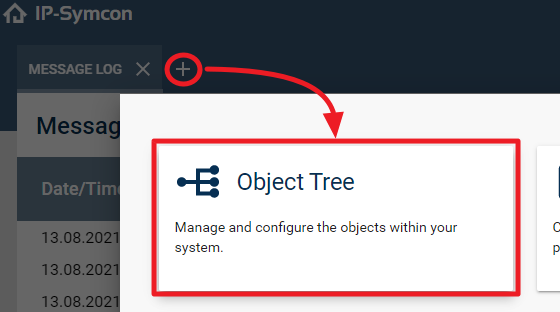
The Object Tree can be accessed via Object Tree Widget or the plus in the tab list.
This is done by simply clicking "Open" in the widget or openening the Object Tree with the plus in the tab list.
### Color Codes
In the Object Tree the status of the objects is displayed with color codes.
__Black font:__
Everything is normal and the object is displayed in the WebFront.
__Light gray font:__
Everything is normal and the object does not appear in the WebFront.
__Gray exclamation mark:__
The object is inactive.
__Light gray exclamation mark:__
A parent instance of the object is inactive.
__Red exclamation mark:__
The object has an error condition.
__Light red exclamation mark:__
A parent instance has an error condition.
### Additional Functions
When hovering over time or a status icon, a tool tip with the current date or the type of complication is displayed.
### Menu Items
#### Plus Button
Via the dialog "+" at the bottom right, new objects can be created. Alternatively, by right-clicking on the desired position in the object tree, an object can be added to this position. The respective object types are described in more detail in the [Basics](../concepts.md).
#### ID
You can search for an ObjectID using the search input. If found, the object tree automatically jumps to the ID you are looking for and selects it.
#### Filter
When entering text into the search field, the quick filter is automatically activated. It can be switched on and off again by clicking on the quick filter. It is searched in the column "Name". If the column "Description" is visible, it is searched as well.
#### Types
The visibility of specific object types can be activated or deactivated to focus the overview on specific types. If something is hidden, this button is highlighted in gray.
#### Columns
Overview functionality to enable and disable the displayed columns.
#### Quick filter
When entering the search field, the quick filter is automatically activated. This can be switched on and off again by clicking on the quick filter. It is only searched in the column "Location/Object".
## Object Tree (physical)
Source: https://www.symcon.de/en/service/documentation/components/management-console/object-tree-physical/
The physical view of the object tree only shows unconnected and I/O instances at the top level. In the I/O area, the devices are shown in the structure of the actual physical connection. The structure is illustrated under Parent Instances. (I/O -> Gateway -> Device). Only instances are displayed.
Unconnected instances include those that are not physically present.
> **Note:** The explanation of the context menu of the various instances can be looked up in the [Basics](../concepts.md).
### Setup
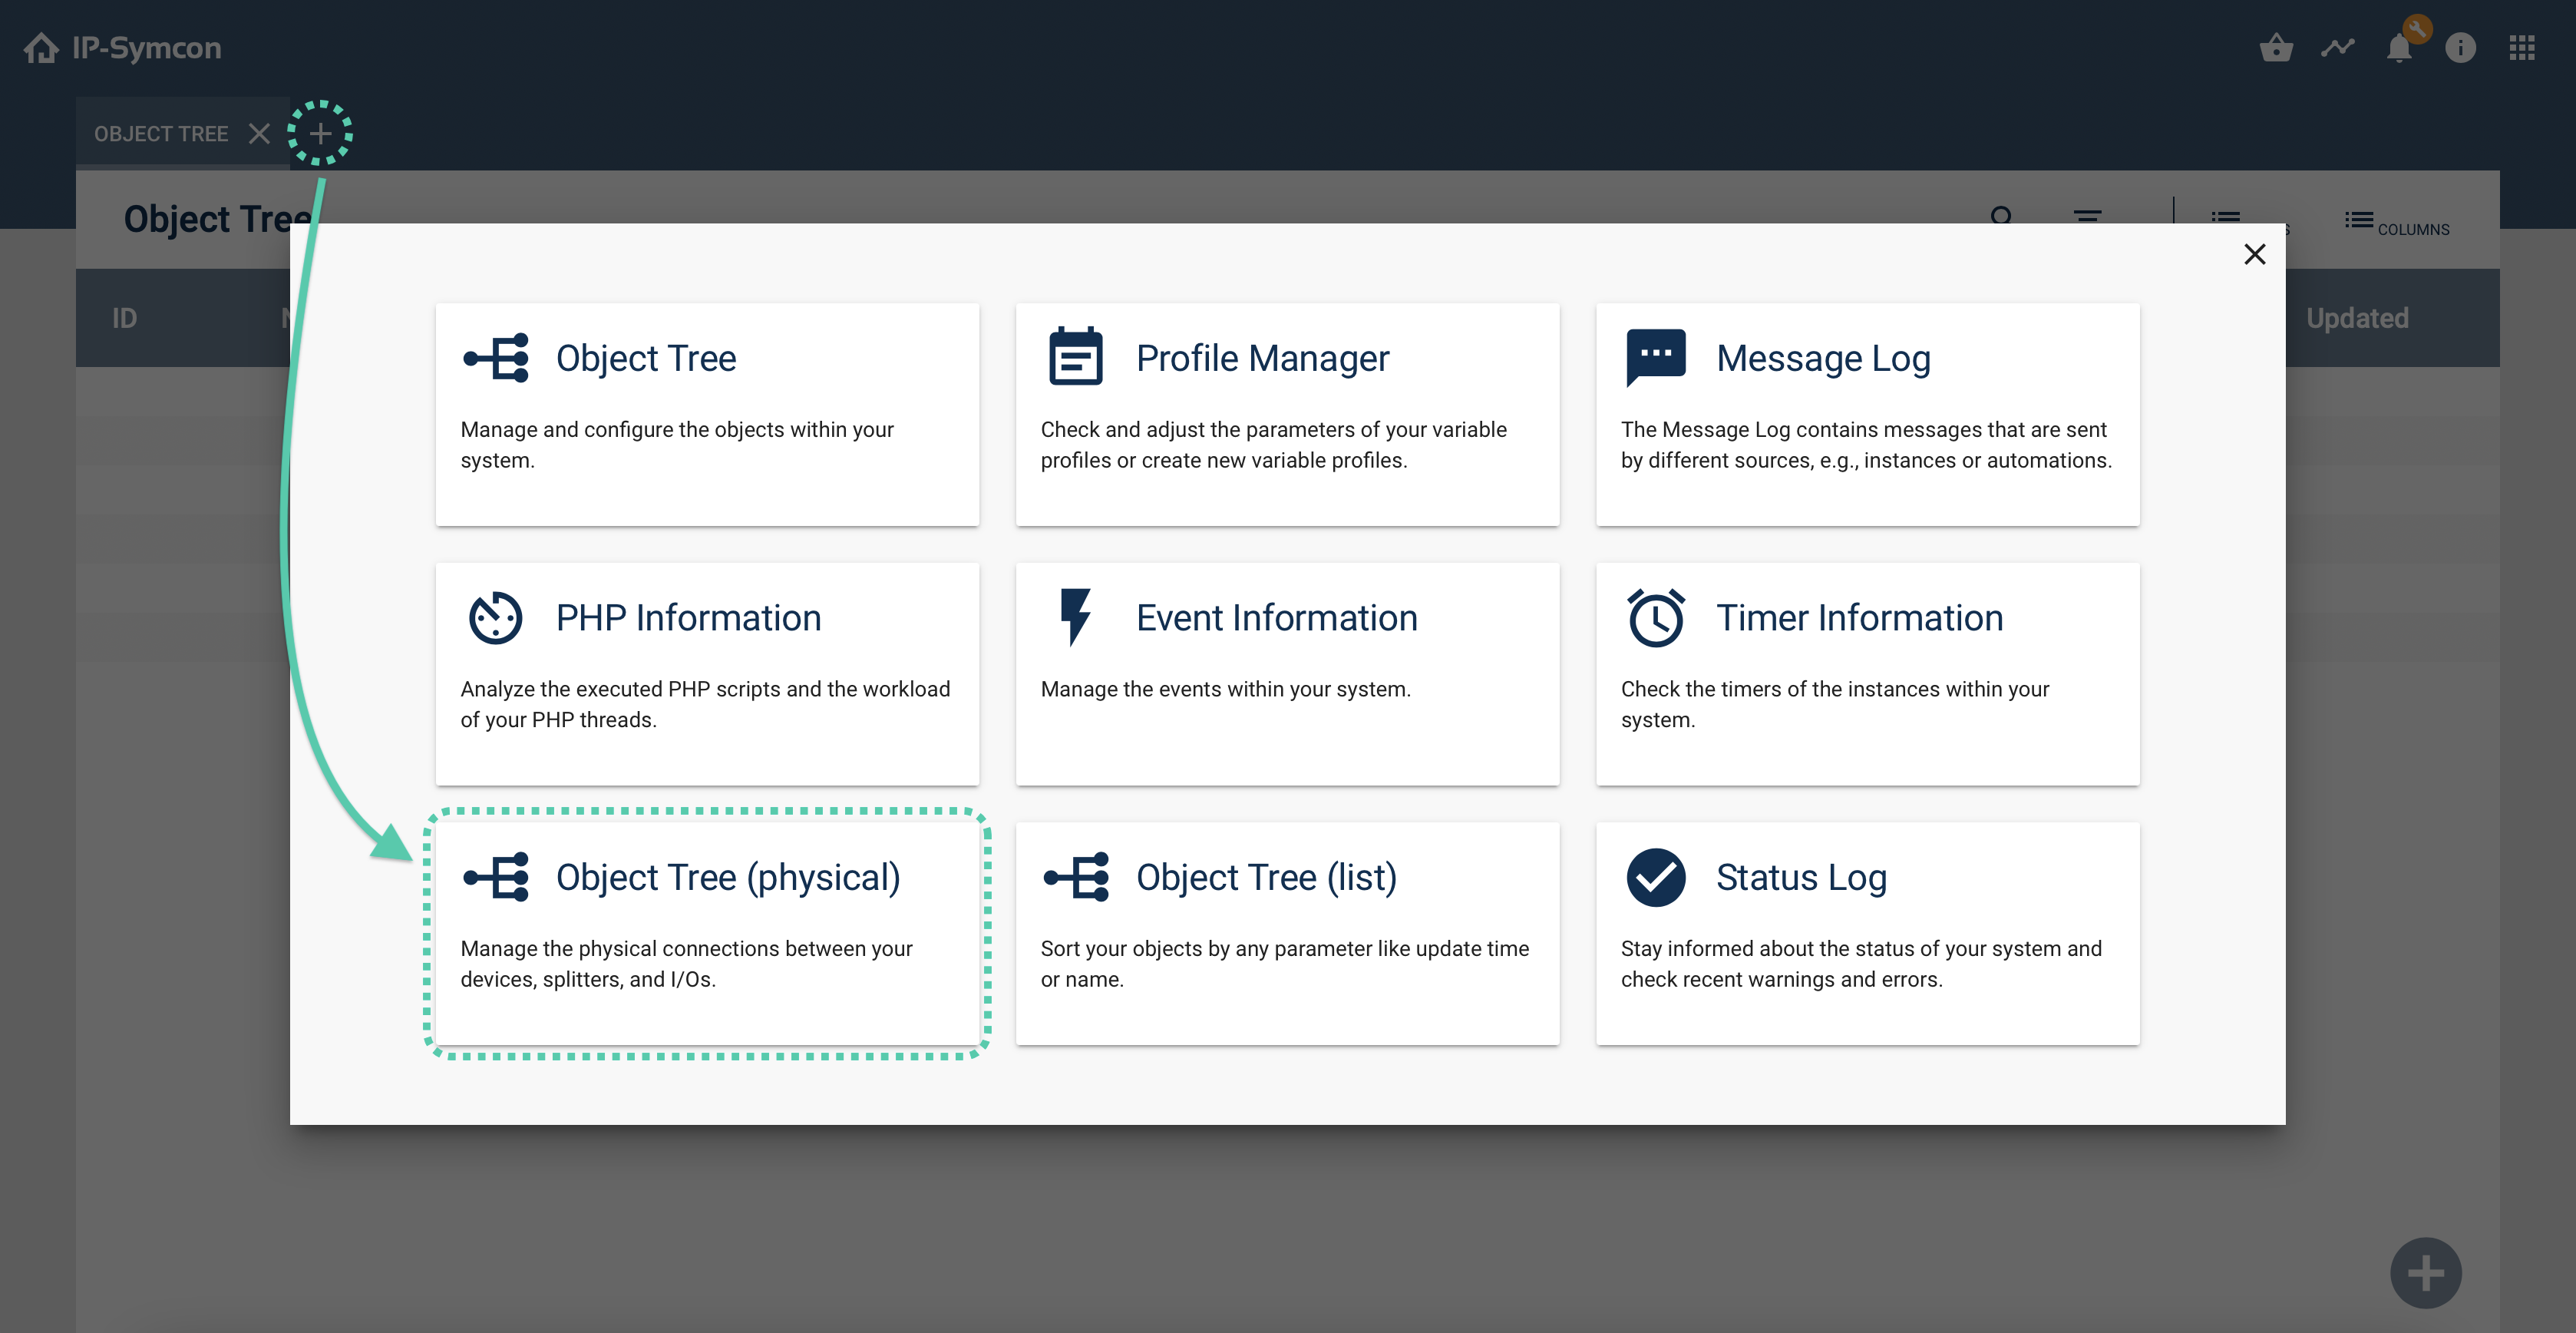
The object tree can be opened via the plus in the tab bar.
### Color codes
In the object tree the status of the objects is shown with color codes
__Black font:__
Everything is normal and the object is displayed in the WebFront.
__Light grey font:__
Everything is normal and the object is not displayed in the WebFront.
__Grey exclamation mark:__
The object is inactive.
__Light grey exclamation mark:__
A higher-level instance of the object is inactive.
__Red exclamation mark:__
The object has an error state.
__Light red exclamation mark:__
A higher-level instance has an error state.
### Adjusting connections
Using drag & drop, an instance can be moved to another compatible connection and will then be assigned to it. If the target instance is not compatible, the move will be prevented.
### Further functionalities
If a time or an exclamation mark is hovered over in the object tree, a tooltip appears which shows, for example, the entire date or the type of fault.
### Menu items
#### ID
An ObjectID can be searched for using the search dialog. If it is found, the object tree automatically jumps to the ID one is looking for and selects it.
#### Filter
With entry to the search field the filter is automatically activated. This can be activated/ deactivated by clicking on "Filter". The search is only carried out in the “Name” column.
#### Types
Here the visibility of certain objects in the object tree can be switched on and off in order to set the overview or focus on certain types. If something is hidden, this button is highlighted in grey.
#### Columns
Overview functionality to activate and deactivate the displayed columns.
## Pro Console
Source: https://www.symcon.de/en/service/documentation/components/management-console/pro-console/
The Pro Console is an expert tool to setup and configure the complete logic of the IP-Symcon server. It includes all features of the [web based Management Console](management-console.md) and additional expert options.
### Installation
The Pro Console can be installed for Windows, MacOS, and Linux Ubuntu.
> **Note:** The Pro Console was introduced with IP-Symcon 5.4. However, it is function since IP-Symcon 5.0. For older versions, not all functions are available.
#### Windows
The current Pro Console for Windows can be downloaded [here](https://download.symcon.de/stable/console/win/amd64) .
#### MacOS
The current Pro Console for MacOS can be downloaded [here](https://download.symcon.de/stable/console/mac/amd64) .
#### Ubuntu
If not already done, add the Symcon Repo:
```php
wget -qO- https://apt.symcon.de/install.sh | bash /dev/stdin
```
Execute the following commands:
```php
sudo apt-get update
sudo apt-get install symcon-console
```
### Connect to the IP-Symcon Server
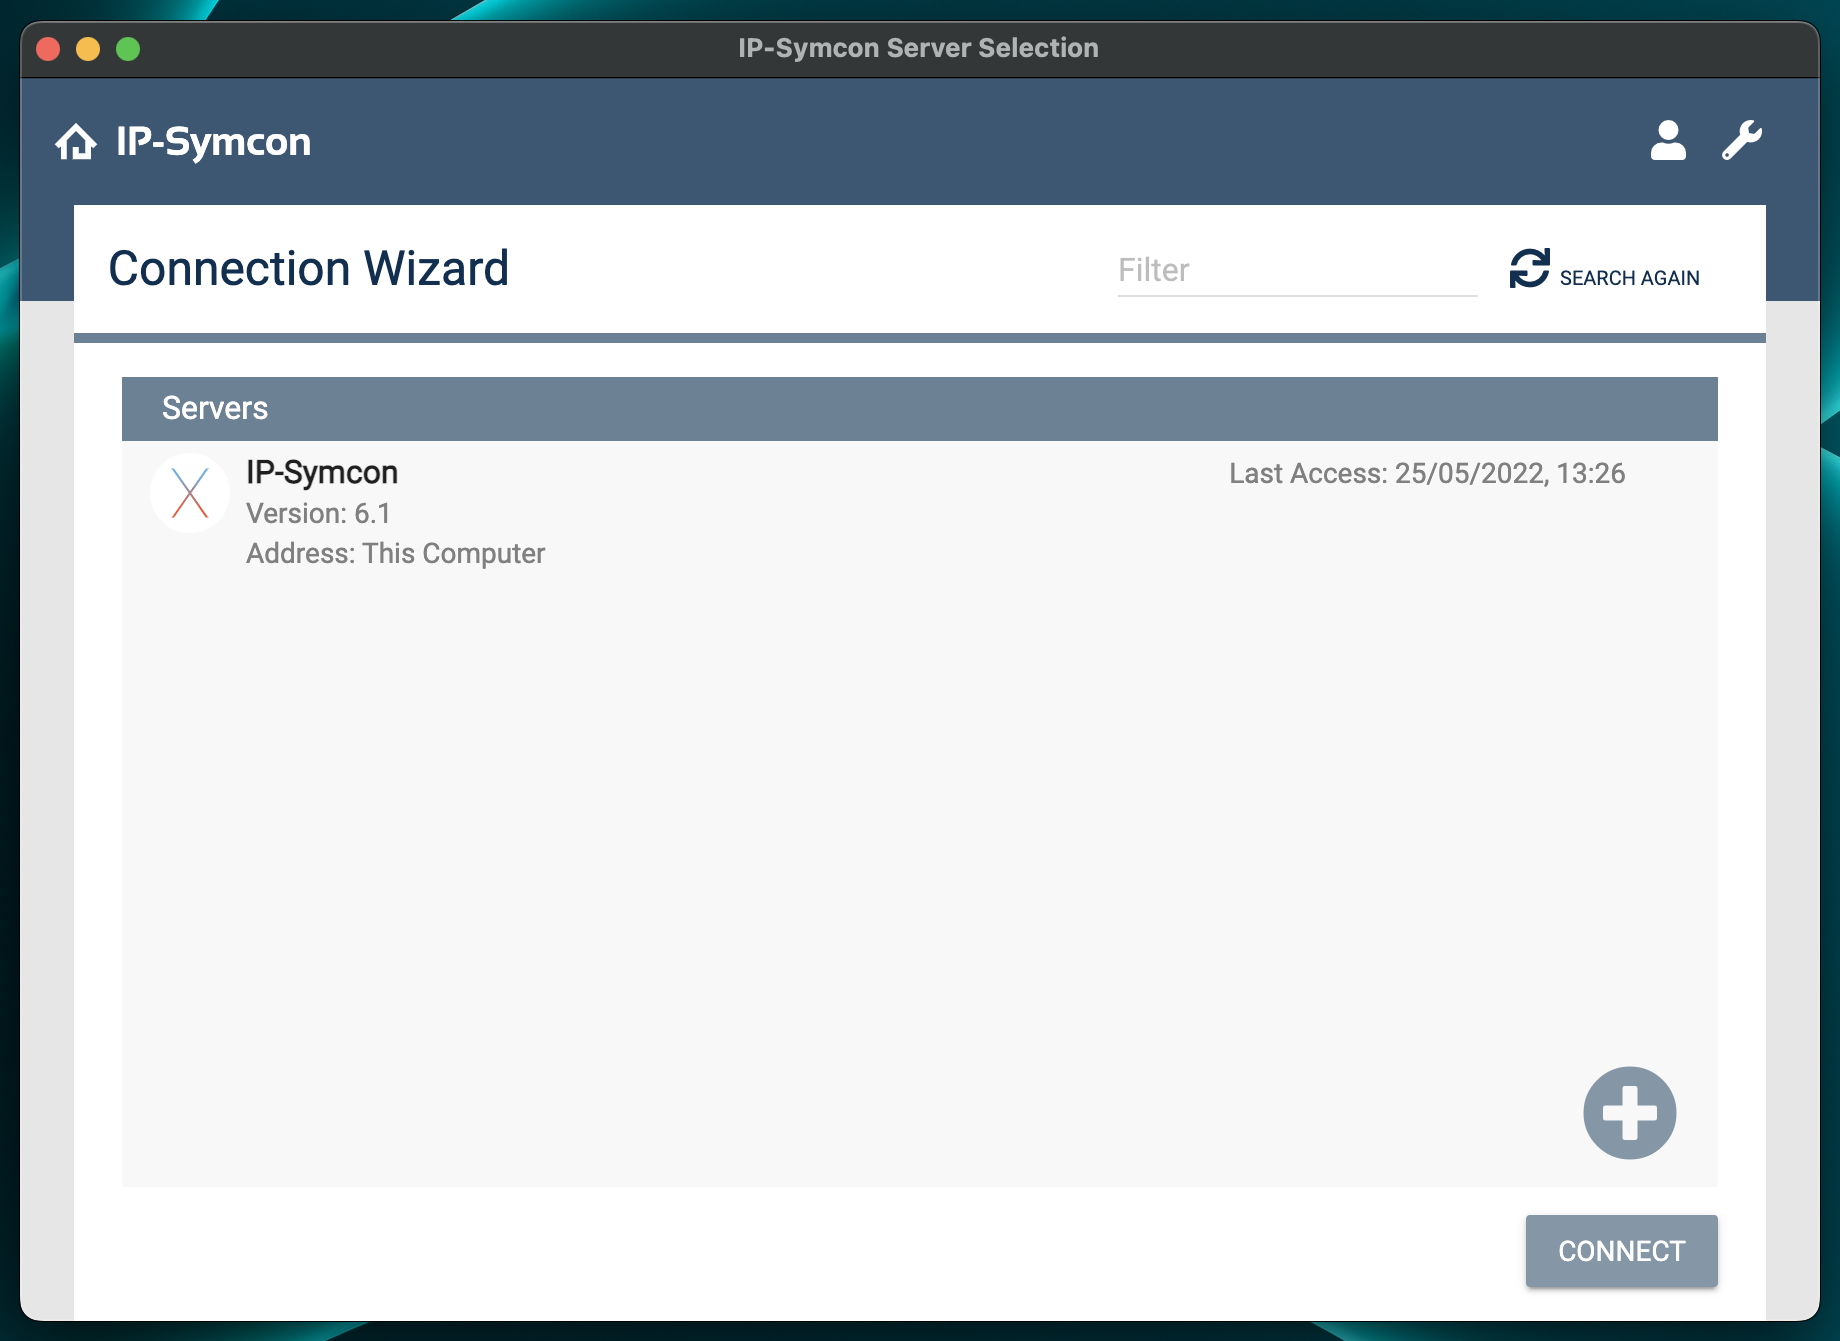
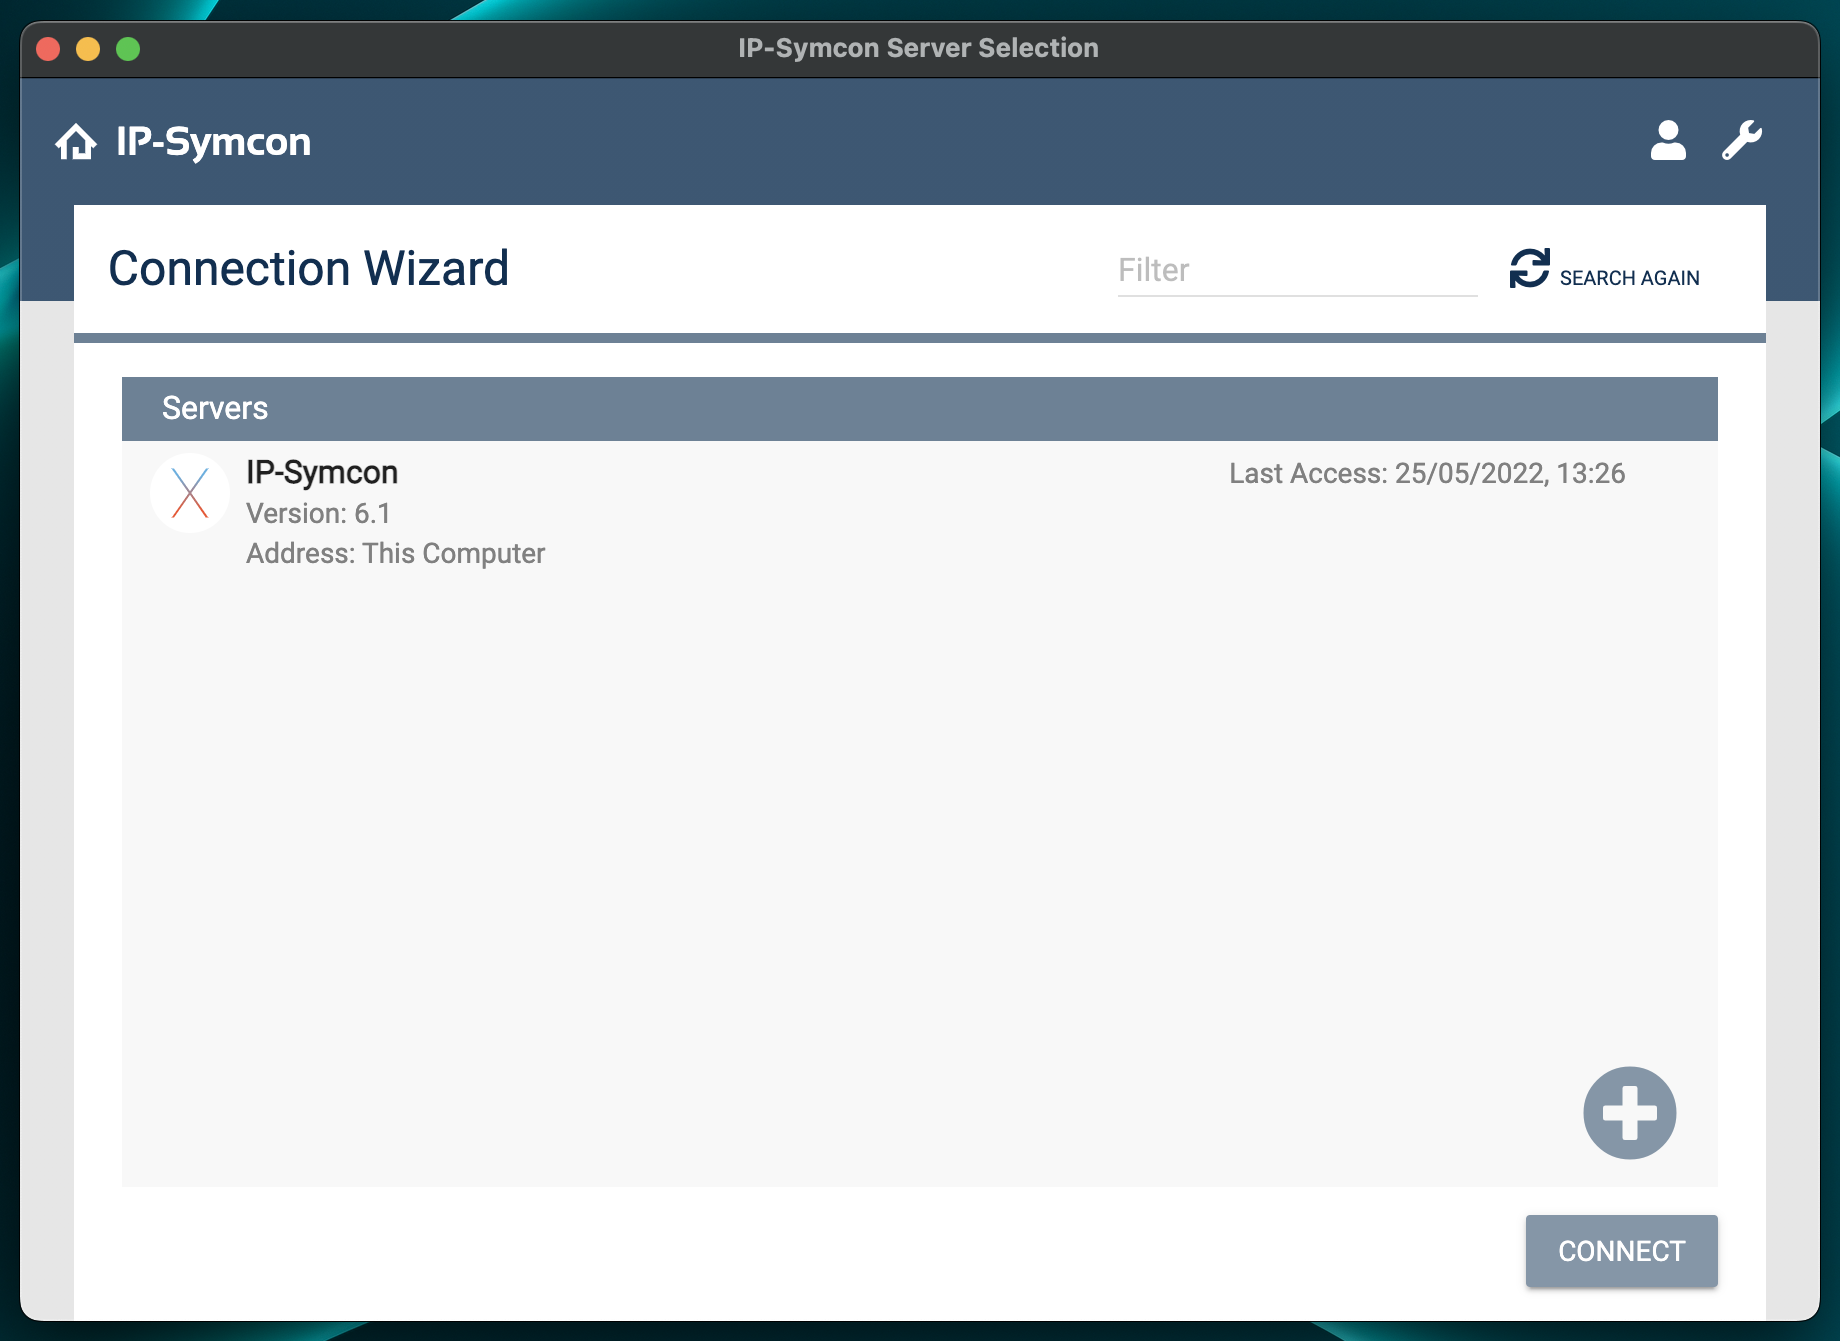
The Pro Console uses the [Connection Wizard](management-console.md). Here, a server can be selected and connected to via "Connect" or double click.
#### Un- and Redock
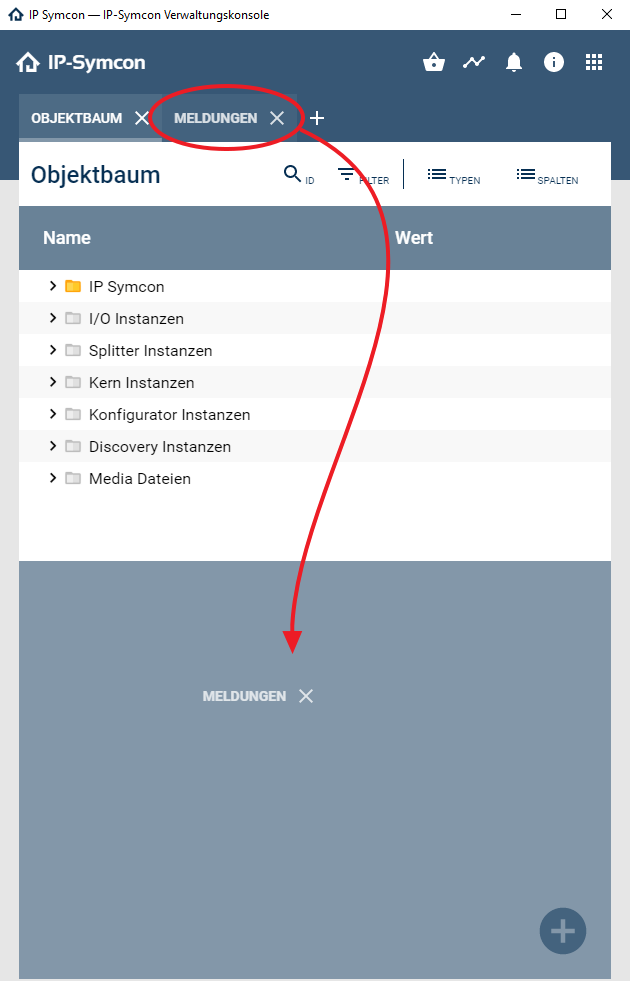
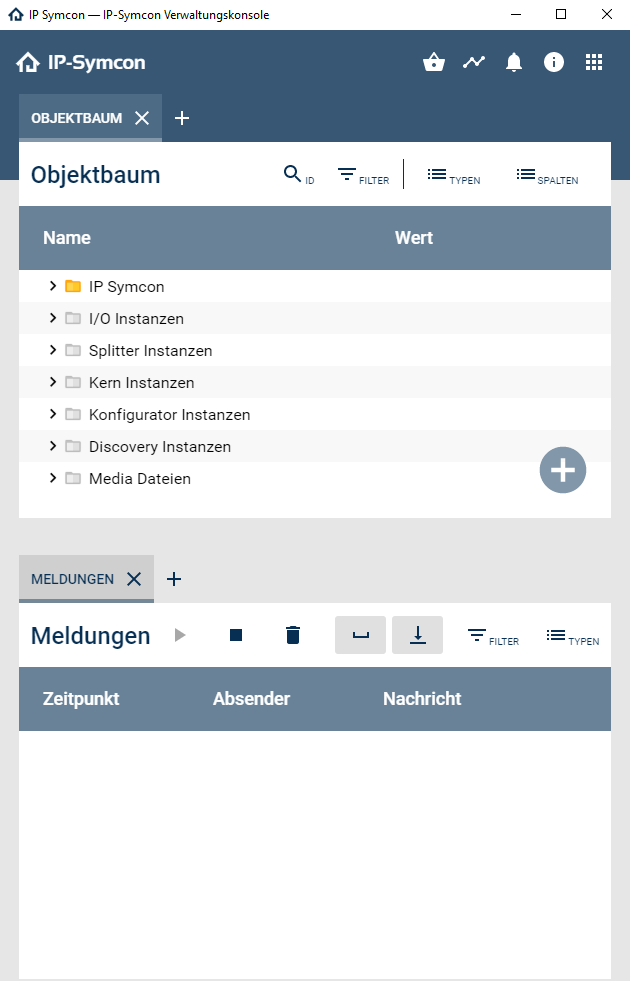
In the Pro Console, individual tabs can be un- and redocked at will. Thus, an individual work space be be designed to keep everything in sight at once. Additionally, single tabs can be shown in a seperate window by rightclicking on it and selecting "Open in New Window".
### Start with Parameters
Usually, the Pro Console directly launches the [Connection Wizard](management-console.md). This behaviour can be adjusted via parameters.
| Parameter | Description | Example for Windows |
| --------------------------------------------------------- | --------------------------------------------------------------------------------------------------------------------------------- | ----------------------------------------------------------------------------------------------------------------- |
| --server=[Console] | Directly connects to a server. [Console] needs to be replaced with the address of the web based Management Console of the Server. | "IP-Symcon Management Console.exe" --server=http://127.0.0.1:3777/console/ |
## Connection Wizard
Source: https://www.symcon.de/en/service/documentation/components/management-console/connection-wizard/
The Connection Wizard helps to connect the [Pro Console](management-console.md) to an IP-Symcon server. The available servers are displayed in a list.
### Servers
All servers found in the local network or entered into the [License Management](../getting-started.md) are listed here consecutively. To display the servers from the License Management, the corresponding Symcon account needs to be logged in. The login is done via click on the person icon top right. There, username and password from the personal area of the Symcon homepage need to be entered. Regard, that this login is seperate from the community forum and the remote access. With "Search again", it is possible to scan for new servers in the local network.
### No Servers Found
If no servers are shown in the list, there may be several reasons.
__IP-Symcon Server from the License Management do not appear__
It should be verified that the correct user is logged in. If a user is logged in, it says "Logged in as ..." next to the person icon. If that label is not visible, no user is logged in and thus no licenses from the License Management can be shown.
__IP-Symcon Server is not powered on/started__
Please start IP-Symcon on the server. Verify that the server is connected and started correctly.
__IP-Symcon server is not properly connected to the network__
It should be checked if a network connection between both computers is available.
__Firewall settings incorrect__
Both client and server side access must be allowed in the firewall for Port 1900 / UDP.
For the connection with the management console additionally, under normal circumstances, port 82/TCP or 3777/TCP must be allowed.