# Automations
> Symcon documentation · English · generated on 2026-09-26
> Index: https://www.symcon.de/en/llms.txt
Source: https://www.symcon.de/en/service/documentation/basics/automations/
Automations are used to define individually adjusted behavior. IP-Symcon supports flow scripts and PHP scripts. Flow scripts use integrated actions that can be clicked together easily. A PHP script is the option for experts and uses the programming language PHP.
Automations in IP-Symcon:
* [Flow Scripts](automations.md)
* [PHP Scripts (for experts)](automations.md)
## Flow Scripts
Source: https://www.symcon.de/en/service/documentation/basics/automations/flow-scripts/
A flow script is a sequence of [Actions](automations.md) . These can be used without a single line of source code and thus are useable without any programming knowledge.
### Add Flow Script
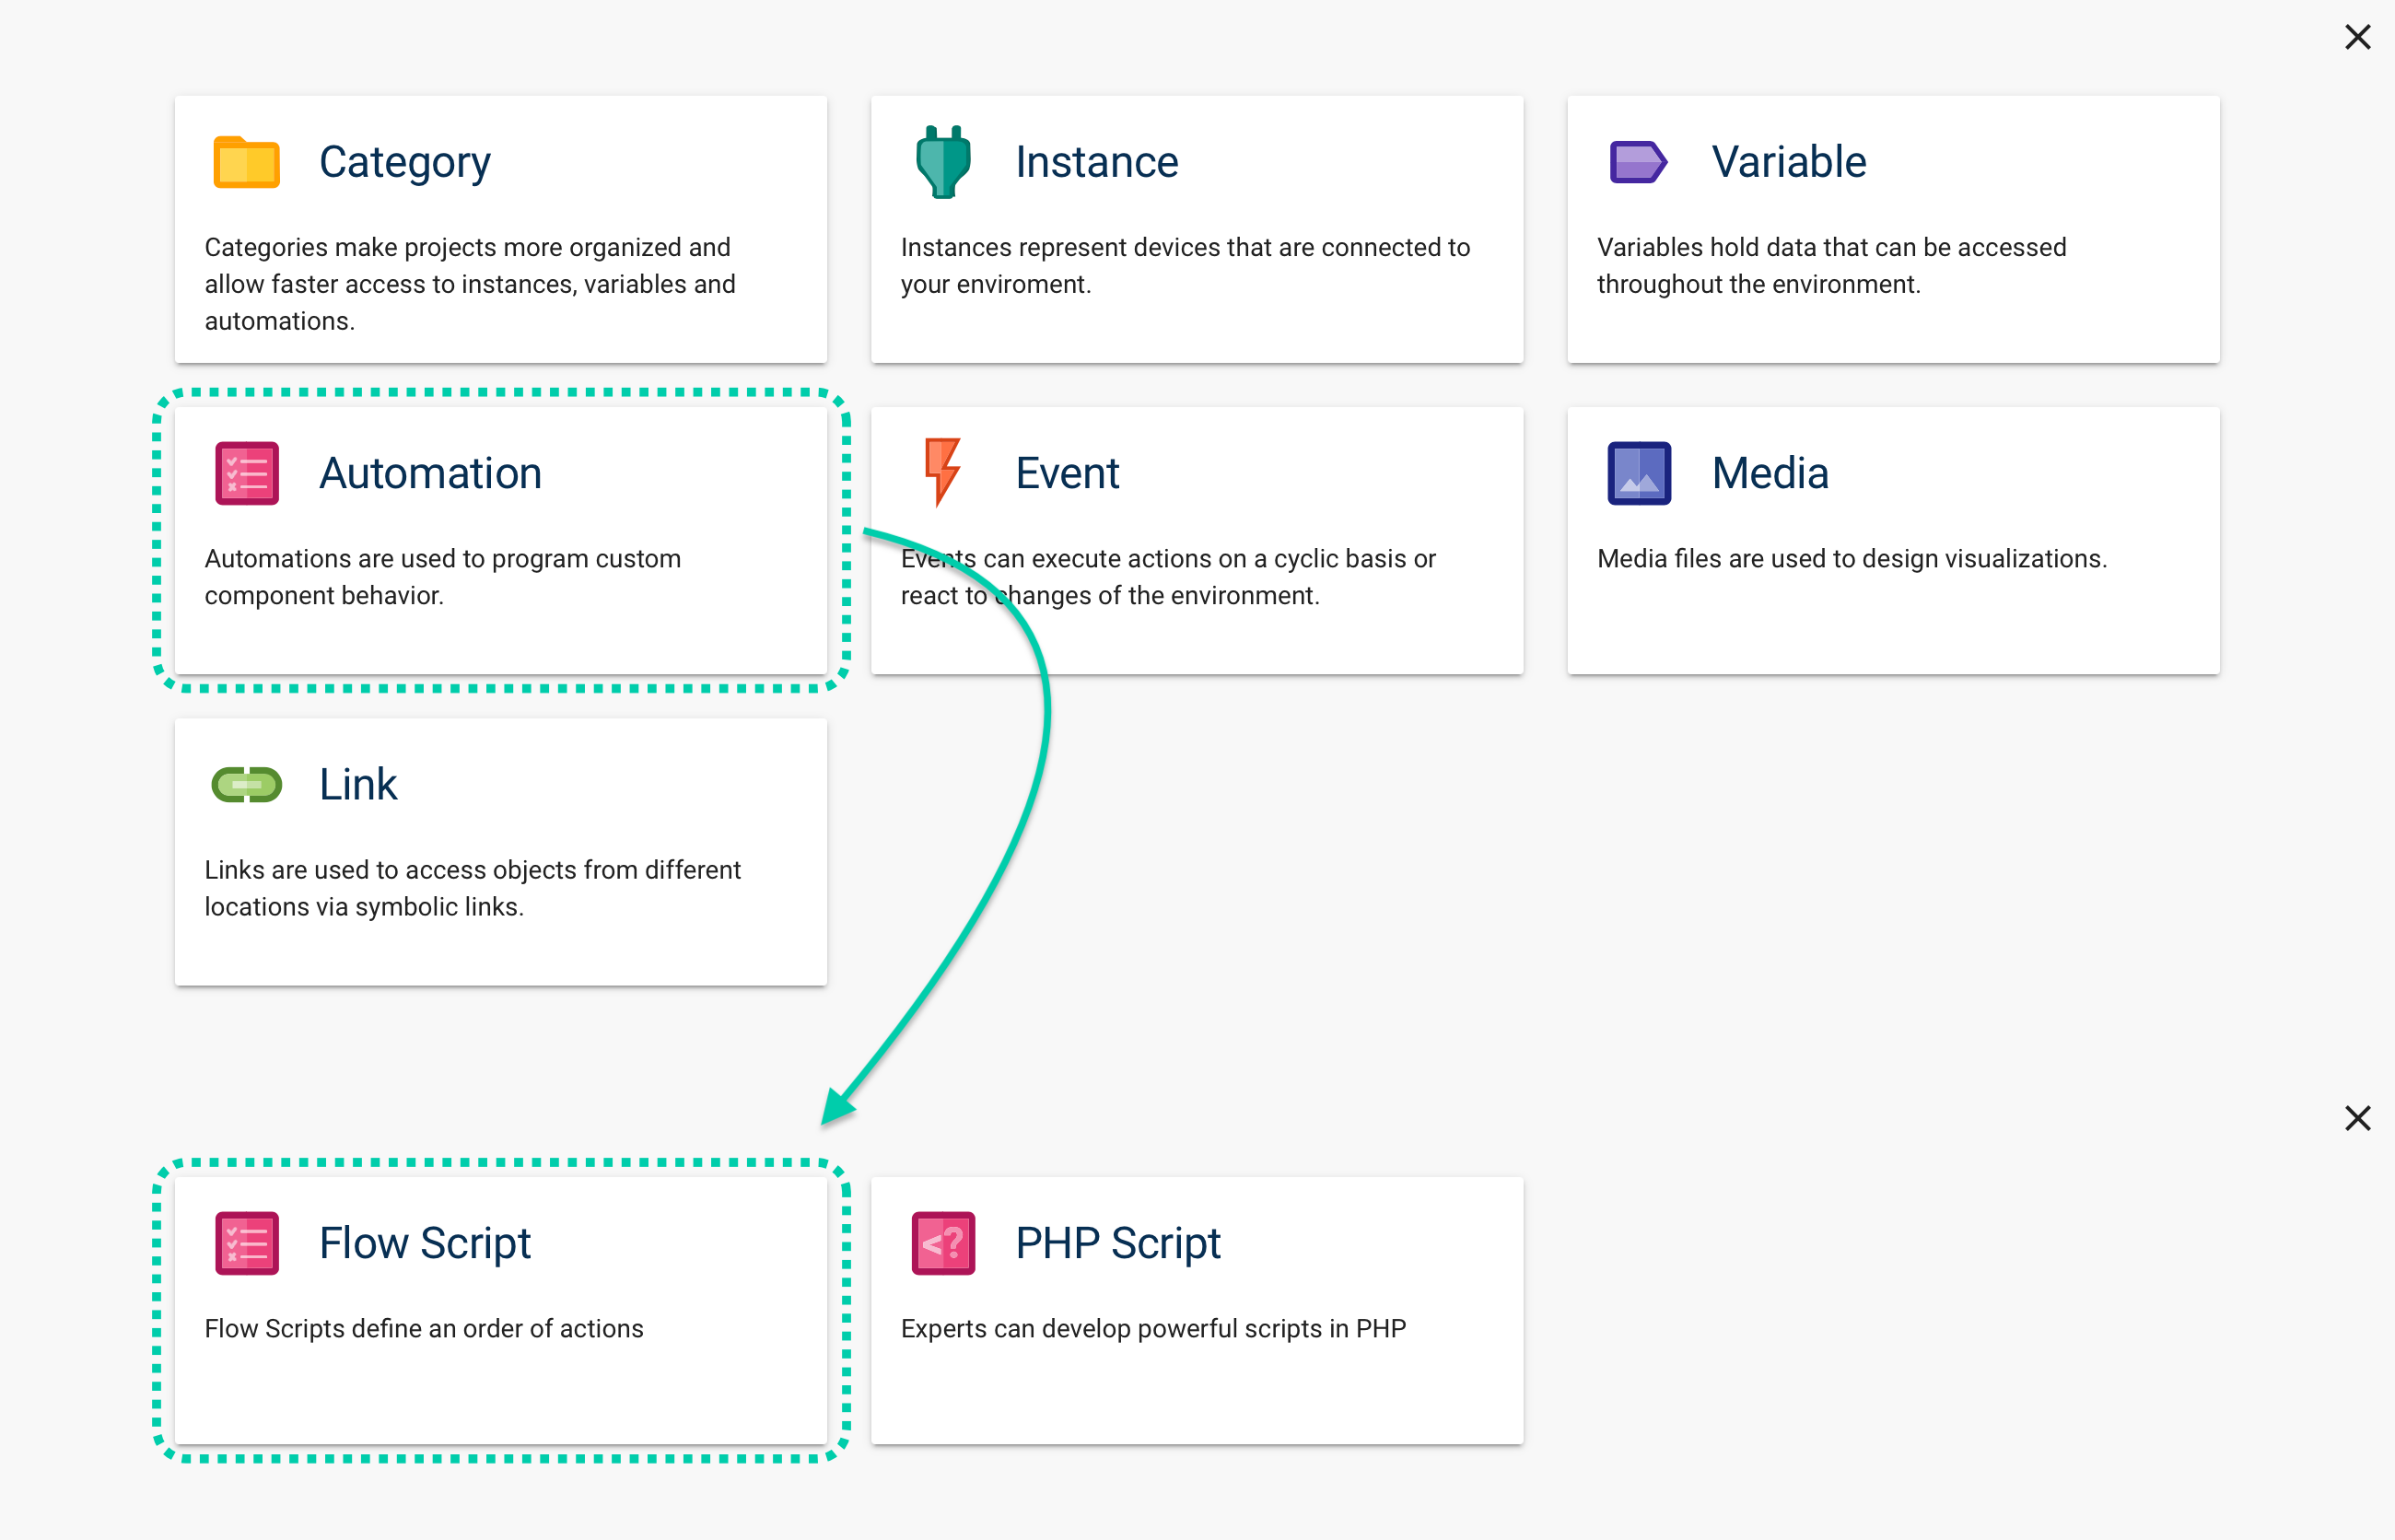
A new flow script can be added via "+" -> "Automation" -> "Flow Script". It is recommended to give the flow script a unique and meaningful name.
The name can be changed at any time and the flow script can be moved within the tree view via Drag & Drop. Alternatively, the flow script can be directly created at the wanted position via "Right click" -> "Add Object" -> "Automation" -> "Flow Script".
### Add Trigger
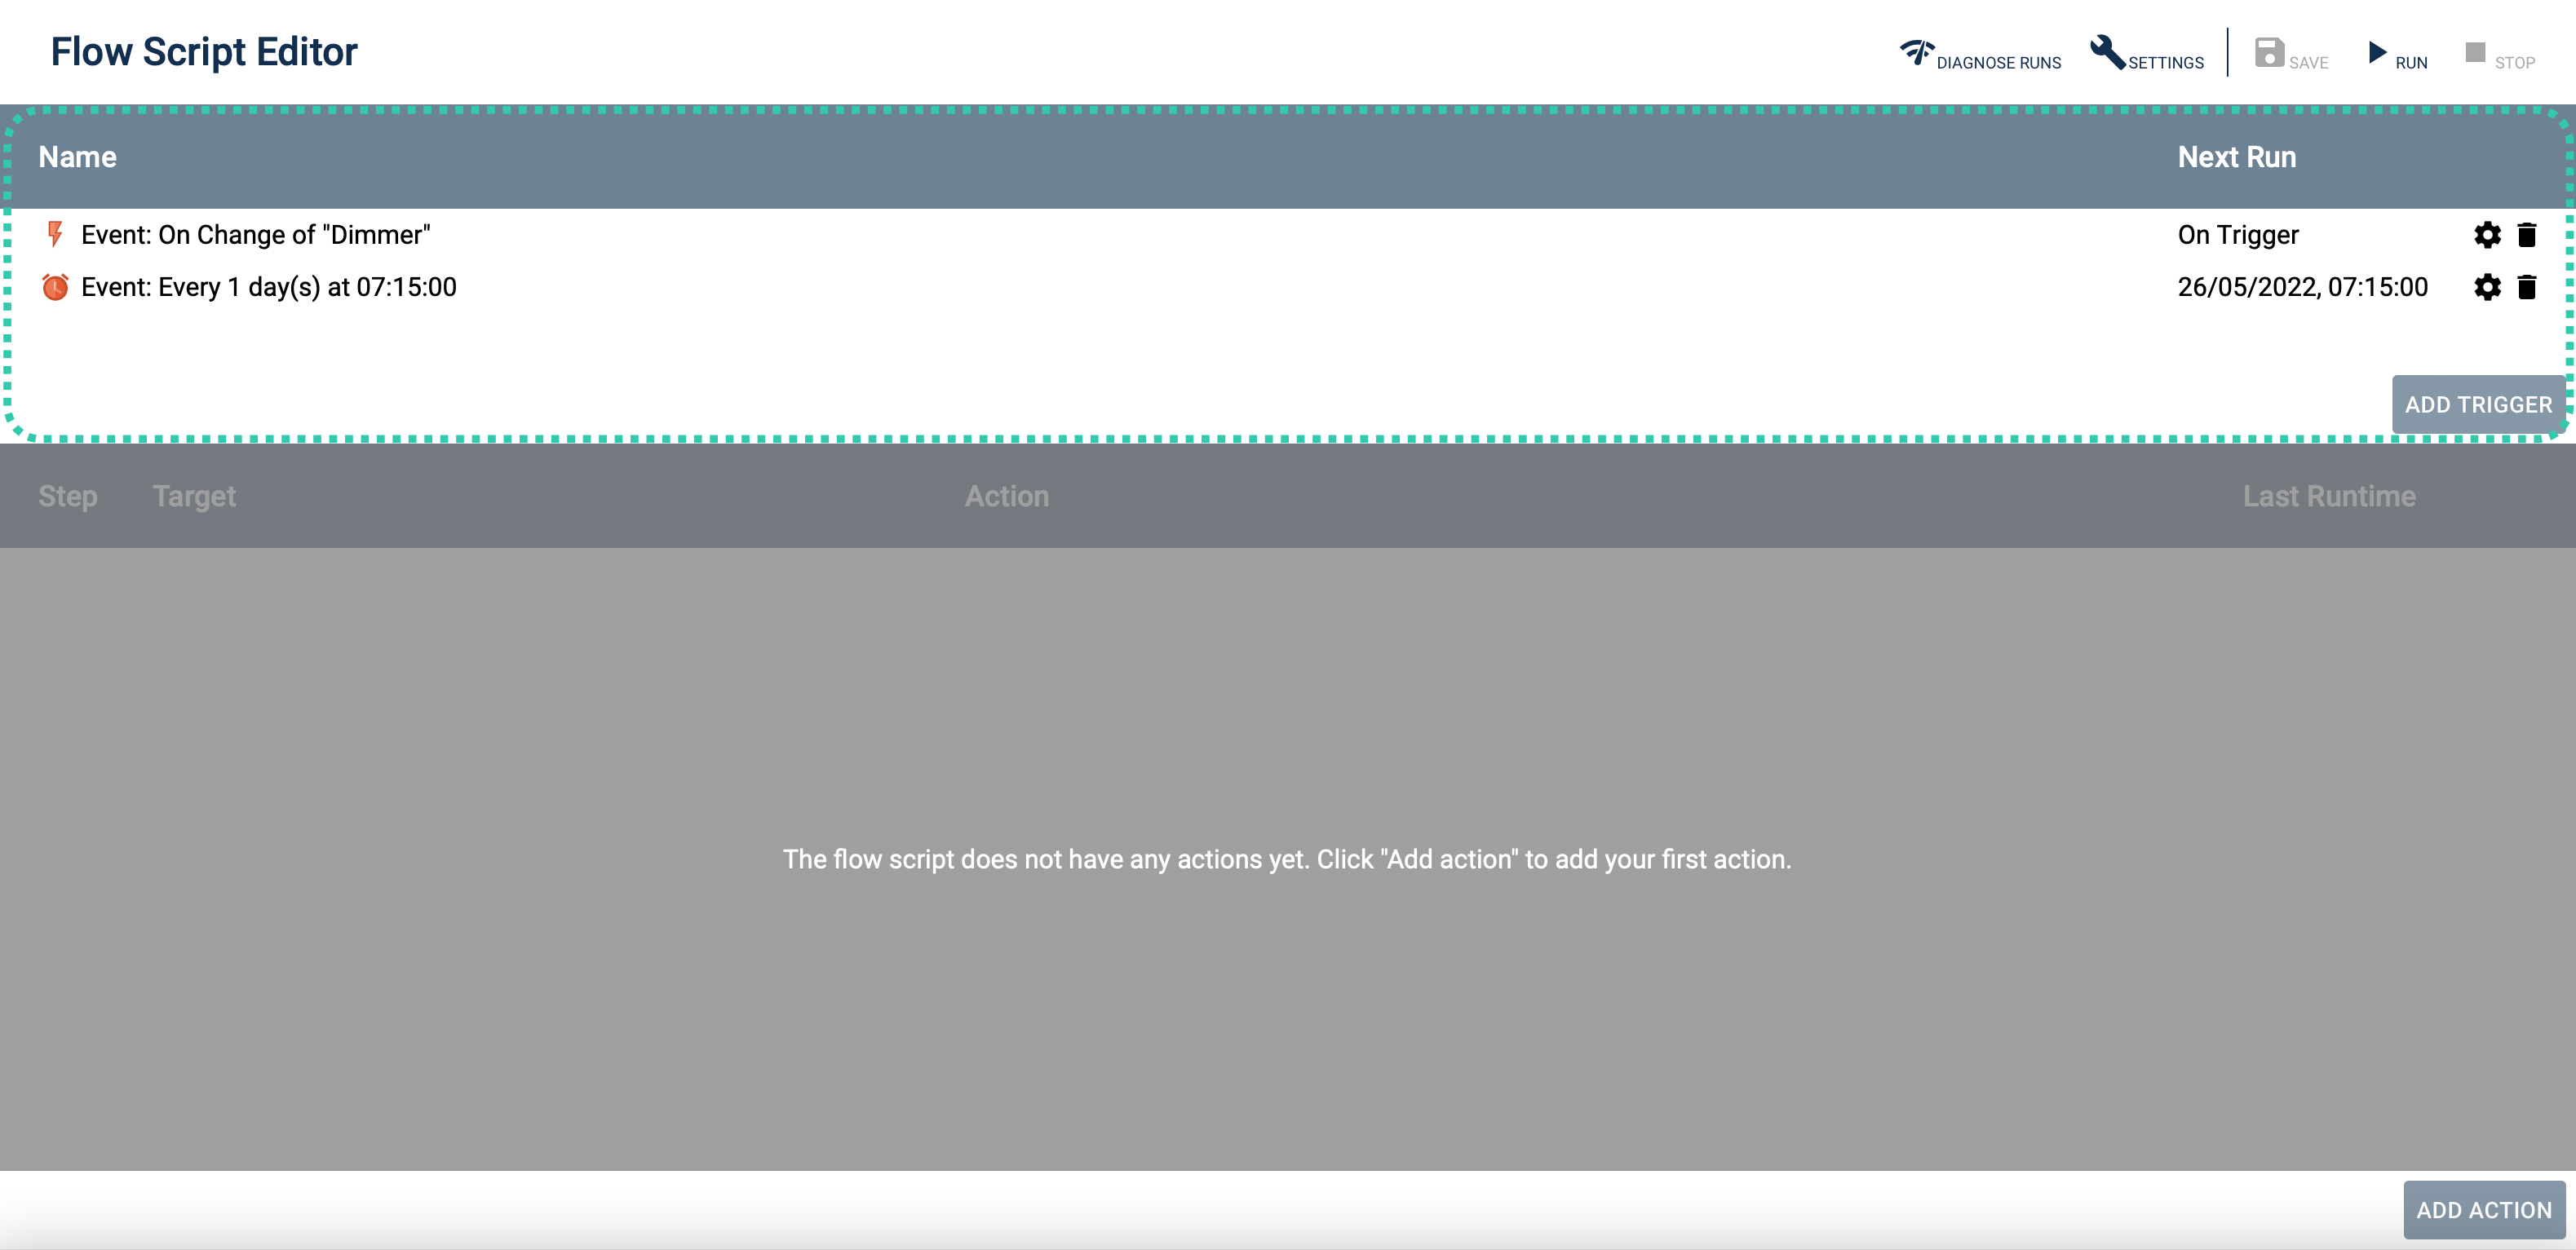
A trigger is an event and defines when a flow script is executed. The specific configuration is explained at [Events](../concepts.md).
| Column | Description |
| -------------- | ------------------------------------------ |
| Name | The name of the trigger in the object tree |
| Next Execution | When or how the trigger is triggered |
| Gear | Open the configuration for the trigger |
| Garbage Bin | Delete the trigger |
### Add Action
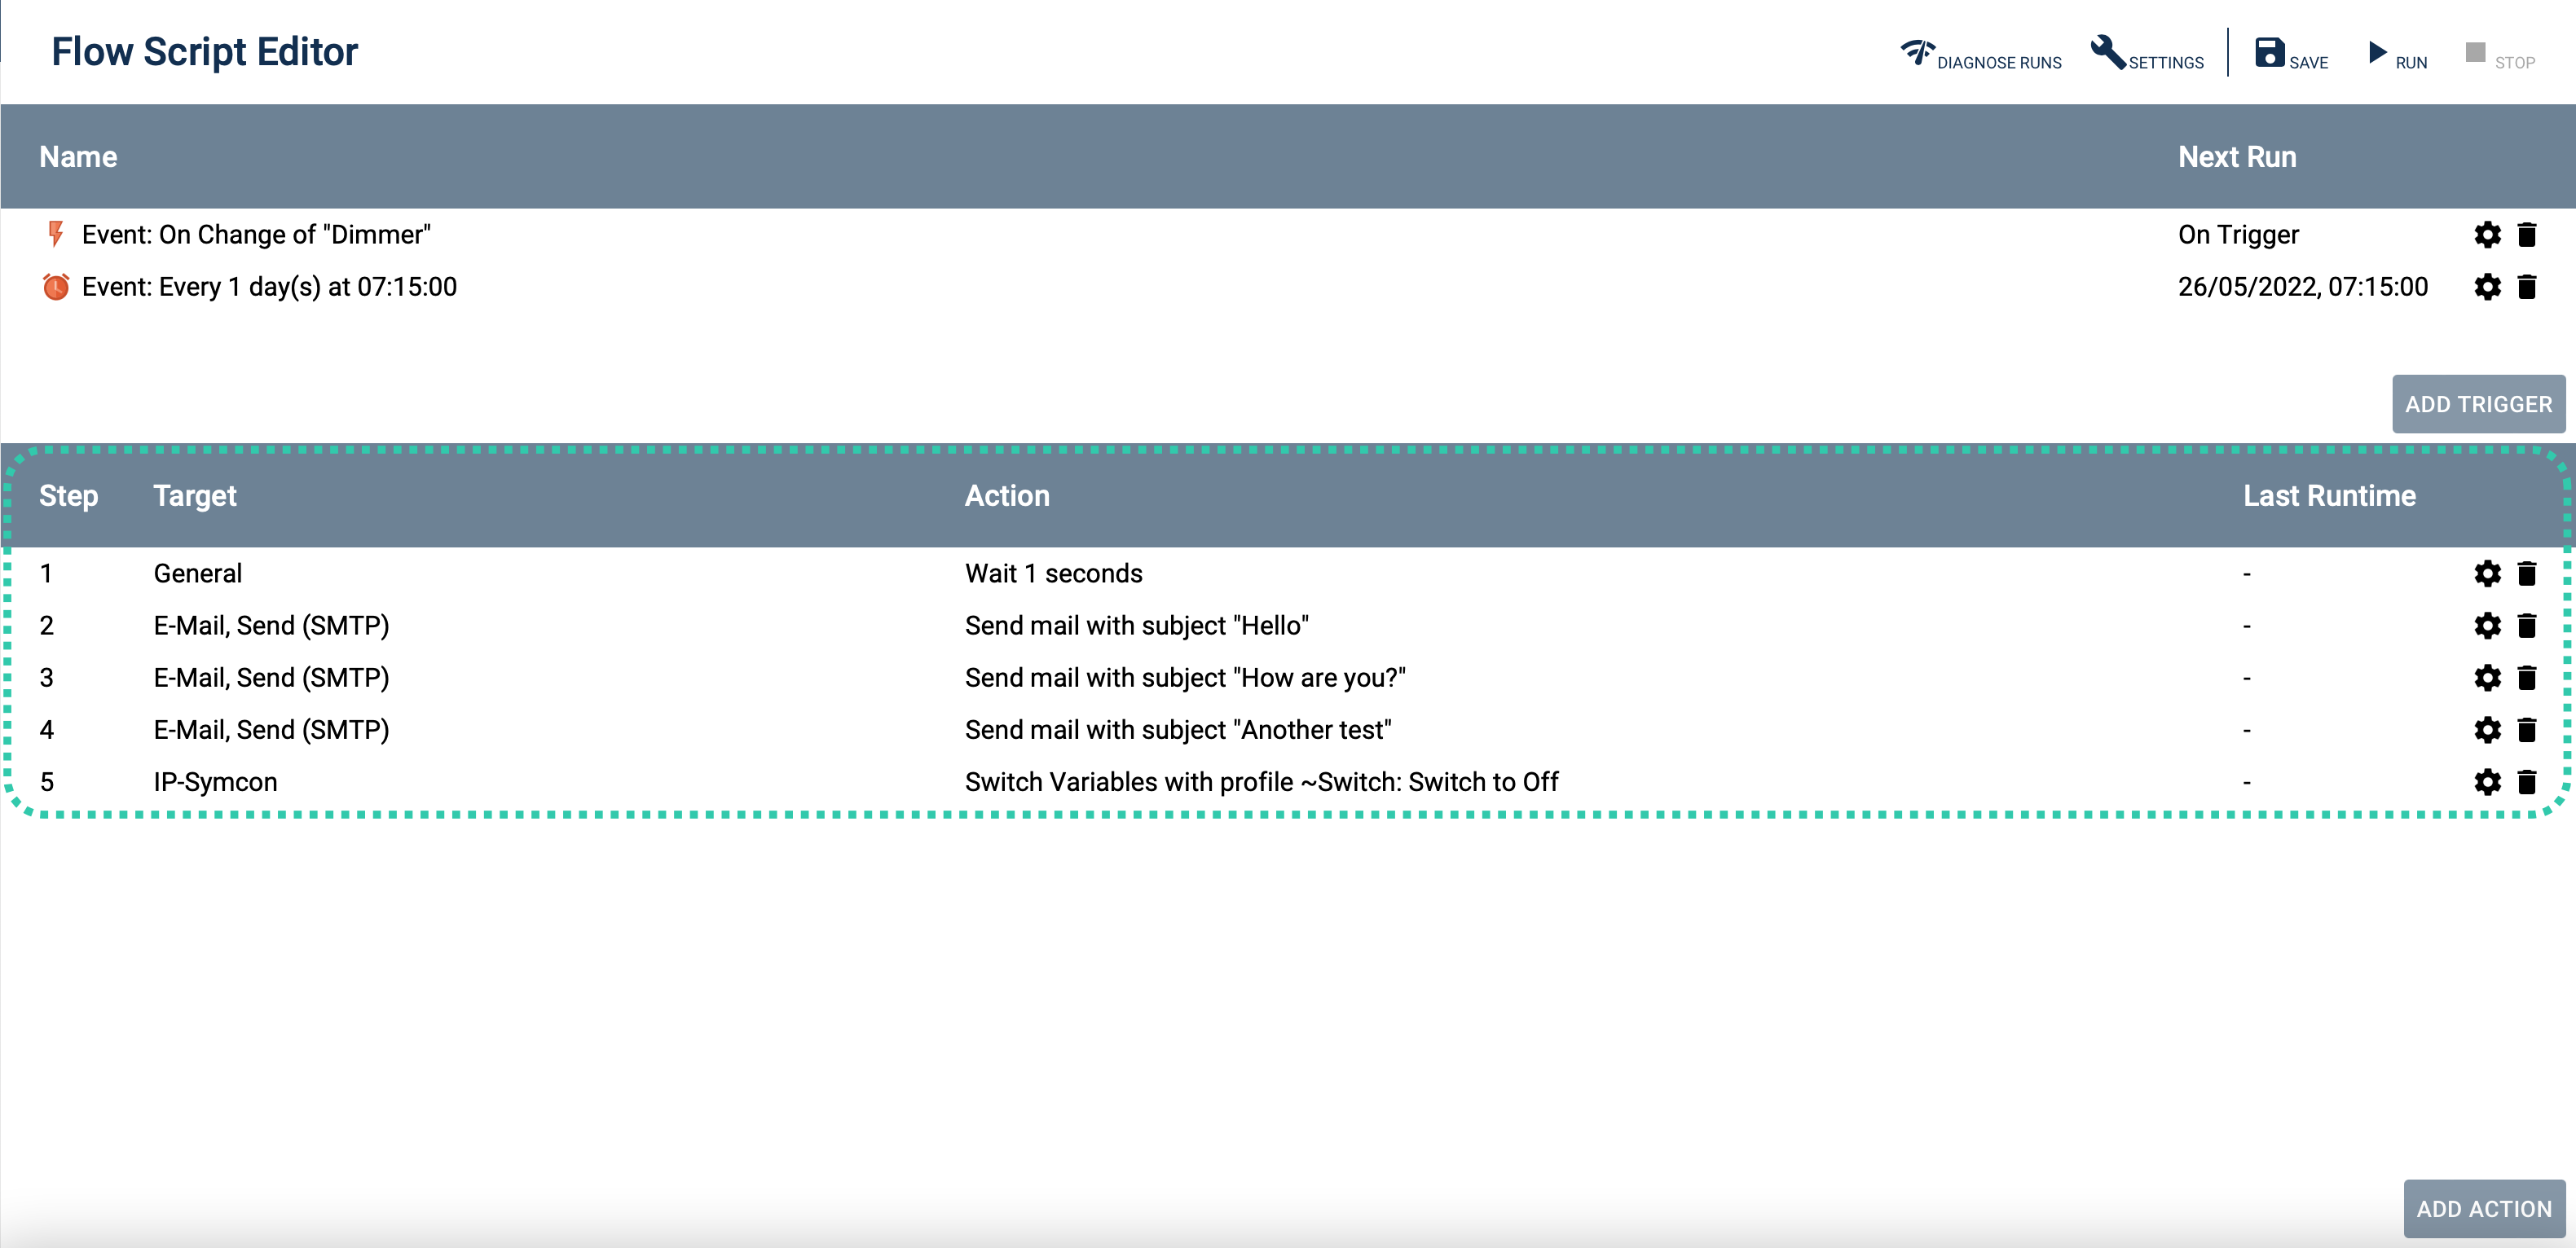
An action is specific for a selected target. An action can trigger a multitude of processes, e.g., switching a device, a condition for further subactions, or a break in the flow that is continued after some time. As such, complex processes can be constructed without a single line of source code.
| Column | Description |
| ------------ | -------------------------------------------------------------------------------------------------------- |
| Step | The position of the action within the flow script. Some actions have substeps |
| Target | Displays the target of the action. It can be an object or a general action, e.g., waiting or a condition |
| Action | A description of the action to be executed |
| Last Runtime | The runtime of the step during the last execution of the flow script |
| Gear | Open the configuration of the action |
| Garbage Bin | Delete the action |
> **Note:** If a red exclamation mark appears in the list, the last execution was erroneous. The error message can be displayed with a click on the exclamation mark.
#### Context Menu
A right click on the list of actions shows additional options in a context menu.
| List | Description |
| ----------------------- | -------------------------------------------------------------------------------------------------------------------------- |
| Add Action before/after | An action is added before or after the clicked row. |
| Duplicate | The clicked action is duplicated, with subactions if applicable. The duplicated action is position after the original one. |
### General Elements
| Menu Entry | Description |
| ------------- | --------------------------------------------------------------------------------------------------------------------------------------------------------------------------------------------------------------------------------------- |
| Diagnose Runs | Opens a dialog that is used for an analysis of previous executions. Erroneous, aborted and succesful actions are listed here, see [below](automations.md) |
| Settings | The behavior of the flow script can be defined here, see [Behavior during Execution](automations.md) and [Behavior on Error](automations.md) |
| Save | Save the current configuration of the flow script |
| Run | Save and run the flow script |
| Stop | Stop the current execution of the flow script |
#### Analyze Execution
The execution of a flow script goes through different status. These are described textually and coded with a color. In addition, a single execution can be expanded. This displays the actions that were executed during that run.
| Status | Description |
| ------------ | -------------------------------------------------------------------- |
| Queued | The execution is still in the queue (Color: White) |
| Running | The execution is still running (Color: White) |
| Aborted | The execution was aborted (Color: Yellow) |
| Done | The execution finished succesfully (Color: Green) |
| Done (Error) | The execution finished but some steps had errors (Color: Yellow) |
| Error | The execution was aborted due to an error (Color: Red) |
| Skipped | Is caused by "Reject further execution when running" (Color: Yellow) |
#### Behavior on running executions
This option describes the behavior if the flow script is executed again while another execution is still running.
| Behavior | Description |
| ---------------------------------------- | ---------------------------------------------------------------------------------------------- |
| Reject further execution when running | New executions are ignored while another execution is still running |
| Abort current execution on new execution | The current execution is aborted on a new execution |
| Add execution into queue | Multiple executions of the flow scripts are added to a queue and executed one after the other. |
#### Behavior on Error
| Behavior | Description |
| --------------------------------- | ----------------------------------------------------------------------------------------------------------------------------------------------------------------------------------------------------------------------------------------------------------------------- |
| Abort remaining steps on Error | On an error, the whole execution is aborted |
| Continue remaining steps on Error | On an error, the execution is continued |
| Retry this step on Error | On an error, the erroneous step is repeated up to the defined number of retries or until succesful. The option "Continue execution even if all retries have failed" defines whether the step is skipped on retries without success or if the whole execution is aborted |
## Actions
Source: https://www.symcon.de/en/service/documentation/basics/automations/flow-scripts/actions/
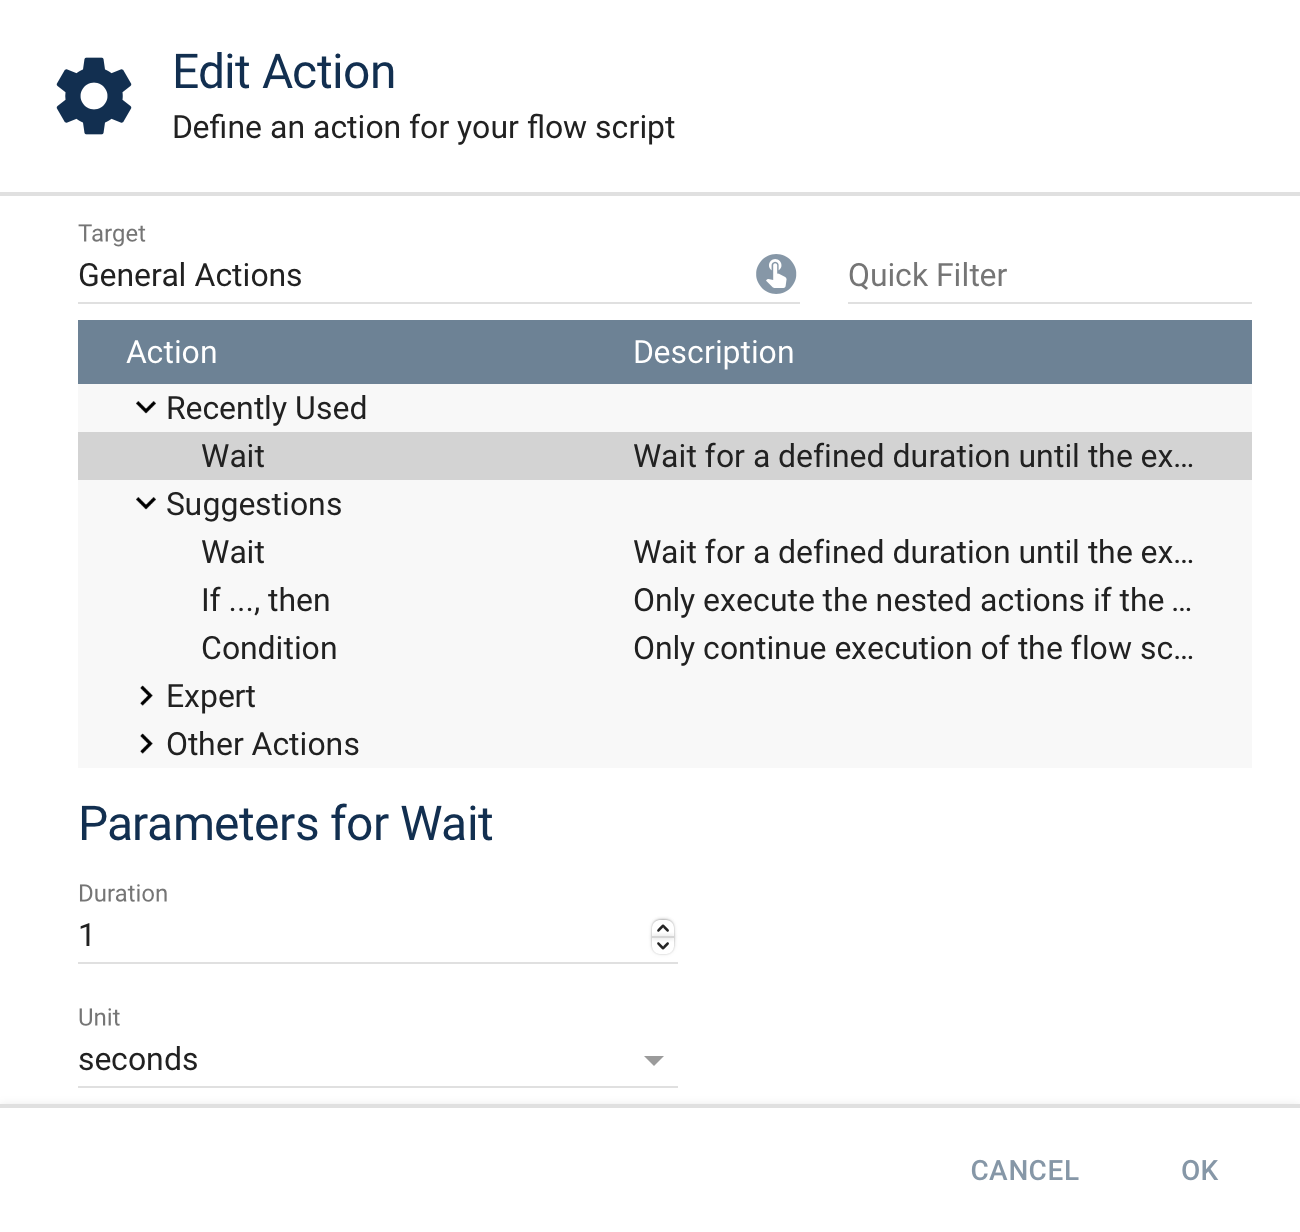
An action is a command that can be used without complex programming or a script. Depending on a selected target, multiple fitting actions are listed. Each action provides individual configuration and options.
### Add Action
Actions are used in [Flow Scripts](automations.md), [Events](../concepts.md), [Instance Configuration](../concepts.md) and the ["Test Commands" Dialog](../concepts.md). How they are added and configured is explained in the corresponding section. However, all possibilities are configured in the same way:
* Step 1: Select a target - This loads and displays possible actions
* Step 2: Selecting an action - The actual selection of an action (Quick Filter Search is possible)
** The actions are sorted into different categories and thus enable a quick access
* Step 3: Configuration of Parameters - The actual values for the action are set here
## Logic Scripts
Source: https://www.symcon.de/en/service/documentation/basics/automations/logic-scripts/
_Requires Symcon >= 7.0_
Logic Scripts is a tool that can be used to create individual logic scripts and automations in IP-Symcon. Typical use cases are
- Group switches for light
- Staircase automation
- Sensor evaluation
#### add logic script
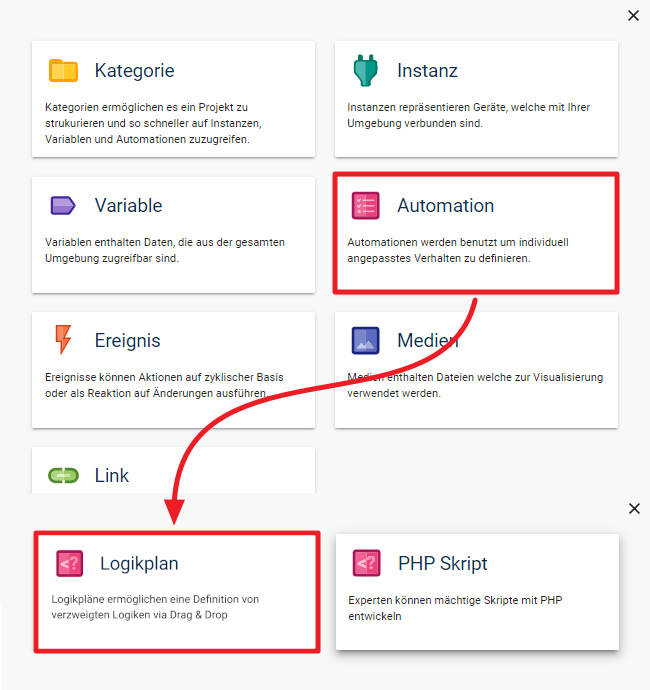
A new logic script can be added via "+" -> "Automation" -> "Logic Script". It is recommended to give the logic scipt a meaningful name.
The name can be changed at any time and the logic script can be moved to a different position in the object tree using drag & drop.
Alternatively, the creation can be done directly at the desired position via "right click" -> "Add object" -> "Automation" -> "Logic Script".
### Components of the editor
The logic script editor is divided into the following areas:
| Name | Description |
| ------------ | ----------------------------------------------------------------------------------------------------------------------------------------------------------------------------------------------------------------------------------------------------------------------------------------------------------------------------------------------- |
| Menu | The menu provides central functions such as saving, zooming or executing a logic script. |
| Panels | The Logic Script Editor provides 2 panels:
- The repository with the list of all available modules
- The PropertyEditor for displaying and editing properties
Use drag & drop to change the position of the panels; 4 predefined positions are available. If you place several panels in one position, tabs are automatically created. |
| Drawing area | The drawing area is the central component of the editor and allows you to place and edit the individual modules. |
## Menu
Source: https://www.symcon.de/en/service/documentation/basics/automations/logic-scripts/menu/

The following functions are available:
| Name | Description |
| ------------------------- | ------------------------------------------------------------------------------------------------------------------------------------------------------------------------------------------------------------------------------------------------------------------------------------------------------------------------------------------------------------------------------------------------------------- |
| Administration | Click the Administration button to display the available actions for the logic script. After activating the button, the administration menu opens.
The following actions are available:
- Export logic script
- Import logic script |
| Zoom | The Logic Script Editor offers the option of zooming in and out of a view in 10% increments; details can be found in the Drawing area section. |
| Undo and Redo | Menu group for canceling or restoring changes, details can be found in the artboard area. |
| Navigate back and forward | - Menu group for navigating in the history, these controls are only available in History mode.
- Press the Back button to navigate back in the history. After pressing the button, the next older data in the history is loaded and displayed.
- Press the Forward button to navigate forwards in the history. After pressing the button, the next newer data in the history is loaded and displayed. |
| Edit | Press the Edit button to activate the edit mode of the Logic Script Editor. After activating the button, the logic script can be edited. |
| Live | Press the Live button to activate the live mode of the Logic Script Editor. After activating the button, the current values of the logic script execution are displayed on the drawing area. |
| History | Click the History button to activate the history mode of the Logic Script Editor. After activating the button, you can navigate through the history of the individual executions. |
| Execute | Press the Execute button to start a manual execution of the logic script. After activating the button, the Automation Logic Script is executed in IP-Symcon and the current values are displayed on the drawing area. |
| Save | Click the Save button to save your changes to the logic script. After activating the button, the logic script is saved on the IP-Symcon server. When switching to live or history mode, the logic script is saved automatically. |
| Info | Press the Info button to display the program information. After activating the button, the dialog with the license and program information is displayed. |
## Property Editor
Source: https://www.symcon.de/en/service/documentation/basics/automations/logic-scripts/property-editor/
The Property Editor panel displays all available properties of a control element.
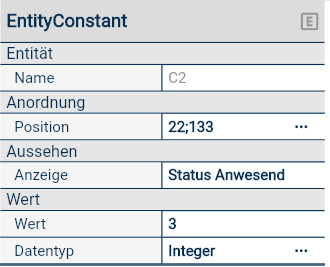
Each property consists of a name (left column) and an associated value (for technicians: key-value pair; right column).
When you create a new object on the drawing area, its properties are assigned default values from IP-Symcon. To customize properties to your needs:
1. Click in the respective value fields and change the values.
2. Save your changes from time to time (this may take a few seconds depending on your connection speed).
### Overview
## Outputs
Source: https://www.symcon.de/en/service/documentation/basics/automations/logic-scripts/property-editor/outputs/
To define the outputs of a mapping module, press the menu button of the Outputs property of your mapping module. The definition of the inputs is loaded and displayed:
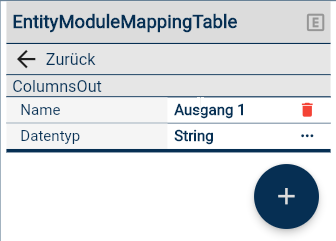
To configure an output of the mapping module:
1. Add a new entry to the selection using +.
2. Select the entries one after the other and edit their properties (see below).
3. Once you have defined all outputs, exit the editor by clicking the Back button.
### The following options are available
| Name | Description |
| --------- | --------------------------------------------------------------------------------------------------------- |
| Name | Name of the output |
| Data type | Defines the data type of the output, the following options are available: Boolean, Integer, Float, String |
## The Properties
Source: https://www.symcon.de/en/service/documentation/basics/automations/logic-scripts/property-editor/the-properties/
The properties described here are important for your work with IPS logic scripts.
A description of specific properties of a module can also be found in [Repository](automations.md) .
### Group: Entity
| Name | Description |
| ---------- | ------------------------------------------- |
| EntityName | The name of the object in the logic script. |
### Group: Variable
| Name | Description |
| ---- | ---------------------------------- |
| ID | ID of the variable in IP-Symcon. |
| Name | Name of the variable in IP-Symcon. |
### Group: Instance
| Name | Description |
| ---- | ---------------------------------- |
| ID | ID of the instance in IP-Symcon. |
| Name | Name of the instance in IP-Symcon. |
## Inputs
Source: https://www.symcon.de/en/service/documentation/basics/automations/logic-scripts/property-editor/inputs/
To define the inputs of a mapping module, press the menu button of the Inputs property of your mapping module. The definition of the inputs is loaded and displayed:
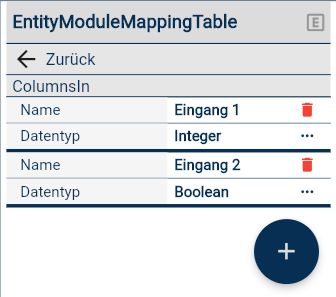
To configure an input of the mapping module:
1. Add a new entry to the selection using +.
2. Select the entries one after the other and edit their properties (see below).
3. When you have defined all inputs, exit the editor by clicking the Back button.
The following options are available
| Name | Description |
| --------- | -------------------------------------------------------------------------------------------------------- |
| Name | Name of the input |
| Data type | Defines the data type of the input, the following options are available: Boolean, Integer, Float, String |
## Mappings
Source: https://www.symcon.de/en/service/documentation/basics/automations/logic-scripts/property-editor/mappings/
To define the individual mappings of a mapping module, press the Edit button of your mapping module. The definition of the mappings is loaded and displayed:
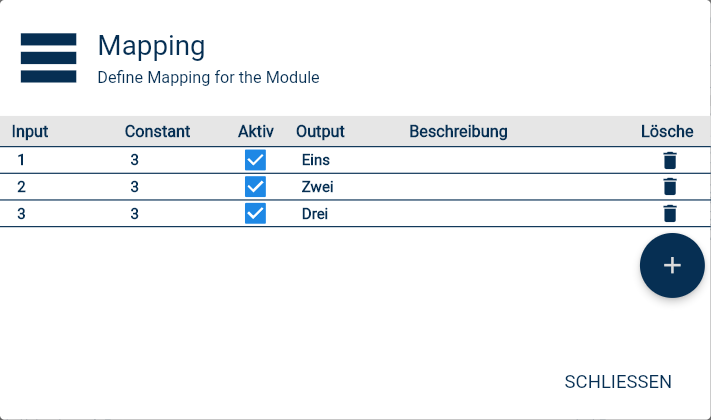
The editor provides a column for each input and for each output; when evaluating the module, the first entry in the list is used where all values at the input match.
To configure a mapping of the mapping module:
1. Add a new entry to the selection using +.
2. Select the value for the mapping for each input.
3. With "Active" you can deactivate a mapping without having to delete it immediately.
4. Select the desired value for each output.
5. Description provides a brief documentation of the current mapping line. This entry has no effect on the actual execution of the module.
6. Once you have defined all outputs, exit the editor by clicking the Back button.
## Repository
Source: https://www.symcon.de/en/service/documentation/basics/automations/logic-scripts/repository/
The panel repository offers all available logic script modules, which can be placed on the drawing area simply by "drag and drop".
The repository offers the following options for finding modules:
### Alphabetical sorting
Select the Alphabetical sorting option to sort all available modules in the repository by name.

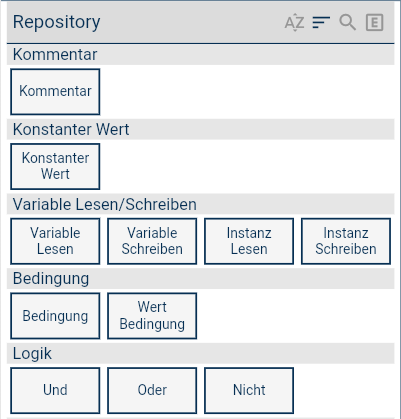
### Grouped by usage
Select the option Grouped by usage () to group all available modules in the repository according to their usage:
### Search by ID
Select the Search by ID option to search for all available modules that can be used for a specific ID in IP-Symcon.
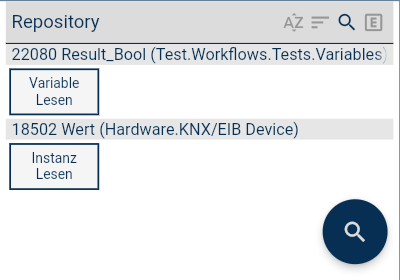
Click on the "Search" button to search for modules for an IP-Symcon object. After clicking on the "Search" button, the dialog for searching for an ID is opened:
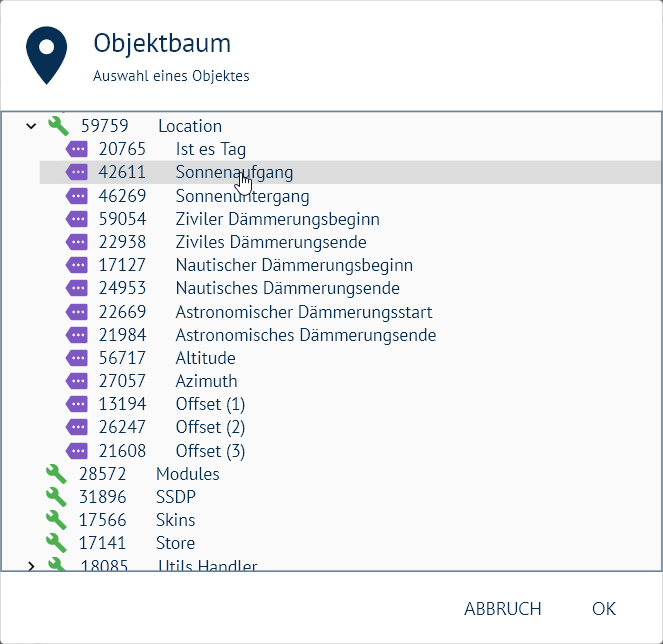
After selecting an ID and confirming with OK, all available modules for the selected object are displayed.
### Expert mode
Select the option Expert mode () to activate the "Expert mode", after activating the option the repository also displays rarely used modules.
> **Note:** An overview of the relevant IP-Symcon properties, regardless of the object type, can be found in the section The properties
### Overview of the modules
For a better overview, the editor modules have been grouped according to their use.
## Actions
Source: https://www.symcon.de/en/service/documentation/basics/automations/logic-scripts/repository/actions/
Modules of the "Actions" group enable the execution of IP-Symcon Automation scripts or various other IP-Symcon actions.
## Custom Action
Source: https://www.symcon.de/en/service/documentation/basics/automations/logic-scripts/repository/actions/custom-action/
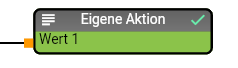
The "Custom action" module offers the option of executing any PHP code.
### Properties
| Name | Description |
| ---------------- | ----------------------------------------------------------------------------------------------------------- |
| Number of inputs | Number of inputs that the module should provide. |
| PHP code | PHP code to be executed. The inputs can be referenced in the PHP code via the variables $value1 to $value8. |
### data points input
| Name | Description |
| ------- | -------------------------------------------------------------------------------------------- |
| Value x | Depending on the "Number of inputs" property, 1 to 8 data points are available at the input. |
## Function call
Source: https://www.symcon.de/en/service/documentation/basics/automations/logic-scripts/repository/actions/function-call/
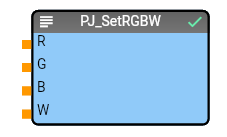
The "Function call" module offers the option of calling an IP Symcon instance function.
### Properties
| Name | Description |
| ------------- | --------------------------------------------------- |
| ID | ID of the instance where a function is to be called |
| Function name | Name of the function to be called. |
> **Note:** After entering a valid ID, the DropDown function already provides all possible function names.
### data points input
| Name | Description |
| ---------- | ---------------------------------------------------------------- |
| Parameters | The inputs of the module vary depending on the selected function |
## IRTrans
Source: https://www.symcon.de/en/service/documentation/basics/automations/logic-scripts/repository/actions/irtrans/
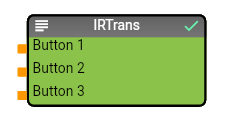
The "IRTrans" module offers the option of controlling an IRTrans instance. Up to 3 buttons can be controlled.
### Properties
| Name | Description |
| -------------- | -------------------------------------------------- |
| Remote control | Remote control to be used for sending the buttons. |
| Instance ID | Instance to be used for sending the IR commands. |
> **Note:** If commands are to be sent to different devices, several IRTrans modules must be used
### data points input
| Name | Description |
| -------- | -------------------------- |
| Button 1 | 1st IR command to be sent. |
| Button 2 | 2nd IR command to be sent. |
| Button 3 | 3rd IR command to be sent. |
## Log Message
Source: https://www.symcon.de/en/service/documentation/basics/automations/logic-scripts/repository/actions/log-message/
The "Log message" module offers the option of writing a message to the IP-Symcon log.

### Properties
| Name | Description |
| ------ | ------------------------------------------------------- |
| Sender | Text to be used in the Sender field of the log message. |
### data points input
| Name | Description |
| ------- | ------------------------------------------------------------------------------------------------------------- |
| Send | TRUE on this input triggers the sending of the message. If the input is not connected, a mail is always sent. |
| Message | Text for the log message. |
## Mail Notification
Source: https://www.symcon.de/en/service/documentation/basics/automations/logic-scripts/repository/actions/mail-notification/
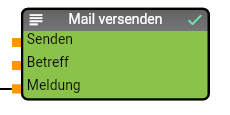
The "Mail" module offers the option of sending mail messages.
### Properties
| Name | Description |
| --------------- | --------------------------------------------------------- |
| InstanceID Mail | ID of the SMTP instance to be used for sending the mails. |
### data points input
| Name | Description |
| ------- | ------------------------------------------------------------------------------------------------------------- |
| Send | TRUE on this input triggers the sending of the message. If the input is not connected, a mail is always sent. |
| Subject | Text to be used in the subject of the message. |
| Message | Text for the mail message. |
## Push Notification
Source: https://www.symcon.de/en/service/documentation/basics/automations/logic-scripts/repository/actions/push-notification/
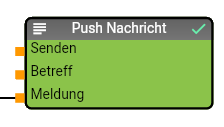
The "Push Notification" module offers the option of sending a push notification to a mobile device.
### Properties
| Name | Description |
| ----------------------- | ---------------------------------------------------------------------------------------------------- |
| Notification instance | ID of the notification instance (notification control) to be used for sending the push notification. |
| Object for notification | ID of the object (view or WebFront configurator) to which the push notification is to be sent. |
### data point input
| Name | Description |
| ------- | -------------------------------------------------------------------------------------------------------------------------- |
| Send | TRUE on this input triggers the sending of the message. If the input is not connected, a notification is always triggered. |
| Subject | Text to be used in the subject of the message. |
| Message | Text for the message. |
## Script execution
Source: https://www.symcon.de/en/service/documentation/basics/automations/logic-scripts/repository/actions/script-execution/
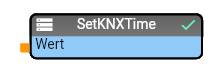
The "Script" module offers the option of integrating other scripts or automations into the logic script.
### Properties
| Name | Description |
| ---------- | ---------------------------------------------------------- |
| ScriptID | ID of the script. |
| Sender | Value for the SENDER variable when the script is called. |
| VariableID | Value for the variable VARIABLE when the script is called. |
### data points input
| Name | Description |
| ----- | ------------------------------------------------------- |
| Value | Value for the variable VALUE when the script is called. |
## Variable with ID
Source: https://www.symcon.de/en/service/documentation/basics/automations/logic-scripts/repository/actions/variable-with-id/
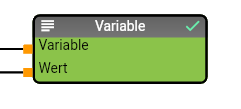
The "Variable with ID" module offers the option of changing a variable that is only referenced at logic script runtime via the ID of the variable.
### data points input
| Name | Description |
| -------- | --------------------------------- |
| Variable | ID of the variable to be changed. |
| Value | Value to be set. |
## Condition
Source: https://www.symcon.de/en/service/documentation/basics/automations/logic-scripts/repository/condition/
Modules of the "Condition" group enable the conditional execution of parts of the logic script.
## Conditional value
Source: https://www.symcon.de/en/service/documentation/basics/automations/logic-scripts/repository/condition/conditional-value/
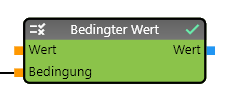
The "Conditional value" module only sets a value if a condition at the input has been evaluated to TRUE.
### Data points input
| Name | Description |
| --------- | --------------------------------------------- |
| Value | Value to be set. |
| Condition | Logical value that is checked as a condition. |
### data point output
| Name | Description |
| ----- | ------------------------------------------------------------------------------------------------------------------------------- |
| Value | Value to be set. The following branch of the logic script is only executed if the condition at the input was evaluated to TRUE. |
## Condition
Source: https://www.symcon.de/en/service/documentation/basics/automations/logic-scripts/repository/condition/condition/
The "Condition" (If) module offers the option of integrating a conditional branch into the logic diagram. If the condition at the input is fulfilled, the "Fulfilled" output returns the value "True", otherwise the "Not fulfilled" output returns the value "True". The other output does not return a value.

### data points input
| name | description |
| --------- | --------------------------------------------- |
| Condition | Logical value that is checked as a condition. |
### data points output
| Name | Description |
| ------------- | ----------------------------------------------------------------------------- |
| Fulfilled | The following branch is only executed if the condition is evaluated to TRUE. |
| Not fulfilled | The following branch is only executed if the condition is evaluated to FALSE. |
## Documentation: Comment
Source: https://www.symcon.de/en/service/documentation/basics/automations/logic-scripts/repository/documentation-comment/
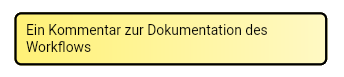
The "Comment" module offers the option of inserting text to comment on the logic script.
### Properties
| Name | Description |
| ---- | ------------- |
| Text | Comment Text. |
## Events
Source: https://www.symcon.de/en/service/documentation/basics/automations/logic-scripts/repository/events/
Modules in the "Events" group enable the logic script to be executed automatically when the value of a variable changes.
## On change
Source: https://www.symcon.de/en/service/documentation/basics/automations/logic-scripts/repository/events/on-change/
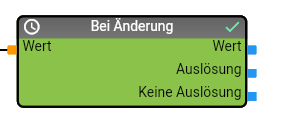
The "On change" module enables the logic script to be executed when a specific variable has been changed (new value is assigned to the variable).
### data points input
| Name | Description |
| ----- | ------------------------------------------------------------------------------------ |
| Value | Data point of the variable whose change is to trigger execution of the logic script. |
### data point output
| Name | Description |
| ------------- | --------------------------------------------------------------------------------------------------------------------------------------------------------------------------------------- |
| Value | Data point of the variable. The following branch of the logic script is only executed if the associated variable has been changed. |
| Triggering | Data point of the module that returns TRUE if the linked variable has been changed. The following branch of the logic script is only executed if the variable has been changed. |
| No triggering | Data point of the module that returns TRUE if the linked variable has not been changed. The following branch of the logic script is only executed if the variable has not been changed. |
### application example
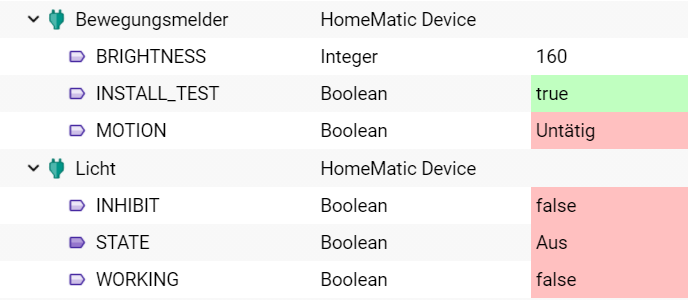
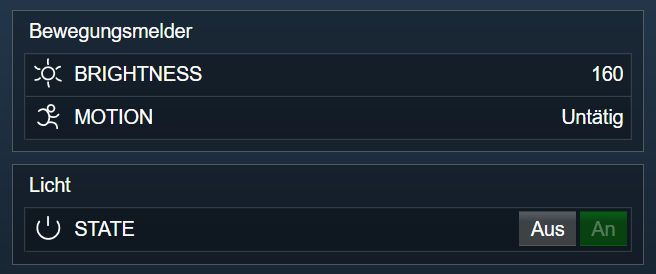
Given are 1 Homematic motion detector and 1 Homematic actuator for switching a light:
View of the two actuators in the WebFront
A logic script is now to be created in Logic Scripts that automatically switches a light on or off again when the motion detector is triggered.
You can implement this behavior by using a With change, predefined instance modules for setting the values can be found in the object tree of the logic script designer.
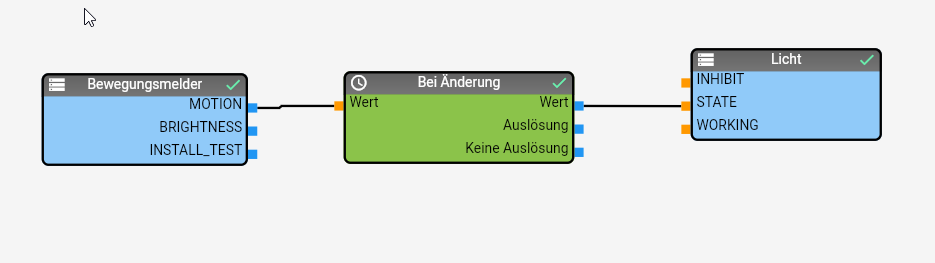
In this specific case, the logic script is called up each time the status variable of the motion detector is changed and applies its status to the light.
## On update
Source: https://www.symcon.de/en/service/documentation/basics/automations/logic-scripts/repository/events/on-update/
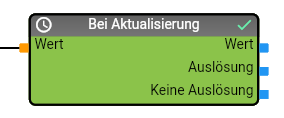
The "On update" module enables the logic script to be executed when a specific variable is updated (same value or different value is assigned to the variable).
### data points input
| Name | Description |
| ----- | ------------------------------------------------------------------------------------ |
| Value | Data point of the variable whose update is to trigger execution of the logic script. |
### data point output
| Name | Description |
| ------------- | --------------------------------------------------------------------------------------------------------------------------------------------------------------------------------------- |
| Value | Data point of the variable. The following branch of the logic script is only executed if the associated variable has been updated. |
| Triggering | Data point of the module that returns TRUE if the linked variable has been updated. The following branch of the logic script is only executed if the variable has been updated. |
| No triggering | Data point of the module that returns TRUE if the linked variable has not been updated. The following branch of the logic script is only executed if the variable has not been updated. |
## At specific value
Source: https://www.symcon.de/en/service/documentation/basics/automations/logic-scripts/repository/events/at-specific-value/
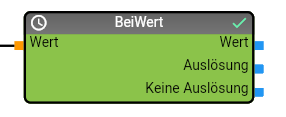
The "At specific value" module enables the logic script to be executed when a variable reaches a specific value.
### Properties
| Name | Description |
| ------------------------- | --------------------------------------------------------------------------------------------------------------------------------------------------------------------------------------------------------------------------------------------------------------------------------------------------- |
| Value for triggering | Value at which the module should trigger. |
| Trigger subsequent events | If this option is activated, the module triggers each time the variable is updated if the value corresponds to the specified limit. If the option is deactivated, the module only triggers once; the module only triggers again if the value exceeds or falls below the limit and reaches it again. |
### data points input
| Name | Description |
| ----- | ------------------------------------------------------------------------------------ |
| Value | Data point of the variable whose change is to trigger execution of the logic script. |
### data point output
| Name | Description |
| ------------- | ----------------------------------------------------------------------------------------------------------------------------------------------------------------------------------------------------------------- |
| Value | Data point of the variable. The following branch of the logic script is only executed if the "Update" output also returns TRUE. |
| Triggering | Data point of the module that returns TRUE if the value of the linked variable has reached the specified value. The subsequent branch of the logic script is only executed if the value has been reached. |
| No triggering | Data point of the module that returns TRUE if the value of the linked variable has not reached the specified value. The subsequent branch of the logic script is only executed if the value has not been reached. |
## When exceeded
Source: https://www.symcon.de/en/service/documentation/basics/automations/logic-scripts/repository/events/when-exceeded/
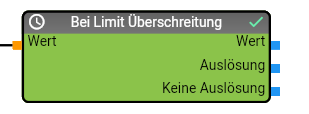
The "When exceeded" module enables the logic script to be executed when a variable exceeds a certain value.
### Properties
| Name | Description |
| ------------------------- | -------------------------------------------------------------------------------------------------------------------------------------------------------------------------------------------------------------------------------------------------------------------------------- |
| Value for triggering | Value above which the module should trigger. |
| Trigger subsequent events | If this option is activated, the module triggers every time the variable changes if the value is above the specified limit. If the option is deactivated, the module only triggers once; the module only triggers again if the value falls below the limit and exceeds it again. |
### data points input
| Name | Description |
| ----- | ---------------------------------------------------------------------------------------- |
| Value | Data point of the variable whose exceeding should trigger execution of the logic script. |
### data point output
| Name | Description |
| ------------- | ------------------------------------------------------------------------------------------------------------------------------------------------------------------------------------------------------------------- |
| Value | Data point of the variable. The following branch of the logic script is only executed if the "Update" data point also returns TRUE. |
| Triggering | Data point of the module that returns TRUE if the value of the linked variable has exceeded the specified value. The subsequent branch of the logic script is only executed if the value has been exceeded. |
| No triggering | Data point of the module that returns TRUE if the value of the linked variable has not exceeded the specified value. The subsequent branch of the logic script is only executed if the value has not been exceeded. |
## When falling below
Source: https://www.symcon.de/en/service/documentation/basics/automations/logic-scripts/repository/events/when-falling-below/
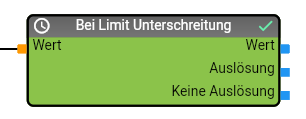
The "When falling below" module enables the logic script to be executed when a variable falls below a certain value.
### Properties
| Name | Description |
| ------------------------- | ------------------------------------------------------------------------------------------------------------------------------------------------------------------------------------------------------------------------------------------------------------------------------- |
| Value for triggering | Value below which the module should trigger. |
| Trigger subsequent events | If this option is activated, the module triggers each time the variable changes if the value is below the specified limit. If the option is deactivated, the module only triggers once; the module only triggers again if the value exceeds the limit and falls below it again. |
### data points input
| Name | Description |
| ----- | ----------------------------------------------------------------------------------------- |
| Value | Data point of the variable whose undershoot should trigger execution of the logic script. |
### data point output
| Name | Description |
| ------------- | ------------------------------------------------------------------------------------------------------------------------------------------------------------------------------------------------------------------------------------------ |
| Value | Data point of the variable. The following branch of the logic script is only executed if the "Update" output also returns TRUE. |
| Triggering | Data point of the module that returns TRUE if the value of the linked variable has fallen below the specified value. The subsequent branch of the logic script is only executed if the value has fallen below the specified value. |
| No triggering | Data point of the module that returns TRUE if the value of the linked variable has not fallen below the specified value. The subsequent branch of the logic script is only executed if the value has not fallen below the specified value. |
## weekly schedule (1 group)
Source: https://www.symcon.de/en/service/documentation/basics/automations/logic-scripts/repository/events/weekly-schedule-1-group/
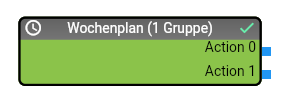
The module "Weekly schedule (1 group)" offers the possibility to link the logic script with an IP-Symcon weekly schedule with 1 group.
### Properties
| Name | Description |
| ----------------- | ------------------------------------------------------------------------------------------------ |
| Number of actions | Number of actions available for configuring the weekly schedule in the visualization. |
| Actions | List of weekly schedule actions. Each weekly schedule action can be assigned a name and a color. |
### data points output
| Name | Description |
| -------- | ----------------------------------------------------------------------------------------------------------------------------------------------------------------------------------------------------------------------------------------- |
| Action x | Data point of the respective weekly plan action, if the corresponding action is triggered, the data point is evaluated to TRUE. The subsequent branch of the logic script is only executed if this data point has been evaluated to TRUE. |
## Weekly schedule (2 groups)
Source: https://www.symcon.de/en/service/documentation/basics/automations/logic-scripts/repository/events/weekly-schedule-2-groups/
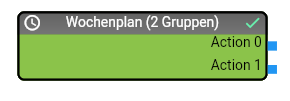
The module "Weekly schedule (2 groups)" offers the possibility to link the logic script with an IP-Symcon weekly schedule with 2 groups.
### Properties
| Name | Description |
| ----------------- | ------------------------------------------------------------------------------------------------ |
| Number of actions | Number of actions available for configuring the weekly schedule in the visualization. |
| Actions | List of weekly schedule actions. Each weekly schedule action can be assigned a name and a color. |
### data points output
| Name | Description |
| -------- | ----------------------------------------------------------------------------------------------------------------------------------------------------------------------------------------------------------------------------------------- |
| Action x | Data point of the respective weekly plan action, if the corresponding action is triggered, the data point is evaluated to TRUE. The subsequent branch of the logic script is only executed if this data point has been evaluated to TRUE. |
## Weekly schedule (7 groups)
Source: https://www.symcon.de/en/service/documentation/basics/automations/logic-scripts/repository/events/weekly-schedule-7-groups/
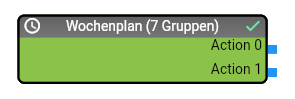
The module "Weekly schedule (7 groups)" offers the possibility to link the logic script with an IP-Symcon weekly schedule with 7 groups.
### Properties
| Name | Description |
| ----------------- | ------------------------------------------------------------------------------------------------ |
| Number of actions | Number of actions available for configuring the weekly schedule in the visualization. |
| Actions | List of weekly schedule actions. Each weekly schedule action can be assigned a name and a color. |
### data points output
| Name | Description |
| -------- | ----------------------------------------------------------------------------------------------------------------------------------------------------------------------------------------------------------------------------------------- |
| Action x | Data point of the respective weekly plan action, if the corresponding action is triggered, the data point is evaluated to TRUE. The subsequent branch of the logic script is only executed if this data point has been evaluated to TRUE. |
## Information
Source: https://www.symcon.de/en/service/documentation/basics/automations/logic-scripts/repository/information/
Module der Gruppe "Informationen" ermöglichen die Einbindung von diversen IP-Symcon Informationen in den Logic Script.
## Script Information
Source: https://www.symcon.de/en/service/documentation/basics/automations/logic-scripts/repository/information/script-information/
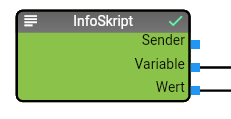
The "ScriptInfo" module offers the option of integrating information on the current script execution.
### data points output
| Name | Description |
| -------- | ------------------------------------------------------------------------------------------------------------- |
| Sender | The sender variable of the current script execution (value of the IP-Symcon script variable $_IPS['SENDER']). |
| Variable | The variable ID of the current script execution (value of the IP-Symcon script variable $_IPS['VARIABLE']). |
| Value | The value variable of the current script execution (value of the IP-Symcon script variable $_IPS['VALUE']). |
### application example
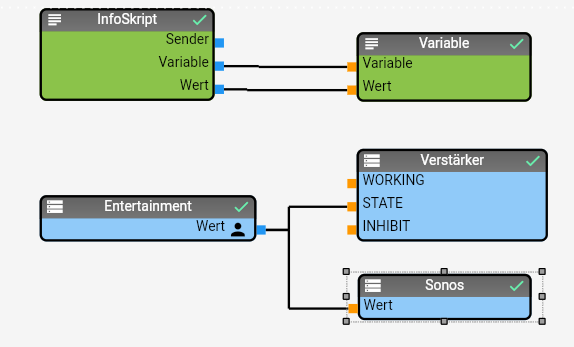
A typical application example for the "ScriptInfo" module is the realization of an action script for a variable.
The logic script receives the value of the visualization and assigns it to the relevant variable.
Further information on the subject of [action scripts](automations.md).
The logic script is assigned to the variable as an action script by integrating the variable into the logic script and selecting the "As action script" option in the property editor.
Alternatively, the logic script script can also be manually assigned to the variable in the console.
In this example, the value of the "Entertainment" variable is set first (operation via the WebFront or IPSView client) and then the value is used to control an amplifier and a Sonos player using an automation script.
## System Information
Source: https://www.symcon.de/en/service/documentation/basics/automations/logic-scripts/repository/information/system-information/
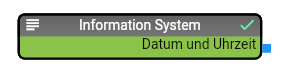
The "SystemInfo" module provides information about the IP-Symcon system.
### data points output
| Name | Description |
| --------- | ------------------------------------------ |
| Timestamp | Unix Timestamp of the current system time. |
## Variable Inforamtion
Source: https://www.symcon.de/en/service/documentation/basics/automations/logic-scripts/repository/information/variable-inforamtion/
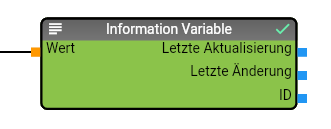
The "VariableInfo" module provides information on a variable.
### data points input
| Name | Description |
| ----- | ----------------------------------------------------------------------------------------------- |
| Value | Connection to the data point value of a variable from which the information is to be displayed. |
### data point output
| Name | Description |
| ----------- | -------------------------------------------------- |
| Last update | Unix Timestamp of the last update of the variable. |
| Last change | Unix timestamp of the last change to the variable. |
| ID | ID of the variable. |
## Constant
Source: https://www.symcon.de/en/service/documentation/basics/automations/logic-scripts/repository/constant/
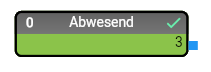
The "Constant" module offers the option of integrating fixed values into the logic script; a data type, a value and a name for the display can be assigned to the module in the properties.
### Properties
| Name | Description |
| --------- | ----------------------------------------------- |
| Display | Name displayed in the diagram for the constant. |
| Value | Value of the constant as a string. |
| Data type | Data type of the constant. |
### data points output
| Name | Description |
| ----- | ------------------------- |
| Value | The value of the constant |
### application example
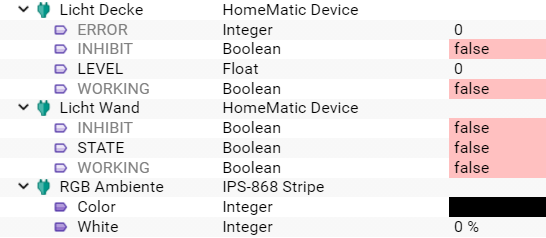
Given are 1 Homematic actuator for switching a light, 1 Homematic actuator for dimming a light and an IP-Symcon 868 actuator for operating an RGB strip:
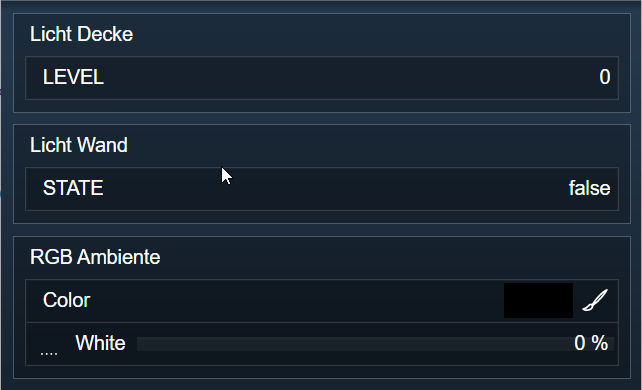
The actuators can be switched separately via the WebFront:
A logic script is now to be created in Logic Scripts that sets a specific lighting scenario and assigns predefined values to the individual lighting fixtures.
You can realize these values by using constants, predefined instance modules for setting the values can be found in the [Object tree](automations.md) of the Logic Script Designer.
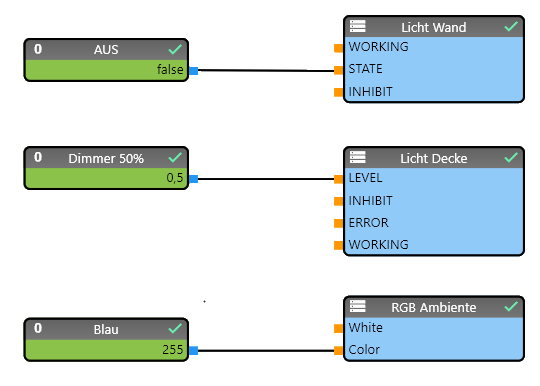
In this specific case, the RGB luminaire is assigned the color blue, the wall light is switched off and the dimmer is set to 50%.
## Logic
Source: https://www.symcon.de/en/service/documentation/basics/automations/logic-scripts/repository/logic/
Modules in the "Logic" group enable the integration of logic modules.
## Not
Source: https://www.symcon.de/en/service/documentation/basics/automations/logic-scripts/repository/logic/not/
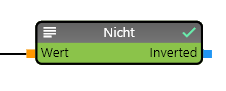
The "Not" module offers the option of implementing a logical NOT in the logic script.
### data points input
| Name | Description |
| ----- | --------------------------- |
| Value | Data point for input value. |
### data point output
| Name | Description |
| -------- | -------------------------------------------------------------------------------------------------------- |
| Inverted | Returns TRUE if the value at input Value is FALSE and returns FALSE if the value at input Value is TRUE. |
## Or
Source: https://www.symcon.de/en/service/documentation/basics/automations/logic-scripts/repository/logic/or/
The "Or" module offers the option of implementing a logical OR link in the logic script.

### Properties
| Name | Description |
| ---------------- | ------------------------------ |
| Number of inputs | Provides 2 to 8 module inputs. |
### data points input
| Name | Description |
| ------- | --------------------------------- |
| Value 1 | Data point for comparison value 1 |
| Value 2 | Data point for comparison value 2 |
### data point output
| Name | Description |
| ------ | ----------------------------------------------- |
| Result | Returns TRUE if the value of one input is TRUE. |
### Application example
Given are 2 Homematic actuators for controlling a garden irrigation system and 1 Homematic actuator that acts as the main switch for the irrigation system:
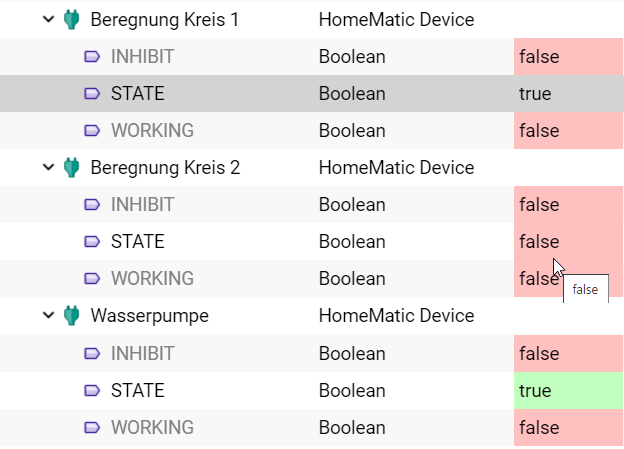
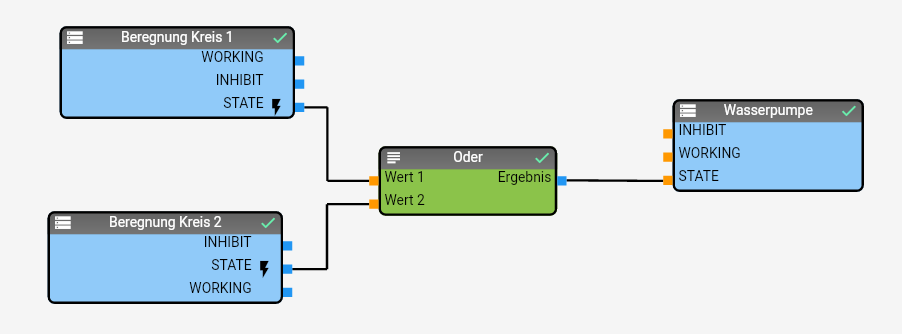
A logic script is now to be created in Logic Scripts that automatically controls the garden pump. If one of the two irrigation actuators is activated, the main switch should also be activated. If both actuators are off, the main switch should also be deactivated.
You can implement this behavior using an Or module; predefined modules for the instances can be found in the object tree of the logic script editor.
How it works:
- A change to the "STATE" outputs of the irrigation circuit automatically calls up the logic script as soon as one of the two irrigation actuators is switched (regardless of whether via a visualization, a weekly schedule or another script).
- If one of the two actuators has been activated, the or returns TRUE and activates the main switch .
- If both actuators are deactivated, the OR returns FALSE and deactivates the main switch again.
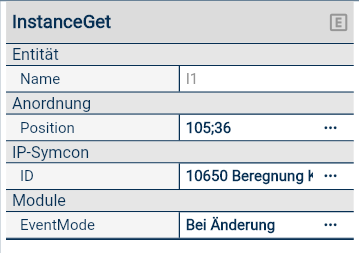
> **Note:** For automatic execution of the logic script when the variable is changed, you must set the "Logic Script execution" property of the "Read instance" module to the value "On change"
## And
Source: https://www.symcon.de/en/service/documentation/basics/automations/logic-scripts/repository/logic/and/
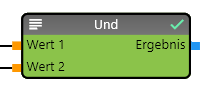
The "And" module offers the option of implementing a logical AND link in the logic script.
### Properties
| Name | Description |
| ---------------- | ------------------------------ |
| Number of inputs | Provides 2 to 8 module inputs. |
### data points input
| Name | Description |
| ------- | --------------------------------- |
| Value 1 | Data point for comparison value 1 |
| Value 2 | Data point for comparison value 2 |
### data point output
| Name | Description |
| ------ | ------------------------------------------------------ |
| Result | Returns *TRUE* if the value at all inputs are *TRUE*. |
## Mapping table
Source: https://www.symcon.de/en/service/documentation/basics/automations/logic-scripts/repository/mapping-table/
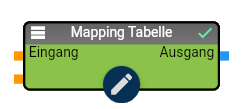
The "Mapping table" module offers the option of mapping up to 8 inputs with a complex mapping logic to up to 8 outputs. You can define the values for the respective outputs for various combinations of values at the inputs.
### Properties
| Name | Description |
| -------- | ------------------------------------------------------------------------------------------------------------ |
| Inputs | Definition of the inputs. Up to 8 inputs can be defined, each input must be assigned a name and a data type. |
| Outputs | Definition of outputs. Up to 8 outputs can be defined, each output must be assigned a name and a data type. |
| Mappings | Definition of the mappings. |
### data points input
| Name | Description |
| ------- | ------------------------------------------ |
| Input x | Data points defined in the Inputs property |
### Data points output
| Name | Description |
| -------- | ------------------------------------------- |
| Output x | Data points defined in the Outputs property |
## Mathmatics
Source: https://www.symcon.de/en/service/documentation/basics/automations/logic-scripts/repository/mathmatics/
Modules in the "Mathematics" group enable the calculation of mathematical expressions in the logic script.
## Addition
Source: https://www.symcon.de/en/service/documentation/basics/automations/logic-scripts/repository/mathmatics/addition/
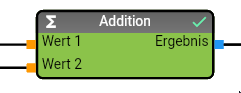
The "Addition" module offers the option of adding 2 values.
### Properties
| Name | Description |
| ---------------- | ------------------------------------- |
| Number of inputs | Provides 2 to 8 inputs of the module. |
### data points input
| Name | Description |
| ------- | ----------------------- |
| Value 1 | Data point for value 1. |
| Value 2 | Data point for value 2. |
### data point output
| Name | Description |
| ------ | ------------------ |
| Result | Sum of the inputs. |
## Division
Source: https://www.symcon.de/en/service/documentation/basics/automations/logic-scripts/repository/mathmatics/division/
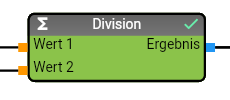
The "Division" module offers the option of dividing 2 values.
### data points input
| Name | Description |
| ------- | ---------------------- |
| Value 1 | Data point for value 1 |
| Value 2 | Data point for value 2 |
### data point output
| Name | Description |
| ------ | ------------------------------------------------- |
| Result | Result from the calculation of value 1 by value 2 |
## Formula
Source: https://www.symcon.de/en/service/documentation/basics/automations/logic-scripts/repository/mathmatics/formula/
The "Formula" module offers the option of calculating up to 8 values based on a user-defined formula with up to 8 different input values.

### Properties
| Name | Description |
| ----------------- | ----------------------------------------------------------------------------------------------------------------------------------------------------------------------------------------------------------------------------------------------------------------------------------------------------------------------------------------- |
| Formula | PHP code to be executed when the module is called. The values of the input are available via the variables $value1, $value2, $value3, $value4, $value5, $value6, $value7 and $value8. The result can be returned to the logic script via the variables $result1, $result2, $result3, $result4, $result5, $result6, $result7 and $result8. |
| Number of outputs | Number of data points at the output (value range 1-8) |
| Number of inputs | Number of data points at the input (value range 1-8) |
### data points input
| Name | Description |
| ------- | ---------------------- |
| Value 1 | Data point for value 1 |
| Value 2 | Data point for value 2 |
| Value 3 | Data point for value 3 |
| Value 4 | Data point for value 4 |
| Value 5 | Data point for value 5 |
| Value 6 | Data point for value 6 |
| Value 7 | Data point for value 7 |
| Value 8 | Data point for value 8 |
### data point output
| Name | Description |
| -------- | ------------------------------------------------------------ |
| Result 1 | Result 1 from the calculation with the user-defined formula. |
| Result 2 | Result 2 from the calculation with the user-defined formula. |
| Result 3 | Result 3 from the calculation with the user-defined formula. |
| Result 4 | Result 4 from the calculation with the user-defined formula. |
| Result 5 | Result 5 from the calculation with the user-defined formula. |
| Result 6 | Result 6 from the calculation with the user-defined formula. |
| Result 7 | Result 7 from the calculation with the user-defined formula. |
| Result 8 | Result 8 from the calculation with the user-defined formula. |
## Maximum
Source: https://www.symcon.de/en/service/documentation/basics/automations/logic-scripts/repository/mathmatics/maximum/
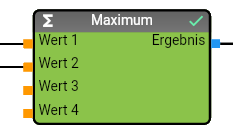
The "Maximum" module offers the option of calculating the maximum from up to 4 different values.
### data points input
| Name | Description |
| ------- | ---------------------- |
| Value 1 | Data point for value 1 |
| Value 2 | Data point for value 2 |
| Value 3 | Data point for value 3 |
| Value 4 | Data point for value 4 |
### data point output
| Name | Description |
| ------ | ------------------------------------------ |
| Result | Maximum of input values Value 1 to Value 4 |
## Minimum
Source: https://www.symcon.de/en/service/documentation/basics/automations/logic-scripts/repository/mathmatics/minimum/
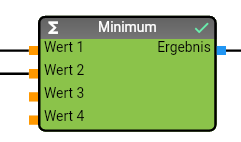
The "Minimum" module offers the option of calculating the minimum from up to 4 different values.
### data points input
| Name | Description |
| ------- | ---------------------- |
| Value 1 | Data point for value 1 |
| Value 2 | Data point for value 2 |
| Value 3 | Data point for value 3 |
| Value 4 | Data point for value 4 |
### data point output
| Name | Description |
| ------ | ------------------------------------------ |
| Result | Minimum of input values value 1 to value 4 |
## Modulo
Source: https://www.symcon.de/en/service/documentation/basics/automations/logic-scripts/repository/mathmatics/modulo/
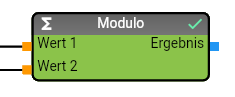
The "Modulo" module offers the option of calculating the modulo of 2 values.
### data points input
| Name | Description |
| ------- | ---------------------- |
| Value 1 | Data point for value 1 |
| Value 2 | Data point for value 2 |
### data point output
| Name | Description |
| ------ | -------------------------------------------------- |
| Result | Result from the calculation Value 1 modulo Value 2 |
## Multiplication
Source: https://www.symcon.de/en/service/documentation/basics/automations/logic-scripts/repository/mathmatics/multiplication/
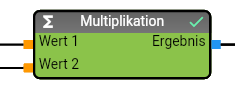
The "Multiplication" module offers the option of multiplying 2 values.
### data points input
| Name | Description |
| ------- | ---------------------- |
| Value 1 | Data point for value 1 |
| Value 2 | Data point for value 2 |
### data point output
| Name | Description |
| ------ | ------------------------------------------------- |
| Result | Result from the calculation value 1 times value 2 |
## Rounding
Source: https://www.symcon.de/en/service/documentation/basics/automations/logic-scripts/repository/mathmatics/rounding/
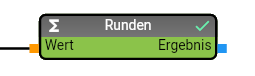
The "Rounding" module offers the option of rounding a value.
### Properties
| Name | Description |
| ------ | ----------------------------- |
| Digits | Number of digits to round to. |
### data points input
| Name | Description |
| ------- | --------------------------- |
| Value 1 | Data point for input value. |
### data point output
| Name | Description |
| ------ | ------------------------------------------ |
| Result | Result from the calculation Value rounded. |
## Subtraction
Source: https://www.symcon.de/en/service/documentation/basics/automations/logic-scripts/repository/mathmatics/subtraction/
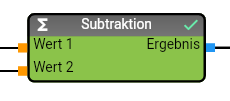
The "Subtraction" module offers the option of subtracting 2 values.
### data points input
| Name | Description |
| ------- | ---------------------- |
| Value 1 | Data point for value 1 |
| Value 2 | Data point for value 2 |
### data point output
| Name | Description |
| ------ | ------------------------------------------------- |
| Result | Result from the calculation Value 1 minus Value 2 |
## Sublogic scripts
Source: https://www.symcon.de/en/service/documentation/basics/automations/logic-scripts/repository/sublogic-scripts/
"Sublogic scripts" make it possible to group several modules into a new unit and assign parameters and data points to them. This group of modules can then be addressed in the "main logic script" as an independent module, and it is also possible to export or import these sublogic scripts into a file.
## Sublogic script Parameter
Source: https://www.symcon.de/en/service/documentation/basics/automations/logic-scripts/repository/sublogic-scripts/parameter/
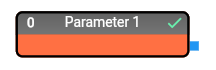
The "Parameter" module offers the option of creating a parameter for a sublogic script. Parameters can subsequently be set in the properties of the sublogic script module.
### Properties
| Name | Description |
| ------------- | ---------------------------------------------------------------------------------------------------------- |
| Display | Name of the parameter, specifies the name of the parameter as it should be displayed in the property list. |
| Data type | Data type of the parameter |
| Default value | Default value of the parameter to be assigned after the initial creation of the module. |
### data points output
| Name | Description |
| ----- | ------------------------------------------------------------------------------------ |
| Value | Current value of the parameter that can subsequently be used in the Sublogic Script. |
## Sublogic Script Output
Source: https://www.symcon.de/en/service/documentation/basics/automations/logic-scripts/repository/sublogic-scripts/sublogic-script-output/
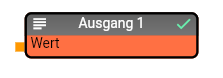
The "Output" module offers the option of creating an output data point for a sublogic script. Outputs are made available as data points of the sublogic script module and can be connected to other modules there.
### Properties
| Name | Description |
| --------- | ------------------------------------------------------------------------------------------------------------------- |
| Display | Name of the output, specifies the name of the data point as it should be displayed in the main logic script module. |
| Data type | Data type of the parameter |
### data point input
| Name | Description |
| ----- | ------------------------------------------------------------------- |
| Value | Value to be made available to the main logic script via the output. |
## Sublogic script Input
Source: https://www.symcon.de/en/service/documentation/basics/automations/logic-scripts/repository/sublogic-scripts/sublogic script-input/
The "Input" module offers the option of creating a data point input for a sublogic script. Inputs are made available as data points of the sublogic script module and can be connected to other modules there.

### Properties
| Name | Description |
| --------- | ------------------------------------------------------------------------------------------------------------------ |
| Display | Name of the input, specifies the name of the data point as it should be displayed in the main logic script module. |
| Data type | Data type of the parameter |
| Mandatory | Specifies whether the input must be connected. |
### data points input
| Name | Description |
| ------------- | -------------------------------------------------- |
| Default value | Default value if the data point was not connected. |
### data point output
| Name | Description |
| ----- | ----------------------------------------------------------------------------------- |
| Value | Current value that was transferred to the data point of the sublogic script module. |
## Sublogic script Module
Source: https://www.symcon.de/en/service/documentation/basics/automations/logic-scripts/repository/sublogic-scripts/sublogic script-module/
The "Sublogic script" module offers the option of combining several modules into one unit and inserting them into your main logic script.
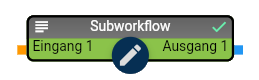
The following functions are available:
| Name | Description |
| ----------- | ------------------------------------------------------------------------------------------------------------------------------------------------------------------------ |
| Open / Edit | Click on Open / Edit to open a sublogic script for editing. After clicking the button, the sublogic script is opened and can be edited. |
| Back | Click on Back to exit the sublogic script editor. After clicking the button, the current changes to the sublogic script are saved and the main logic script is reloaded. |
## Timer
Source: https://www.symcon.de/en/service/documentation/basics/automations/logic-scripts/repository/timer/
Modules of the "Timer" group to automatically execute the logic script via a timer.
## Once a day
Source: https://www.symcon.de/en/service/documentation/basics/automations/logic-scripts/repository/timer/once-a-day/
The "Timer cyclic second" module allows you to implement a timer that calls up the logic script every day at a specific time.

### Properties
| Name | Description |
| ---- | ------------------------------ |
| Time | Time for triggering the timer. |
### data points input
| Name | Description |
| ------ | -------------------------------------------------------------------------------------------------------------------------------------------------------- |
| Active | Activation of the timer; if TRUE, the timer is activated and triggers the logic script at the set time every day. |
| Hour | Data point of the module that controls the hour of triggering. If the input is not connected, the value of the "Time" property is used for triggering. |
| Minute | Data point of the module that controls the minute of triggering. If the input is not connected, the value of the "Time" property is used for triggering. |
### data point output
| Name | Description |
| ------------- | ------------------------------------------------------------------------------------------------------------------------------------------------------------------------------------------------------------------------ |
| Triggering | Data point of the module that returns TRUE when the module has triggered. This occurs every second when the timer is active. The subsequent branch of the logic script is only executed if the timer has been triggered. |
| No triggering | Data point of the module that returns TRUE if the module has not triggered. The subsequent branch of the logic script is only executed if the timer has not been triggered. |
## One time Timer
Source: https://www.symcon.de/en/service/documentation/basics/automations/logic-scripts/repository/timer/one-time-timer/
The "One-time timer" module enables the time-delayed execution of certain parts of the logic diagram.
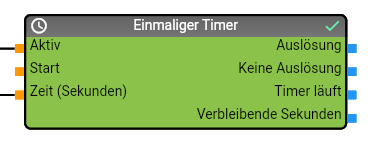
### data points input
| Name | Description |
| -------------- | ------------------------------------------------------------------------------------------------------------------------------------------------------------------------------------------------------ |
| Restart/Active | Activation of the timer, if TRUE the timer is activated and triggers the logic diagram again after a certain time. If the timer is already running, the remaining time is reset to the original value. |
| Start | Start the timer, if TRUE the timer is activated if it is not yet active and triggers the logic plan again after a certain time. |
| Time (seconds) | Time in seconds after which the timer should be triggered. |
### data points output
| Name | Description |
| ----------------- | -------------------------------------------------------------------------------------------------------------------------------------------------------------------------- |
| Triggering | Data point of the module that returns TRUE when the module has triggered. The following branch of the logic script is only executed if the timer has been triggered. |
| No triggering | Data point of the module that returns TRUE if the module has not triggered. The following branch of the logic script is only executed if the timer has not been triggered. |
| Timer running | Data point of the module that returns TRUE if the timer has been started but has not yet been triggered. |
| Remaining seconds | Returns the number of seconds that must elapse before the timer is triggered. |
### application example
Given are 1 Homematic push-button and 1 Homematic actuator for switching a light:
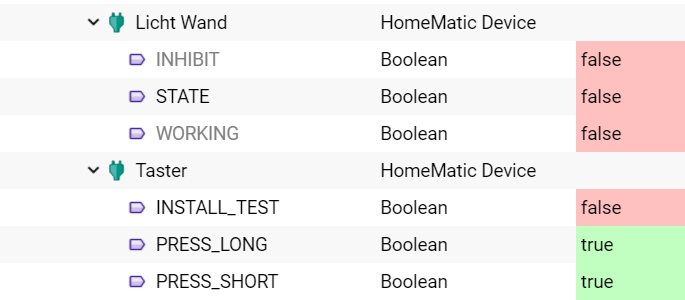
A logic script is now to be created in the logic script that switches on a light when the push-button is triggered and switches it off again after one minute.
You can implement this requirement by using a one-time timer module; predefined instance modules for the push-button or activating the light can be found in the object tree of the logic script designer.
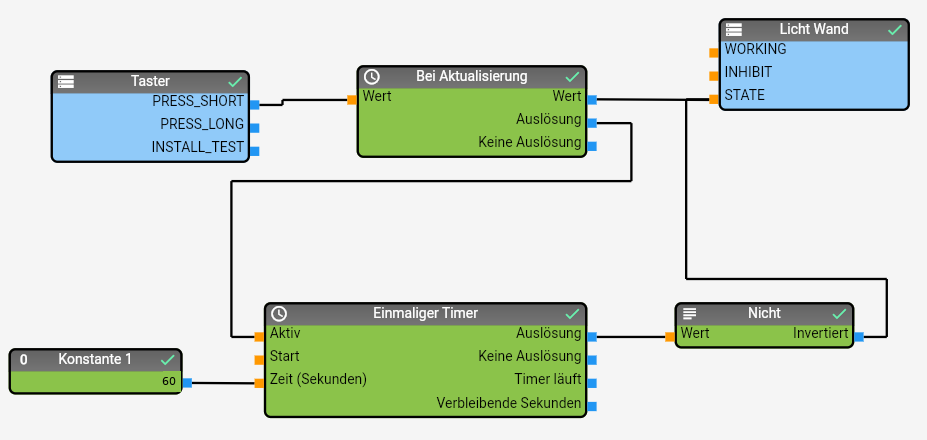.
Functionality:
- The PRESS_SHORT variable of a Homematic push-button always has the value TRUE; when the push-button is pressed, the value of the variable is updated and only the date/time of the variable is updated. This update can be evaluated with the On update module and used to control other modules.
- In the current example, the light is switched on when the PRESS_SHORT variable is updated and at the same time a timer with 60 seconds is triggered by setting the "Active" input in the One-time timer module.
- The logic plan script is executed a second time by this timer after 60 seconds and switches the light off again via the Non module.
## Timer Variable
Source: https://www.symcon.de/en/service/documentation/basics/automations/logic-scripts/repository/timer/timer-variable/
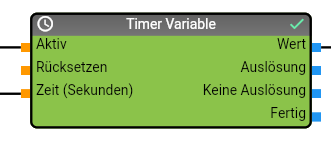
The "Timer Variable" module enables the implementation of a timer based on a variable. After activating the timer, the remaining time until the timer is triggered is counted down.
### data points input
| Name | Description |
| -------------- | ----------------------------------------------------------------------------------------------------------------- |
| Active | Activation of the timer, if TRUE the timer is activated and triggers the logic script again after a certain time. |
| Reset | Deactivation of the timer; if TRUE, an active timer can be canceled. |
| Time (seconds) | Time in seconds after which the timer should be triggered. |
### data points output
| Name | Description |
| ------------- | -------------------------------------------------------------------------------------------------------------------------------------------------------------------------------------------------------------------------- |
| Value | This data point of the module must be connected to a variable of type integer. The variable realizes the display of the remaining timer time. |
| Triggering | Data point of the module that returns TRUE when the module has triggered. This occurs every second when the timer is active. The subsequent branch of the logic script is only executed when the timer has been triggered. |
| No triggering | Data point of the module that returns TRUE if the module has not triggered. The subsequent branch of the logic script is only executed if the timer has not been triggered. |
| Done | Data point of the module that returns TRUE if the timer has ended. The following branch of the logic script is only executed if the timer has ended. |
### application example
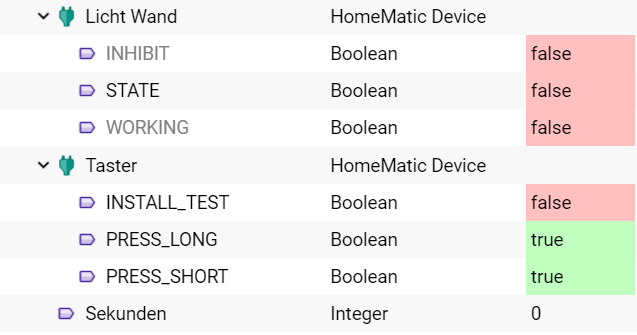
Given are 1 Homematic button, 1 Homematic actuator for switching a light and a variable for displaying the remaining time of a staircase timer (normal variable of type integer, which has a profile with suffix "Sec" assigned).
A logic script is now to be created in Logic Scripts that switches on a light when the push-button is triggered and switches it off again after one minute. In addition, the remaining time in seconds should also be visualized
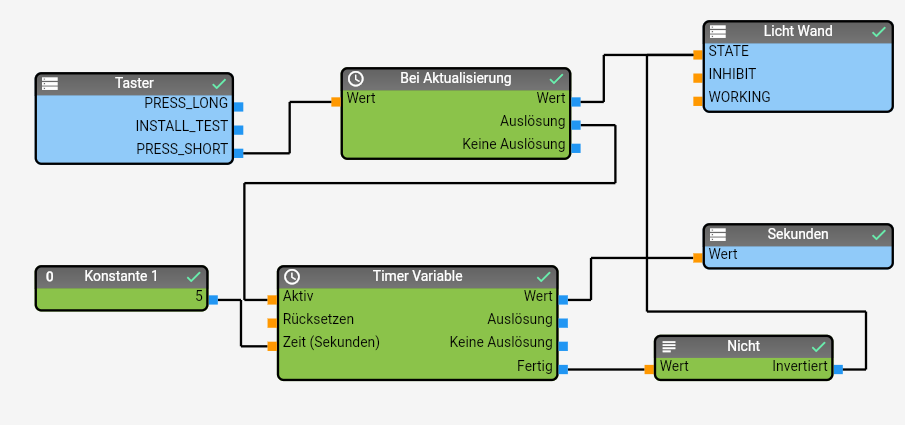
You can implement this requirement by using a Timer Variable module; predefined instance modules for the push-button or activating the light can be found in the object tree of the Logic Script Designer.
How it works:
- The PRESS_SHORT variable of a Homematic push-button always has the value TRUE; when the push-button is pressed, the value of the variable is updated and only the date/time of the variable is updated. This update can be evaluated with the On update module and used to control other modules.
- In the current example, when the PRESS_SHORT variable is updated, the light is switched on and at the same time a timer with 60 seconds is triggered by setting the "Active" input in the Timer Variable module, which uses the "Remaining time" variable to count down the seconds.
- The logic script script is executed by this timer every second and updates the value in the "Remaining time" variable.
- Once the timer has reached the value 0, the lamp is switched off again via the "Done" output and a non-module.
## Timer cyclic minute
Source: https://www.symcon.de/en/service/documentation/basics/automations/logic-scripts/repository/timer/timer-cyclic-minute/
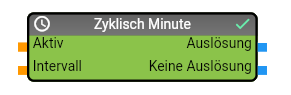
The "Timer cyclic minute" module allows you to implement a timer that calls up the logic script cyclically at the set interval.
### Properties
| Name | Description |
| -------- | --------------------------------------------- |
| Interval | Interval in minutes for triggering the timer. |
### data points input
| Name | Description |
| -------- | -------------------------------------------------------------------------------------------------------------------------------------------------- |
| Active | Activation of the timer; if TRUE, the timer is activated and triggers the logic script every minute at the specified interval. |
| Interval | Data point of the module for controlling the interval. If the input is not connected, the value of the "Interval" property is used for triggering. |
### data point output
| Name | Description |
| ------------- | ------------------------------------------------------------------------------------------------------------------------------------------------------------------------------------------------------------------------ |
| Triggering | Data point of the module that returns TRUE when the module has triggered. This occurs every second when the timer is active. The subsequent branch of the logic script is only executed if the timer has been triggered. |
| No triggering | Data point of the module that returns TRUE if the module has not triggered. The following branch of the logic script is only executed if the timer has not been triggered. |
## Timer cyclic second
Source: https://www.symcon.de/en/service/documentation/basics/automations/logic-scripts/repository/timer/timer-cyclic-second/
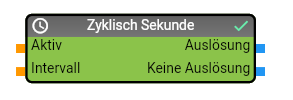
The "Timer cyclic second" module enables the implementation of a timer that calls up the logic script cyclically with the set interval.
### Properties
| Name | Description |
| -------- | --------------------------------------------- |
| Interval | Interval in seconds for triggering the timer. |
### data points input
| Name | Description |
| -------- | -------------------------------------------------------------------------------------------------------------------------------------------------- |
| Active | Activation of the timer; if TRUE, the timer is activated and triggers the logic script at the specified interval every second. |
| Interval | Data point of the module for controlling the interval. If the input is not connected, the value of the "Interval" property is used for triggering. |
### data point output
| Name | Description |
| ------------- | ------------------------------------------------------------------------------------------------------------------------------------------------------------------------------------------------------------------------ |
| Triggering | Data point of the module that returns TRUE when the module has triggered. This occurs every second when the timer is active. The subsequent branch of the logic script is only executed if the timer has been triggered. |
| No triggering | Data point of the module that returns TRUE if the module has not triggered. The following branch of the logic script is only executed if the timer has not been triggered. |
## Timer cyclic hour
Source: https://www.symcon.de/en/service/documentation/basics/automations/logic-scripts/repository/timer/timer-cyclic-hour/
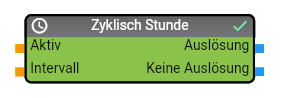
The "Timer cyclic hour" module enables the implementation of a timer that calls up the logic script cyclically with the set interval.
### Properties
| Name | Description |
| -------- | ------------------------------------------- |
| Interval | Interval in hours for triggering the timer. |
### data points input
| Name | Description |
| -------- | -------------------------------------------------------------------------------------------------------------------------------------------------- |
| Active | Activation of the timer; if TRUE, the timer is activated and triggers the logic script at the specified interval every hour. |
| Interval | Data point of the module for controlling the interval. If the input is not connected, the value of the "Interval" property is used for triggering. |
### data point output
| Name | Description |
| ------------- | ------------------------------------------------------------------------------------------------------------------------------------------------------------------------------------------------------------------------ |
| Triggering | Data point of the module that returns TRUE when the module has triggered. This occurs every second when the timer is active. The subsequent branch of the logic script is only executed if the timer has been triggered. |
| No triggering | Data point of the module that returns TRUE if the module has not triggered. The subsequent branch of the logic script is only executed if the timer has not been triggered. |
## Conversion
Source: https://www.symcon.de/en/service/documentation/basics/automations/logic-scripts/repository/conversion/
Modules in the "Conversion" group enable the integration of modules for converting data into another format.
## Date to String
Source: https://www.symcon.de/en/service/documentation/basics/automations/logic-scripts/repository/conversion/date-to-string/
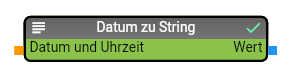
The module "Date to String" offers the possibility to convert a Unix timestamp into a string.
### Properties
| Name | Description |
| ----------- | ------------------------------------------------- |
| Date format | Format to be used for the conversion to a string. |
> **Note:** Any PHP format can be entered for converting a date. Details on the possible formats can be found in the PHP documentation.
> Some general formats are already predefined and can be selected via the dropdown
### data points input
| Name | Description |
| --------- | ------------------------------- |
| Timestamp | Unix timestamp to be converted. |
### data points output
| Name | Description |
| ----- | ------------------------------ |
| Value | Converted timestamp as string. |
## Date to time
Source: https://www.symcon.de/en/service/documentation/basics/automations/logic-scripts/repository/conversion/date-to-time/
The module "Date to Time" offers the possibility to split a Unix timestamp into the individual time components.
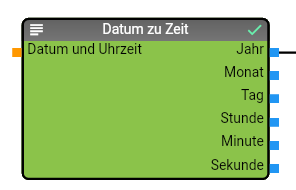
### data points input
| Name | Description |
| --------- | ------------------------------- |
| Timestamp | Unix timestamp to be converted. |
### data points output
| Name | Description |
| ------ | ------------------------------------ |
| Year | The year from the Unix timestamp. |
| Month | The month from the Unix timestamp. |
| Day | The day from the Unix timestamp. |
| Hour | The hours from the Unix timestamp. |
| Minute | The minutes from the Unix timestamp. |
| Second | The seconds from the Unix timestamp. |
## Format message
Source: https://www.symcon.de/en/service/documentation/basics/automations/logic-scripts/repository/conversion/format-message/
The "Format message" module offers the option of assembling a string with one or more variable values. The module supports up to 8 different variables.

### Properties
| Name | Description |
| ---------------- | ------------------------------------------------------- |
| Number of inputs | Number of inputs that the module should make available. |
| Format String | PHP Format String for formatting the string |
### data points input
| Name | Description |
| ------- | ------------------------------- |
| Value 1 | Value 1 for forming the message |
| Value 2 | Value 2 for forming the message |
| Value 3 | Value 3 for forming the message |
| Value 4 | Value 4 for forming the message |
| Value 5 | Value 5 for forming the message |
| Value 6 | Value 6 for forming the message |
| Value 7 | Value 7 for forming the message |
| Value 8 | Value 8 for forming the message |
### data points output
| Name | Description |
| ------ | -------------------------------------------------------------- |
| Result | Result message from the format string and the input variables. |
## Invert value
Source: https://www.symcon.de/en/service/documentation/basics/automations/logic-scripts/repository/conversion/invert-value/
The "Invent value" module offers the option of inverting a value. The respective minimum or maximum can either be configured via the properties of the module or, alternatively, the module also offers inputs for the values.
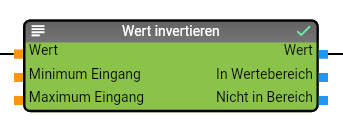
### Properties
| Name | Description |
| ------------- | -------------------------------------------------------------------------------------------------------------------------------------------- |
| Outputs Range | Activates the data points at the "In range" and "Not in range" output. These data points are not activated by default. |
| Inputs Limit | Activates the data points at the input for the limits ("Minimum input" and "Maximum input"). These data points are not activated by default. |
| Maximum Input | Specifies the maximum for the inversion of the value, is only used if the data points for the limits are not activated. |
| Minimum input | Specifies the minimum for the inversion of the value, is only used if the data points for the limits are not activated. |
### data points input
| Name | Description |
| ------------- | --------------------------------------------------------------------------------------------------------------------- |
| Value | Value to be inverted |
| Minimum input | Minimum value for the inversion. This data point is only available if the "Inputs limit" property has been activated. |
| Maximum input | Maximum value for the inversion. This data point is only available if the "Inputs Limit" property has been activated. |
### data point output
| Name | Description |
| ------------ | ----------------------------------------------------------------------------------------------------------------------------------------------------------------------- |
| Value | Converted value |
| In range | Returns __TRUE__ if the value to be inverted was within the minimum and maximum. This data point is only available if the "Outputs range" property has been activated. |
| Not in range | Returns __TRUE__ if the value to be inverted was outside the minimum and maximum. This data point is only available if the "Outputs range" property has been activated. |
## Value to Boolean
Source: https://www.symcon.de/en/service/documentation/basics/automations/logic-scripts/repository/conversion/wert-zu-boolean/
The "Value to Boolean" module offers the option of converting a value into a Boolean.
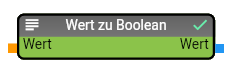
### Data points input
| Name | Description |
| ----- | ---------------------- |
| Value | Value to be converted. |
### data points output
| Name | Description |
| ----- | --------------------------- |
| Value | Converted value as Boolean. |
## Value to float
Source: https://www.symcon.de/en/service/documentation/basics/automations/logic-scripts/repository/conversion/wert-zu-float/
The "Value to float" module offers the option of converting a value into a float.
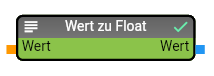
### data points input
| Name | Description |
| ----- | ---------------------- |
| Value | Value to be converted. |
### data points output
| Name | Description |
| ----- | ------------------------- |
| Value | Converted value as float. |
## Value to integer
Source: https://www.symcon.de/en/service/documentation/basics/automations/logic-scripts/repository/conversion/value-to-integer/
The "Value to integer" module offers the option of converting a value to an integer.
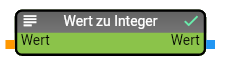
### data points input
| Name | Description |
| ----- | ---------------------- |
| Value | Value to be converted. |
### data points output
| Name | Description |
| ----- | ------------------------------ |
| Value | Converted value as an integer. |
## Value to string
Source: https://www.symcon.de/en/service/documentation/basics/automations/logic-scripts/repository/conversion/value-to-string/
The "Value to string" module offers the option of converting a value into a string.
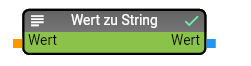
### data points input
| Name | Description |
| ----- | ---------------------- |
| Value | Value to be converted. |
### data points output
| Name | Description |
| ----- | ---------------------------- |
| Value | Converted value as a string. |
## Convert range
Source: https://www.symcon.de/en/service/documentation/basics/automations/logic-scripts/repository/conversion/convert-range/
The "Convert range" module offers the option of converting a value from one value range to another value range. For example, it is possible to use the module to convert a value in the range 0 to 1 to the value range 0 to 100.
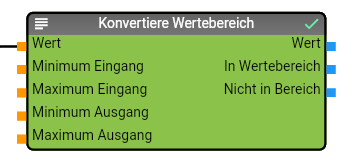
### Properties
| name | description |
| ------------------ | -------------------------------------------------------------------------------------------------------------------------------------------- |
| Outputs range | Activates the data points at the "In range" and "Not in range" output. These data points are not activated by default. |
| Inputs Limit | Activates the data points at the input for the limits ("Minimum input" and "Maximum input"). These data points are not activated by default. |
| Maximum input | Specifies the maximum for the input range of the value, is only used if the data points for the limits are not activated. |
| Minimum input | Specifies the minimum for the input range of the value, is only used if the data points for the limits are not activated. |
| Maximum output | Specifies the maximum for the output range of the value, is only used if the data points for the limits are not activated. |
| Minimum output | Specifies the minimum for the output range of the value, is only used if the data points for the limits are not activated. |
| Rounding to digits | Specifies the number of digits to be used for rounding the converted value. |
### data points input
| Name | Description |
| -------------- | -------------------------------------------------------------------------------------------------------------------------------- |
| Value | Value to be inverted |
| Minimum input | Minimum value for the input range. This data point is only available if the "Connector for limits" property has been activated. |
| Maximum input | Maximum value for the input range. This data point is only available if the "Connector for limits" property has been activated. |
| Minimum output | Minimum value for the output range. This data point is only available if the "Connector for limits" property has been activated. |
| Maximum output | Maximum value for the output range. This data point is only available if the "Connector for limits" property has been activated. |
### Output data points
| Name | Description |
| ------------ | ---------------------------------------------------------------------------------------------------------------------------------------------------------------------------------- |
| Value | Converted value |
| In range | Returns "true" if the value to be converted was within the minimum and maximum. This data point is only available if the "Connector for range check" property has been activated. |
| Not in range | Returns "true" if the value to be converted was outside the minimum and maximum. This data point is only available if the "Connector for range check" property has been activated. |
## Time to Date
Source: https://www.symcon.de/en/service/documentation/basics/automations/logic-scripts/repository/conversion/time-to-date/
The module "Time to Date" offers the possibility to convert single time components into a Unix timestamp.
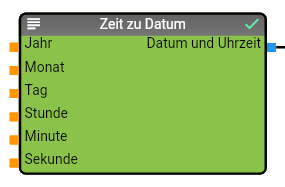
### data points input
| Name | Description |
| ------- | ------------------------------------------------------------------------------------ |
| Year | The year for the Unix timestamp (if no value is set, the current year is used). |
| Month | The month for the Unix timestamp (if no value is set, the current month is used). |
| Day | The day for the Unix timestamp (if no value is set, the current day is used). |
| Hour | The hours for the Unix timestamp (if no value is set, the current hour is used). |
| Minute | The minutes for the Unix timestamp (if no value is set, the current minute is used). |
| Seconds | The seconds for the Unix timestamp (if no value is set, the current second is used). |
### data points output
| Name | Description |
| --------- | ---------------------------------------------------------- |
| Timestamp | Unix timestamp formed from the individual time components. |
## Read/ write variables
Source: https://www.symcon.de/en/service/documentation/basics/automations/logic-scripts/repository/read-write-variables/
Modules in the "Read/write variables" group enable variables or instances to be read and set in IP-Symcon.
## Read Instance
Source: https://www.symcon.de/en/service/documentation/basics/automations/logic-scripts/repository/read-write-variables/read-instance/
The "Read instance" module offers the option of integrating instances as logic script input; variables of the corresponding instance can be used to control other modules.
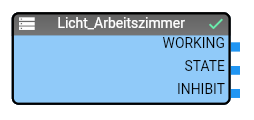
### Properties
| Name | Description |
| ---------------------- | ------------------------------------------------------------------------------- |
| ID | The ID of the instance in IP-Symcon. |
| Logic Script execution | Enables the automatic execution of the logic script when a variable is changed. |
The following values are available for selection during logic script execution:
- None - no automatic execution of the logic script
- On change - automatic execution of the logic script when the value of a linked variable changes.
- On update - automatic execution of the logic script when the value of a linked variable is updated.
- As action script - the logic script script is stored as an action script for each variable linked in the instance. When operated in the GUI (WebFront or IPSView), the logic script is called up with the new value.
Additional information on the topic of [action scripts](automations.md).
### data points output
| Name | Description |
| ----------------------- | ------------------------------------------------------------------ |
| Value instance variable | The values of all instance variables are available as data points. |
## Write Instance
Source: https://www.symcon.de/en/service/documentation/basics/automations/logic-scripts/repository/read-write-variables/write-instance/
The "Write Instance" module offers the option of integrating instances as an output of the logic script.
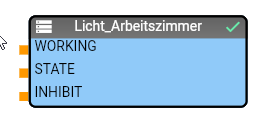
### Properties
| Name | Description |
| ---- | ------------------------------------ |
| ID | The ID of the instance in IP-Symcon. |
### data points input
| Name | Description |
| ----------------------- | ---------------------------------------------------------------------------------- |
| Value instance variable | Instance variables that have an action script stored are available as data points. |
## Read Variable
Source: https://www.symcon.de/en/service/documentation/basics/automations/logic-scripts/repository/read-write-variables/read-variable/
The "Read Variable" module offers the option of integrating normal variables as logic script input.
### Properties
| Name | Description |
| ---------------------- | --------------------------------------------------------------------------------- |
| ID | The ID of the variable in IP-Symcon. |
| Logic Script execution | Enables the automatic execution of the logic script when the variable is changed. |
The following values are available for selection for logic script execution:
- None - no automatic execution of the logic script
- On change - automatic execution of the logic script when the value of the variable changes.
- On update - automatic execution of the logic script when the value of the variable is updated.
- As action script - the logic script script is stored as an action script for the variable. When operated in the GUI (WebFront or IPSView), the logic script is called up with the new value.
Additional information on the topic of [action scripts](automations.md).
### data points output
| Name | Description |
| ----- | -------------------------- |
| Value | The value of the variable. |
## Write Variable
Source: https://www.symcon.de/en/service/documentation/basics/automations/logic-scripts/repository/read-write-variables/write-variable/
The "Write Variable" module offers the option of integrating normal variables as an output of the logic script.
### Properties
| Name | Description |
| ----------------- | ------------------------------------------------------------------------------------------------------------------------------------------ |
| ID | The ID of the variable in IP-Symcon. |
| Use action script | If TRUE, the action script is used to set the variable value. If no action script is available, the value of the variable is set directly. |
| Sender | Value for the SENDER variable when the action script is called. |
### data points input
| Name | Description |
| ----- | -------------------------- |
| Value | The value of the variable. |
## Logic Script Variable
Source: https://www.symcon.de/en/service/documentation/basics/automations/logic-scripts/repository/read-write-variables/workflow-variable/
The "Logic Script Variable" module offers the option of having a variable created by the logic script itself.
### Properties
| Name | Description |
| ----------------------------- | --------------------------------------------------------------------------------------------------------------------------------------------------------------------------------------------------------------------------- |
| Data type | Data type of the variable |
| Default value | Value of the variable to be assigned after the initial creation of the variable. |
| Profile name | Name of the profile that is to be assigned to the variable after the initial creation of the variable. |
| Variable name | Name of the variable |
| Logic Script as action script | If this option is activated, the logic script itself is called up to set a value via a visualization. In this case, you must take care of assigning the new value in the logic script, otherwise the value will not be set. |
### data points input
| Name | Description |
| ----- | ---------------------- |
| Value | Value of the variable. |
### data points output
| Name | Description |
| ------ | ----------------------------------------------- |
| Value | Current value of the variable |
| Update | Signals an update of the variable via the input |
| Change | Signals a change of the variable via the input |
## Compare
Source: https://www.symcon.de/en/service/documentation/basics/automations/logic-scripts/repository/compare/
Modules in the "Compare" group allow you to compare values in the logic script.
## Equal
Source: https://www.symcon.de/en/service/documentation/basics/automations/logic-scripts/repository/compare/equal/
The "Equal" module offers the opportunity to compare different values for equality or inequality.
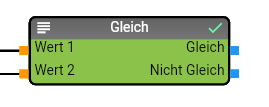
### data points input
| Name | Description |
| ------- | --------------------------------- |
| Value 1 | Data point for comparison value 1 |
| Value 2 | Data point for comparison value 2 |
### data point output
| Name | Description |
| --------- | ------------------------------------------------------------------------------------- |
| Equals | Returns TRUE if the value at input value 1 is equal to the value at input value 2. |
| Not equal | Returns TRUE if the value at input value 1 is not equal to the value at input value 2 |
## Larger/smaller
Source: https://www.symcon.de/en/service/documentation/basics/automations/logic-scripts/repository/compare/larger-smaller/
The "Larger/smaller" module offers the option of comparing different values for Larger, Larger equal, Equal, Smaller equal or Smaller.
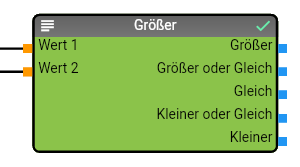
### Data points input
| Name | Description |
| ------- | --------------------------------- |
| Value 1 | Data point for comparison value 1 |
| Value 2 | Data point for comparison value 2 |
### data point output
| Name | Description |
| ------------------------ | -------------------------------------------------------------------------------------------------- |
| Greater | Returns TRUE if the value at input value 1 is greater than the value at input value 2. |
| Greater than or equal to | Returns TRUE if the value at input Value 1 is greater than or equal to the value at input Value 2. |
| Equal | Returns TRUE if the value at input Value 1 is equal to the value at input Value 2. |
| Less than or equal to | Returns TRUE if the value at input Value 1 is less than or equal to the value at input Value 2. |
| Smaller | Returns TRUE if the value at input Value 1 is smaller than the value at input Value 2. |
## In value range
Source: https://www.symcon.de/en/service/documentation/basics/automations/logic-scripts/repository/compare/in-value-range/
The "In value range" module offers the option of checking whether a value is within a certain value range. The limits for the value range can be defined via properties or via separate module inputs.
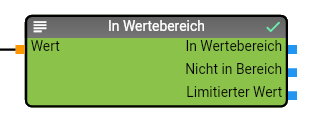
### Properties
| Name | Description |
| ------------- | ---------------------------------------------------------------------------------------------------------------------------------------- |
| Inputs Limits | Activates the data points at the input for the limits ("Lower Limit" and "Upper Limit"). These data points are not activated by default. |
| Upper Limit | Specifies the maximum for the input range of the value, is only used if the data points for the limits are not activated. |
| Lower Limit | Specifies the minimum for the input range of the value, is only used if the data points for the limits are not activated. |
### data points input
| Name | Description |
| ----------- | ------------------------------------------------------------------------------------------------------------------------ |
| Value | Value to be evaluated |
| Lower Limit | Minimum value for the input range. This data point is only available if the "Input limits" property has been activated. |
| Upper Limit | Maximum value for the input range. This data point is only available if the "Inputs Limits" property has been activated. |
### data point output
| Name | Description |
| ------------- | ------------------------------------------------------------------------------------------------- |
| In range | Returns TRUE if the value to be converted was within the minimum and maximum range. |
| Not in range | Returns TRUE if the value to be converted was outside the minimum and maximum. |
| Limited value | If the value is outside the upper or lower limit, the value is corrected to the respective limit. |
## Drawing Area
Source: https://www.symcon.de/en/service/documentation/basics/automations/logic-scripts/drawing-area/
The drawing area is located in the middle of the Logic Script Editor. Here you can combine the individual modules into a logic script.
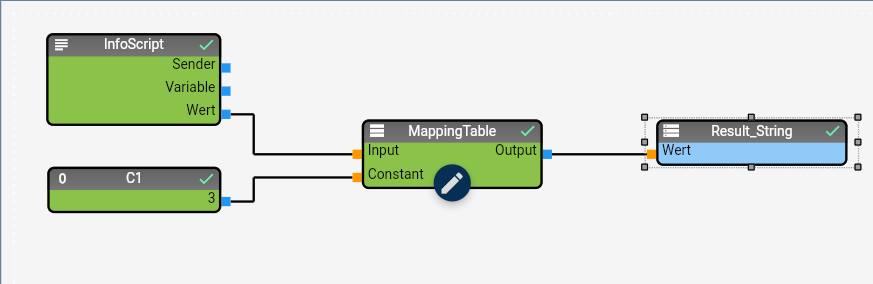
The drawing area is intuitive to use; the functionality is very similar to other programs with graphical components. In this section you will find an overview of the available functions and actions.
### Place object
To place a new object on the drawing area:
1. Select the object in the object tree or from the Repository menu.
2. Drag the selected control element onto the drawing area (drag & drop).
The object is drawn with the default values from IP-Symcon (size, color ...). You must then customize it for your purposes (see below).
### select / deselect objects
To select a single object:
1. Click on the object.
To select several objects at the same time:
1. Hold down ____ while clicking on different objects.
To select all objects on the drawing area at the same time:
1. Press __+A__.
You can recognize selected objects by the eight handles (boxes) on the frame:
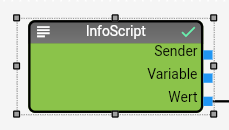
To cancel the selection again:
1. Click on an empty area of the drawing area.
The entire selection made is canceled.
### Change properties
The stored values and properties of the selected object are saved in the [Property-Editor](automations.md). You can change them there as required.
If you have selected several objects at the same time, you can change the properties that appear in all selected objects (properties that only appear in individual objects are not displayed). Your change will then be applied to all currently selected objects at the same time.
### cut, copy, paste, delete
Logic Scripts supports the standard commands for manipulating objects and content:
| Name | Description |
| ------ | -------------------------------------------------------- |
| Cut | Cut context menu or the key combination __+X__. |
| Copy | Copy context menu or the key combination __+C__. |
| Paste | Paste context menu or the key combination __+V__. |
| Delete | Delete context menu or the ____ key. |
### Undo / Redo
Logic Scripts supports "Undo / Redo", i.e. canceling or restoring changes:
| Name | Description |
| ------- | ----------------------------------------------------------- |
| Undo | Menu+Undo or the key combination __+Z__. |
| Restore | Menu+Restore or the key combination __++Z__. |
### Zooming a logic script
The Logic Scripts Designer offers the option to zoom in and out of a view in steps of 10%. This only changes the display in the Designer; the display on the client is not changed.
| Name | Description |
| -------- | ------------------------------------------------------------------------------------------------------------------------------------------------------------------------ |
| Zoom In | Select Menu+Zoom In or press the ++ key combination to enlarge the display by one level. |
| Zoom Out | Select Menu+Zoom Out or press the +- key combination to reduce the display by one level. |
| Zoom | Select Menu+Zoom to set the zoom functionality to a specific value. After pressing the button, a drop-down window is displayed that allows you to select the zoom level. |
## PHP Scripts
Source: https://www.symcon.de/en/service/documentation/basics/automations/php-scripts/
A PHP script is a concatenation of more or less complex commands. IP-Symcon uses and supports every functionality of the programming language PHP. Numerous examples and further documentation are found in our community forum and throughout the internet.
### Add PHP Script
A new PHP script can be added to a project via "+" -> "Automation" -> "PHP Script". It is recommended to give the PHP script a unique and meaningful name.
The name can be changed at any time and the PHP script can be moved within the tree view via Drag & Drop. Alternatively, the PHP script can be directly created at the wanted position via "Right Click" -> "Add object" -> "Automation" -> "PHP Script.

### Edit and Execute PHP Scripts
A PHP script is required to begin with a PHP Tag ( **Note:** A list of all [keyboard-shortcuts](../how-to.md).
## Action Scripts
Source: https://www.symcon.de/en/service/documentation/basics/automations/php-scripts/action-scripts/
Action scripts are scripts that are called when a [Variable](../concepts.md) is clicked in a [Visualization](../modules/index.md) (e.g., WebFront, Mobile).
The action script needs to be linked to the corresponding variable as "Custom Action".
Special variables for called scripts are shown in [System Variables](automations.md).
An action script can be used by multiple variables. The most common variant is shown below: "Set Variable only".
### Select Action Script
The selection of an action script is the same as the selection of a [Variable Action](../concepts.md) .
> **Note:** Some variables of added modules contain a "Default Action". It can be overwritten by a "Custom Action".
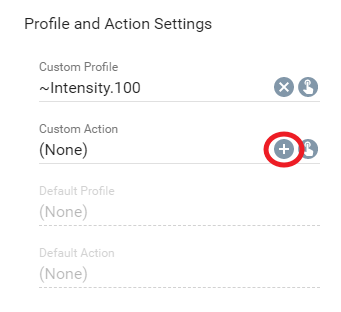
### Create Action Script
An action script is a regular script file. It becomes an action script by linking it to a variable.
An action script should describe the switching process or at least a command that sets the variable to the requested state:
#### Example 1
```php
//Set Variable only
SetValue($_IPS['VARIABLE'], $_IPS['VALUE']);
```
#### Example 2
```php
//Set variable accordingly when switching was sucessful
if (FS20_SwitchMode(12345, (boolean)$_IPS['VALUE'])) {
SetValue($_IPS['VARIABLE'], $_IPS['VALUE']);
}
```
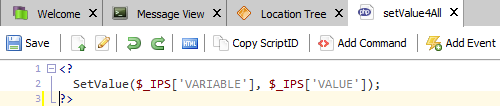
### Bad Action Scripts
Some criterias should be regarded when creating an action script. Otherwise, unexpected behavior could appear.
#### Setting a Variable without Checking for Sucessful Switching
Most functions return a "True" when they succeed. This should be checked.
If this is not done, the state of IP-Symcon and the device are not consistent any more. Thus, the configured automatic control could fail.
```php
//Variable is set to new value even if the switching was not sucessful.
//This can lead to consistency faults.
FS20_SwitchMode(12345, (boolean)$_IPS['VALUE']);
SetValue($_IPS['VARIABLE'], $_IPS['VALUE']);
```
#### Switching a Device via Event when the Variable changes
There should be no additional event to switch a device after the corresponding variable was changed. This approach cannot detect switching problems of the device. Thus, error messages are hidden and the variable value could be different from the device value.
Consider a dimmer that is set from 0% to 50% via WebFront.
The variable is instantly set to 50% und the switch command is executed asynchonously by the additional event. The action script cannot detect if the switch command failed and the variable within IP-Symcon stays at 50% even though the device value is 0%.

## System Variables
Source: https://www.symcon.de/en/service/documentation/basics/automations/php-scripts/system-variables/
System variables are variables that are available in every PHP script. The user can utilize them to create efficient PHP scripts that can solve generic tasks. The according system variables are set automatically when the PHP script is called, depending on the trigger. The following tables providing an overview over the variables which are available in which PHP scripts.
> **Warning:** __Regard upper and lower case when writing these variables (Case Sensitive)!__
### General System Variables
The following system variables are always available.
| System Variable | Description |
| --------------- | ----------------------------------------------------------------------------------------------------------------------------------------------------------------------------------------------------------------------------------------- |
| $_IPS['SELF'] | ScriptID of the current PHP script |
| $_IPS['THREAD'] | ThreadID of the current PHP script |
| $_IPS['SENDER'] | Trigger of the current PHP script. Further global variables are possible, depending on the value. Possible values are further specified at [Additional System Variables](automations.md) |
### Additional System Variables
The following system variables are available, depending on the value of $_IPS['SENDER'].
* Execute
* HeatingControl
* RegisterVariable
* RunScript
* Shutdown
* ShutterControl
* Startup
* StatusEvent
* TimerEvent
* Variable
* VoIP (since version 5.2)
* Watchdog
* WebFront
* WebHook (since version 4.0)
* WebInterface
* WebOAuth (since version 4.0)
#### Action
When the PHP script was executed by a [RequestAction](../functions/access-variables.md) .
| system variable | description |
| ----------------- | ------------------------------------------------------------------------------------------------------------- |
| $_IPS['SENDER'] | By default, this "Action" can be set individually with [RequestActionEx](../functions/access-variables.md) |
| $_IPS['VALUE'] | Value with which the variable was called |
| $_IPS['VARIABLE'] | ID of the variable that is to be switched |
#### Execute
When the [PHP script](automations.md) was run from the administration console.
No additional system variables.
#### HeatingControl
When the PHP script was called from an event of [HeatingControl](../modules/heating-control.md).
| System Variable | Description |
| ------------------ | ---------------------------------------------------- |
| $_IPS['INSTANCES'] | IDs of the sending instances |
| $_IPS['INVERTS'] | States if a device is inverted (true/false) |
| $_IPS['VALUE'] | States if a device should heat (true) or not (false) |
#### RegisterVariable
When the PHP script was called by a [RegisterVariable](../modules/registervariable.md) instance.
| System Variable | Description |
| ----------------------------------------------- | ------------------------------------------------------------------------ |
| $_IPS['INSTANCE'] | ID of the triggering RegisterVariable instance |
| $_IPS['VALUE'] | Value of the puffer that was received from the splitter or I/O module |
| $_IPS['CLIENTIP'] (only for I/O ServerSocket) | Received IP adress of the Client |
| $_IPS['CLIENTPORT'] (only for I/O ServerSocket) | Receiving port of the Client |
| $_IPS['TYPE'] | Status of the receiving port (0 = Data; 1 = Connected; 2 = Disconnected) |
#### RunScript
When the PHP script was called by an [IPS_RunScript](../functions/process-control.md) function. In addition, [IPS_RunScriptEx](../functions/process-control.md) can be called to pass additional parameters.
No additional system variables.
#### Shutdown
During IP-Symcon Shutdown (see [EventControl](../modules/event-control.md)).
No additional variables.
#### ShutterControl
When the PHP script was called by a [ShutterControl Module](https://www.symcon.de/en/product/application-examples/shutter-control/).
| System Variable | Description |
| ------------------ | ------------------------------------------------------------------------ |
| $_IPS['DIRECTION'] | Moving direction:
0 = Stop
1 = Up
2 = Down |
| $_IPS['DURATION'] | Moving duration in milliseconds |
| $_IPS['INSTANCE'] | InstanceID that was set in ShutterControl |
| $_IPS['INSTANCE2'] | InstanceID #2 that was set in ShutterControl |
#### Startup
During IP-Symcon Startup (see [EventControl](../modules/event-control.md)).
No additional system variables.
#### StatusEvent
When the PHP script is called by a state change of an instance.
Further informations are found at [EventControl](../modules/event-control.md) and [IPS_GetInstance](../functions/management-instances.md).
| System Variable | Description |
| ------------------- | ---------------------------------------------------------------------------------------------------------------------- |
| $_IPS['INSTANCE'] | InstanceID for state change |
| $_IPS['STATUS'] | State of the instance. A list of possible values is found here: [IPS_GetInstance](../functions/management-instances.md) |
| $_IPS['STATUSTEXT'] | A short text according to the state |
#### TimerEvent
When the PHP script was called by a [cyclic](../concepts.md) or a [schedule](../concepts.md) event.
| System Variable | Description |
| --------------- | ---------------------------------------------- |
| $_IPS['ACTION'] | ID of the calling action (only schedule event) |
| $_IPS['EVENT'] | ID of the triggered event |
| $_IPS['TARGET'] | ID of the superior object |
#### Variable
When the PHP script was called be a [trigger event](../concepts.md).
| System Variable | Description |
| ------------------------------------------ | ----------------------------------------------- |
| $_IPS['EVENT'] | ID of the calling event |
| $_IPS['OLDCHANGED']
(since Version 5.1) | Timestamp of the last change of the old value |
| $_IPS['OLDVALUE'] | Value of the affected variable before switching |
| $_IPS['OLDUPDATED']
(since Version 5.1) | Timestamp of the last update of the old value |
| $_IPS['TARGET'] | ID of the superior object |
| $_IPS['TRIGGER'] | Type of the calling event |
| $_IPS['VALUE'] | Value of the affected variable when switching |
| $_IPS['VARIABLE'] | ID of the affected variable |
#### VoIP (since Version 5.2)
When the PHP script is executed by an event of the VoIP Module
| System Variable | Description |
| ------------------------------------- | ------------------------------------------------------------------------------------------------------------------------------------------------------------------------------------------------------------------------------------------------------------------- |
| $_IPS['CONNECTION'] | ChannelID of the connection |
| $_IPS['DATA'] | The variable can contain the following values depending on $_IPS['EVENT']:
Incoming: Phone number from which the call is made
PlayFinish: File name of the played file
DTMF: Value of the pressed key |
| $_IPS['EVENT'] | The variable can contain the following values:
Incoming: Incoming call
Connect: Established connection
Disconnect: Terminating connection
PlayFinish: Audio file has finished playing
DTMF: Received a DTMF sound |
| $_IPS['INSTANCE']
(ab Version 5.4) | InstanceID of the VoIP Instance |
#### Watchdog
When the PHP script is called by the [Watchdog](../modules/event-control.md).
| System Variable | Description |
| ------------------- | ----------------------------------------------------- |
| $_IPS['STATUSTEXT'] | The passed state text |
| $_IPS['VALUE'] | Value of the variable that is outside of its interval |
| $_IPS['VARIABLE'] | ID of the variable that is outside of its interval |
#### WebFront
When the PHP script was called by the [WebFront](../components/webfront-visualization.md), [Tile Visualization](../components/tile-visualization.md), or IPSView.
| System Variable | Description |
| ------------------------------------------ | ---------------------------------------------- |
| $_IPS['CONFIGURATOR'] | ID of the currently used visualization |
| $_IPS['VALUE'] (only for action script) | New value of the variable |
| $_IPS['VARIABLE'] (only for action script) | ID of the changing variable |
#### WebHook (since Version 4.0)
When the PHP script was called by a [WebHook control](../modules/webhook-control.md).
| System Variable | Description |
| ---------------- | ---------------------------------- |
| $_SERVER['HOOK'] | Complete URL of the called WebHook |
Furthermore, the WebHook type provides the same variables as WebInterface.
#### WebOAuth (since Version 4.0)
When the PHP script was called by a OAuth Control.
| System Variable | Description |
| ----------------- | ----------------------------------- |
| $_SERVER['OAUTH'] | Complete URL of the called WebOAuth |
Furthermore, the WebOAuth type provides the same variables as WebInterface.
#### WebInterface
When the PHP script was called by the [Webserver](../modules/webserver.md), e.g., in the 'user' folder.
| System Variable | Description |
| -------------------------- | -------------------------------------------------------------------------------------------------------------------------------------- |
| $_IPS['INSTANCE'] | ID of the calling Webserver instance |
| $_GET | Received data via GET |
| $_POST | Received data via POST |
| $_SERVER['DOCUMENT_ROOT'] | Contains the Document Root folder that contains the currently executed PHP script as it is set within the configuration of the server. |
| $_SERVER['PHP_AUTH_PW'] | If HTTP authentication is used, this variable contains the password the user provided |
| $_SERVER['PHP_AUTH_USER'] | If HTTP authentication is used, this variables contains the user name the user provided |
| $_SERVER['PHP_SELF'] | File/Path of the started PHP script |
| $_SERVER['QUERY_STRING'] | If available, the query string that was used to access the website |
| $_SERVER['REMOTE_ADDR'] | The IP adress that the user used to access the website |
| $_SERVER['REMOTE_PORT'] | The port that the user used to access the website |
| $_SERVER['REQUEST_METHOD'] | Contains the request method that was used for the access, e.g., "GET", "HEAD", "POST", or "PUT" |
| $_SERVER['REQUEST_URI'] | The URI that was used to access the current website, e.g., "/index.html" |
| $_SERVER['SCRIPT_NAME'] | Contains the path of the current PHP script. This can be useful for websites that link to themselves |
In addition, all request headers are added in capital letters with a HTTP_* prefix. Minus symbols (-) are changed to underscore symbols (_). For example, the header 'User-Agent is provided as $_SERVER['HTTP_USER_AGENT'].