Documentation
Voice over IP
The VoIP module can set up/receive telephone connections, process DTMF signals, buffer connection-related data and play sounds.

The following devices are supported by IP-Symcon:
Requirements
An active portal for telephony is required. This can be a Fritzbox or a service like Sipgate.
Integration in IP-Symcon
For integration, a "VoIP" device can be added via Add object in the object tree.
Domain and user name for the telephone service must be specified in the instance configuration.
If required, AuthID and password must also be entered.
If the computer has several network cards or -interfaces (e.g. also virtual adapters such as VPN, Docker, Hyper-V) it may be necessary to define the IP address via which the VoIP connection is established. There is also the appropriate special switch "VoIPInterface"
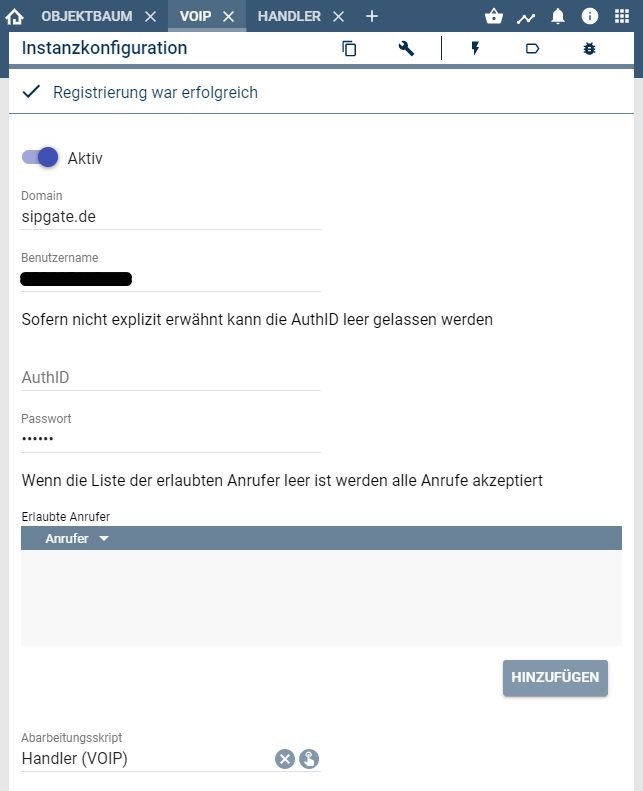
To manage what should happen when a connection is active, a processing script must be added.
Processing script
The processing script determines the behavior for each incoming connection. The Systemvariables are also important for this.
Examples
Script for incoming calls (processing script)
if($_IPS['SENDER'] == "VoIP") {
     // Only incoming calls are to be processed
     // $_IPS["INSTANCE"] is available since IP-Symcon 5.4
     if(VoIP_GetConnection($_IPS["INSTANCE"], $_IPS["CONNECTION"])["Direction"] == 1 /* Outbound */) {
         return;
     }
     switch($_IPS["EVENT"]) {
         case "Incoming":
             IPS_LogMessage("VoIP", "An incoming call");
             break;
         case "Connect":
             IPS_LogMessage("VoIP", "A connection was established");
             break;

         case "Disconnect":
             IPS_LogMessage("VoIP", "A connection was terminated");
             break;
         case "DTMF":
             IPS_LogMessage("VoIP", "A DTMF signal was received");

             switch($_IPS["DATA"]) {
                 case '1':
                 case '2':
                 case '3':
                 case '4':
                 case '5':
                 case '6':
                     IPS_LogMessage("VoIP", "One of the keys 1 to 6 was pressed");
                     break;
                 case '#':
                     IPS_LogMessage("VoIP", "The # key was pressed");
                     break;
                default:
                     IPS_LogMessage("VoIP", "The ". $_IPS["DATA"] ." button was pressed");
                     break;
             }
             break;
         case "PlayFinish":
             IPS_LogMessage("VoIP", "A sound file was played");
             break;
        default:
             IPS_LogMessage("VoIP", "An unknown event was triggered");
             break;
     }
 }
Outbound Call Script with TTS Module "AWS Polly" from the Module Store
if($_IPS['SENDER'] == "Execute") {
     $id = VoIP_Connect(12345, "0451305005xx");
     //Wait a maximum of 10 seconds for someone to pick up
     for($i = 0; $i < 10; $i++) {
         IPS_Sleep(1000);
         $c = VoIP_GetConnection(12345, $id);
         if($c['Connected']) {
             // VoIP_Playwave() only supports WAV in the format: 16 Bit, 8000 Hz, Mono.
             VoIP_PlayWave(12345, $id, TTSAWSPOLLY_GenerateFile(23456, "IP-Symcon wishes you a wonderful day"));
             return;
         }
     }
     //Hang up if nobody picks up
     VoIP_Disconnect(12345, $id);
 }
Example setup on the FritzBox
The VoIP module can be used with the help of the FritzBox. A separate unused telephone number in the FritzBox is recommended for this and the following steps must be kept in mind.
If necessary, a new number must be set up under "Telephony" -> "Own number" -> "New number"
As a first step, a new telephony device must be added to the FritzBox under "Telephony" -> "Telephony Devices".
This must be added as a new "phone".
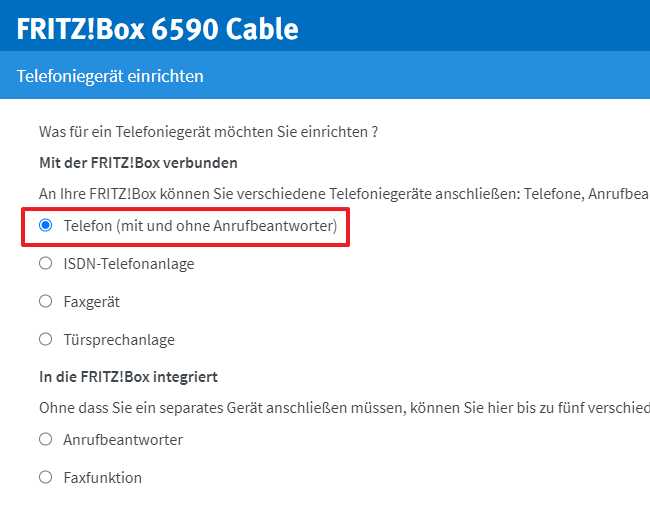
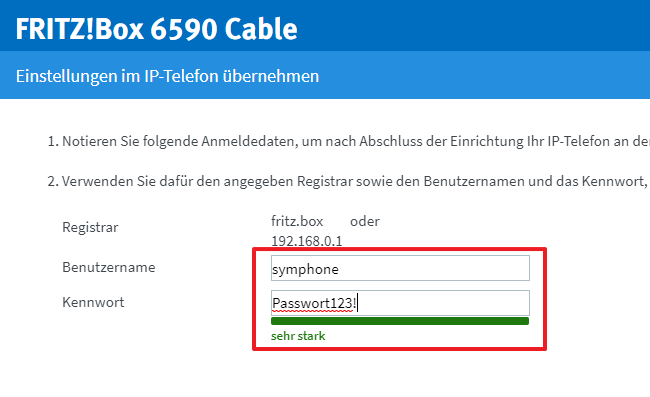
Since IP-Symcon acts as an IP telephone, this and then a separate telephone number must be selected. A descriptive name should be chosen for the telephony device.
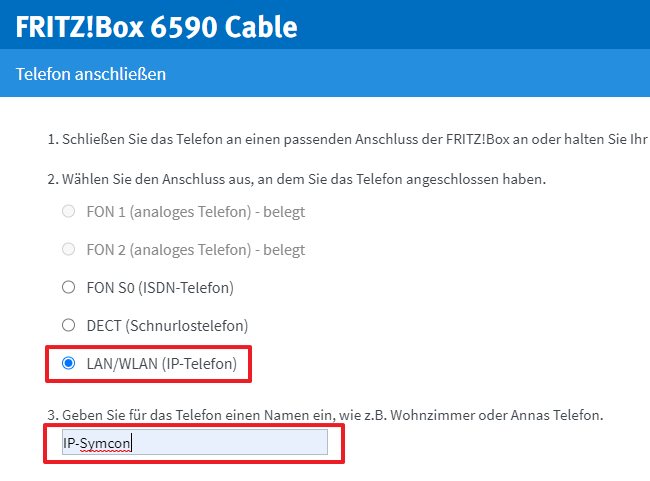
Then a user name and password must be specified, these are later entered into the VoIP in IP-Symcon.
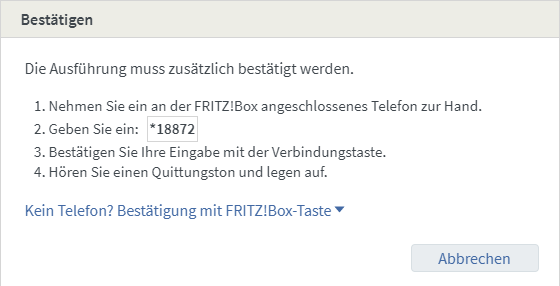
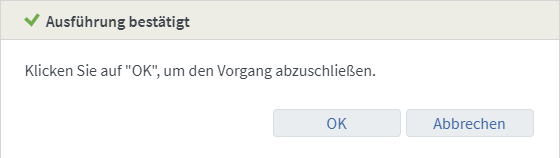
The telephony device to be set up must be confirmed and its setup then completed.
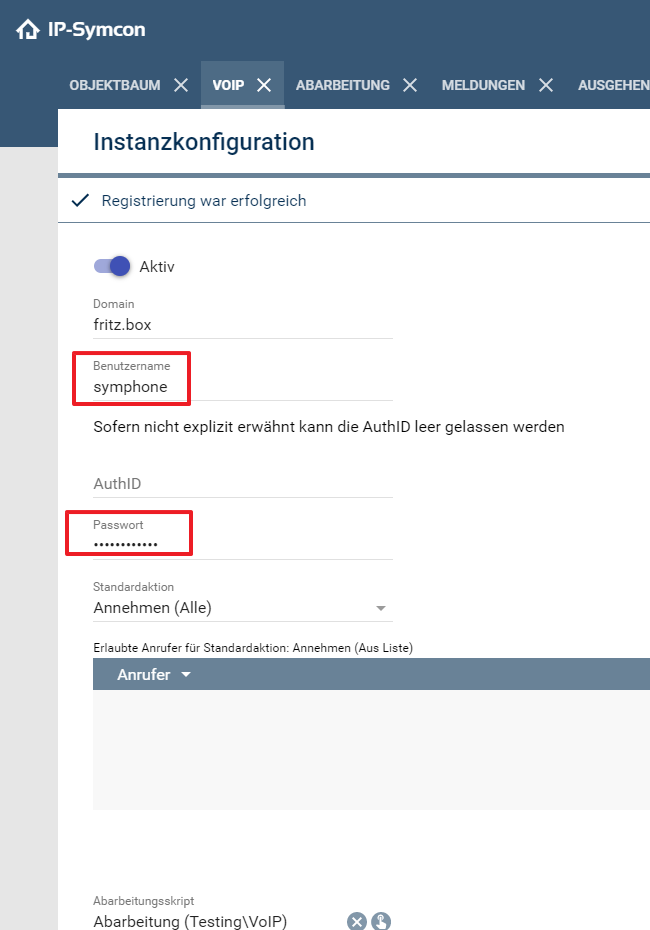
Now the telephony device can be taken over in IP-Symcon within the VoIP module.
If everything went well, the status "Registration was successful" is displayed.
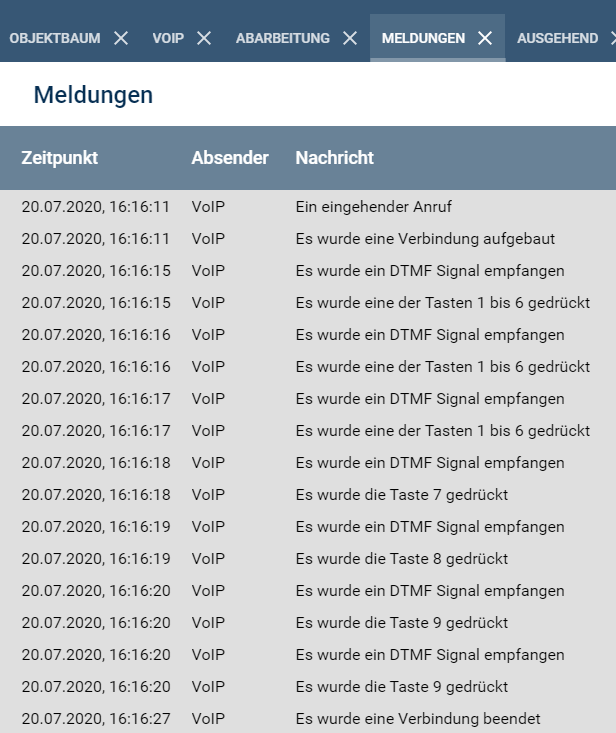
A test call can be made with the Processing-Script set up. In the Messages the following messages should appear when the number keys on the phone are pressed.