Documentation
IPS-868
With its bidirectional radio components, the IP-Symcon radio system 868 supplements areas of application that are often not satisfactorily covered by other systems. This includes consumption recording via the S0 input, presence control via the PresenceControlModule including a tracker, analysis of the room air via an air quality sensor, and the control of LED strips.

The following devices are supported by IP-Symcon:
Content
Installation
The USB Gateway is connected to the PC via USB. The necessary drivers are available from SiLabs for download . After its installation, the gateway is ready for use.
The LAN Gateway is connected to the PC via LAN. By default, DHCP and port 5000 are set up. If an individual IP address is required, the IP-Symcon "Network Configuration Tool" is required. This is available for download . A simple description of how to configure the gateway is available. The gateway can then be reached via the corresponding IP address and port.
If no IP-Symcon house is printed on the front of the LAN gateway, it is an older model of the gateway. The installation instructions for this model can be found here .
Integration in IP-Symcon
When using the LAN gateway, this can be integrated via the Device Search. To do this, "IPS-868 Discovery" must be selected as the system. The discovery instance then offers to create an IPS-868 Configurator. After the configurator has been created, the individual devices can be integrated there as described below.
The USB gateway is created directly as a configurator because it cannot be found via the Device search. For this purpose, an "IPS-868 Configurator" is created in the Object Tree. When configuring the interface, the "IPS-868 USB Gateway" mode must be selected and then the appropriate port selected and opened.
Configurator
All IPS-868 devices can be created as Instance using the IPS-868 configurator. To do this, "New device" must be selected from the list and "Create" clicked on.
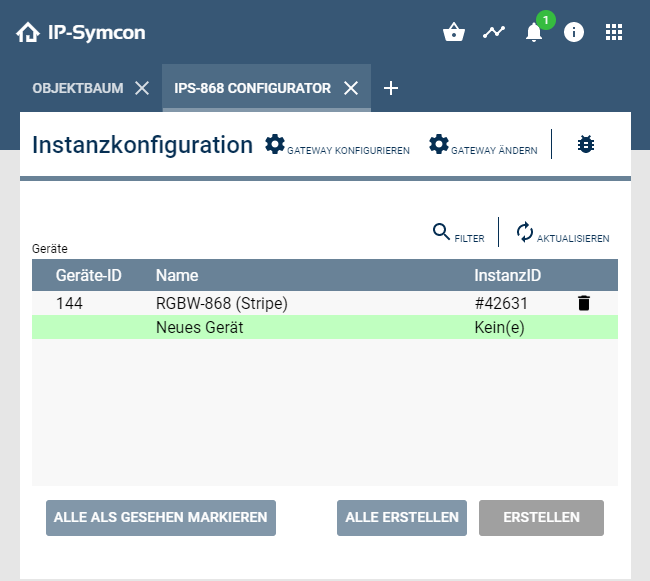
New Instances are created in the Object Tree in the main category. These created instances can then be renamed accordingly and sorted elsewhere. A newly added device can be configured via "Configure".
Here, on the one hand, the device ID must be entered here and, depending on the device, other device-specific properties may have to be defined. The exact procedure and the device ID can be found in the documentation of the respective device. (device list )
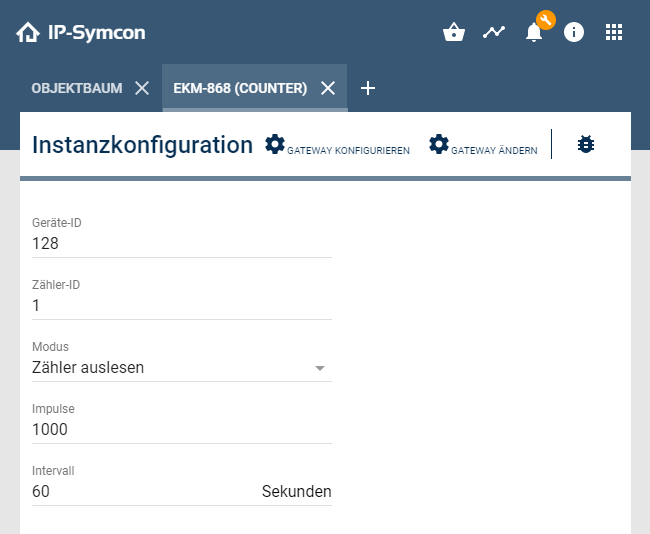
Configuration
Various properties can be set on the configuration page of the device.
These can be found in more detail in the respective device documentation.
| Device Instance | Device description |
|---|---|
| ACC-868 | -------------------------------------------------------- |
| AKM-868 (Tracker) | AKM-868 |
| ANA-868 (Analog-Output) | ANA-868 |
| ANA-868 (Analog-Input) | ANA-868 |
| DATA-868 | -------------------------------------------------------- |
| EKM-868 (Counter) | EKM-868 |
| FD-868 (Display Input) | FD-868 |
| FD-868 (Display Output) | FD-868 |
| FD-868 (Display) | FD-868 |
| JKM-868 (LevelJET) | JKM-868-LevelJET |
| JKM-868 (ThermoJET) | JKM-868-ThermoJET |
| LGS-868 (Air Quality Sensor) | LGS-868 |
| RGBW-868 (Stripe) | RGBW-868 |
| RGBW-868 (Stripe Input) | RGBW-868 |
| SERVO-868 | SERVO-868 |
| SERVO-868 (Input) | SERVO-868 |
| TFK-868 (Input) | -------------------------------------------------------- |
| WDT-868 (WatchDog) | WDT-868 |